Ryobi Miter Saw Manual: A Comprehensive Guide
Ryobi miter saws offer versatile cutting solutions, with various models like the 18V ONE HP and standard 7-1/4 inch options. This guide details parts, blade changes, and safety.
Ryobi miter saws are popular choices for both DIY enthusiasts and professionals, offering a blend of affordability and functionality. Available in corded and 18V ONE HP brushless options, these saws tackle various cutting tasks. Understanding your specific model number – like A18MS01 – is crucial for accessing the correct manual and replacement parts. From non-sliding to sliding compound designs, Ryobi provides solutions for diverse project needs, ensuring precise and efficient cuts.
Understanding Ryobi Miter Saw Models
Ryobi offers a diverse range of miter saws, including 10 non-sliding and various sliding compound models. Identifying your specific model number, often found on a sticker, unlocks access to tailored manuals and parts diagrams. Popular series include the 18V ONE, known for cordless convenience, and higher-amp options for demanding cuts. Knowing your saw’s capabilities—bevel adjustment, blade size—is key to optimal performance.
Identifying Your Ryobi Miter Saw Model Number
Locating your Ryobi miter saw’s model number is crucial for accessing specific documentation and replacement parts; This number is typically found on a sticker affixed to the saw itself – check the base, motor housing, or near the blade. Knowing this identifier allows you to download the correct manual and ensure compatibility when ordering new blades or components.
Popular Ryobi Miter Saw Series (18V ONE, etc.)
Ryobi offers diverse miter saw series, notably the 18V ONE system providing cordless convenience. Options include sliding compound miter saws, non-sliding models, and single-bevel versions. The 18V ONE HP Brushless series delivers enhanced power and runtime. Understanding these series helps determine features, battery compatibility, and appropriate accessories for your needs.
Safety Precautions for Ryobi Miter Saw Operation
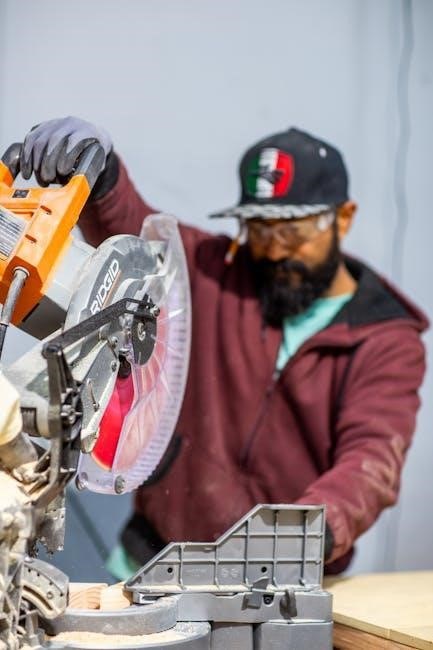
Prioritize safety when operating your Ryobi miter saw. Always unplug the saw before blade changes or maintenance. Wear appropriate Personal Protective Equipment (PPE), including safety glasses and hearing protection. Utilize essential safety features like blade guards. Maintain a clean workspace and avoid distractions for precise, secure cuts.
Essential Safety Features
Ryobi miter saws incorporate crucial safety features. Blade guards shield users from accidental contact. Secure locking mechanisms prevent unwanted angle adjustments during operation. Many models include electric brakes for rapid blade stoppage. Always verify these features are functioning correctly before each use, ensuring a safe cutting experience and preventing potential injuries.
Personal Protective Equipment (PPE)
When operating a Ryobi miter saw, always prioritize personal protective equipment. Safety glasses are essential to shield eyes from flying debris. Wear a dust mask or respirator to avoid inhaling harmful particles. Hearing protection is recommended due to the saw’s noise level. Close-toed shoes and snug-fitting clothing further enhance safety.
Ryobi Miter Saw Parts Diagram
Understanding your Ryobi miter saw’s components is crucial for maintenance and repair. Key parts include the motor, blade, base, handle, and bevel/miter adjustment mechanisms. The saw mounting bracket (A000220601) is a genuine Ryobi replacement part. Refer to your manual for a detailed diagram identifying each component and its function.
Key Components and Their Functions
The Ryobi miter saw’s motor powers the blade, enabling precise cuts. The base provides stability, while the handle ensures control. Bevel and miter adjustments allow for angled cuts. Understanding each component’s role – from the saw mounting bracket to the blade itself – is vital for safe and effective operation, as detailed in your manual.
Locating Replacement Parts
Genuine Ryobi replacement parts are crucial for maintaining your miter saw’s performance. Identify your model number – often found on a sticker – to ensure compatibility. Parts like the saw mounting bracket (A000220601 for A18MS01 stand) can be sourced individually. Check the official Ryobi website or authorized retailers for availability and ordering.
Blade Installation and Replacement
Maintaining a sharp blade is vital for safe and accurate cuts. Always unplug your Ryobi miter saw before changing the blade. Selecting the correct blade – considering tooth count and material – is essential. Follow step-by-step instructions carefully, ensuring proper alignment and tightening. Regular blade inspection and timely replacement enhance performance.
Choosing the Right Blade for Your Ryobi Miter Saw

Selecting the ideal blade depends on the material you’re cutting. Higher tooth counts excel with fine finishes on wood, while fewer teeth are better for rapid cuts in softer materials. Consider blade material – carbide-tipped blades offer durability. Ensure blade compatibility with your specific Ryobi model for optimal performance and safety.
Step-by-Step Blade Change Instructions
Always unplug your Ryobi miter saw before changing the blade! Locate and release the blade hold-down mechanism. Use the appropriate wrench to loosen and remove the blade bolt. Carefully remove the old blade and install the new one, ensuring correct rotation. Tighten the bolt securely, then re-engage the hold-down.
Adjusting the Ryobi Miter Saw
Ryobi miter saws feature both bevel and miter angle adjustments for precise cuts. Loosen the locking levers for the desired angle. Adjust the saw head to the required degree, utilizing the detents for common angles. Securely tighten the levers to lock the setting, ensuring stability during operation for accurate results.
Bevel Angle Adjustment
The Ryobi miter saw’s bevel adjustment allows angled cuts perpendicular to the miter scale. Unlock the bevel lever and rotate the saw head to the desired angle, noting the scale markings. Some models, like the TSS120L, bevel in one direction only. Tighten the lever firmly to secure the bevel angle.
Miter Angle Adjustment
Ryobi miter saws feature a rotating base for precise miter angle cuts. Unlock the miter lock lever and rotate the base to the desired angle, referencing the marked scale. Securely tighten the lever once the correct angle is achieved for accurate, repeatable cuts. Achieving precise angles is key to successful projects.
Ryobi Miter Saw Maintenance
Regular Ryobi miter saw maintenance ensures optimal performance and longevity. Cleaning debris after each use prevents buildup and ensures accurate cuts. Lubricate moving parts periodically for smooth operation. Addressing common issues promptly, like a dull blade, maintains efficiency. Proper care extends the tool’s lifespan and safety.
Cleaning and Lubrication
Post-use, disconnect the Ryobi miter saw and remove sawdust with a brush or vacuum. Clean the blade guard and base. Periodically lubricate the sliding rails, pivot points, and bevel adjustment mechanisms with a light machine oil. Avoid over-lubrication, which attracts dust. This ensures smooth, accurate cuts and prevents corrosion.
Troubleshooting Common Issues
If the Ryobi miter saw lacks power, check the power cord or battery charge. For inaccurate cuts, verify blade sharpness and angle adjustments. A jammed blade may indicate debris; disconnect power before clearing it. Unusual noises suggest a loose part—inspect and tighten. Refer to the manual for error codes.
Ryobi Miter Saw Accessories
Enhance your Ryobi miter saw’s functionality with available accessories. Miter saw stands and extensions provide stability and increased cutting capacity. Effective dust collection systems minimize workspace mess and improve visibility. Genuine Ryobi replacement parts, like mounting brackets, ensure continued performance and longevity of your tool.
Miter Saw Stands and Extensions
Ryobi miter saw stands, like the A18MS01, offer enhanced stability and portability. Extensions increase the material support length for larger workpieces, improving accuracy and safety. These accessories facilitate cleaner, more precise cuts, especially when working with wider boards or molding. Proper stand attachment is crucial for optimal performance.
Dust Collection Systems
Effective dust collection is vital when operating a Ryobi miter saw. Connecting to a dust collector minimizes airborne particles, improving visibility and respiratory health. Maintaining the system—checking hoses and emptying collection bags—ensures optimal suction. Ryobi offers compatible dust ports and adapters for seamless integration with various shop vacuums.
Using the Ryobi Miter Saw for Accurate Cuts

Achieving precise cuts with your Ryobi miter saw requires proper technique. Securely clamp the workpiece, utilize the saw’s guides for consistent angles, and maintain a steady feed rate. Different materials—wood, molding, or composites—may necessitate blade adjustments. Practice on scrap material before final cuts for optimal results.
Cutting Techniques for Different Materials
Ryobi miter saws handle diverse materials, but technique varies. For wood, a consistent feed rate works well. Molding benefits from slower, controlled cuts to prevent chipping. Composites may require a specialized blade and reduced speed. Always support the material adequately and select the appropriate blade tooth count for clean results.
Achieving Precise Angles
Ryobi miter saws excel at angled cuts, but accuracy demands attention. Double-check the miter and bevel scale settings before each cut. Securely clamp the workpiece to prevent movement during operation. Utilize the saw’s detents for common angles, and fine-tune as needed. Practice on scrap material to verify angle precision before final cuts.
Ryobi Miter Saw Troubleshooting
Common issues with Ryobi miter saws include inaccurate cuts or motor stalls. Verify the blade is correctly installed and sharp. Check for obstructions hindering blade movement. If the saw lacks power, inspect the battery or power cord. Consult the manual for specific error codes and their meanings to diagnose complex problems efficiently.
Common Problems and Solutions
If your Ryobi miter saw isn’t cutting accurately, ensure the blade is sharp and properly aligned. A stalled motor often indicates a dull blade or excessive pressure. For power issues, check the battery charge or cord connection. Regularly cleaning debris and lubricating moving parts prevents many operational hiccups.
Error Codes and Their Meanings
While specific Ryobi miter saw models may not display complex error codes, a lack of power usually signifies a battery issue on cordless versions. Unusual noises could indicate a failing motor or worn gears. Always consult the official Ryobi manual for your specific model number to decipher any unique indicators.
Ryobi Miter Saw Warranty Information
Ryobi offers warranties on its miter saws, varying by model and purchase date. Typically, these cover defects in materials and workmanship. To file a claim, retain your proof of purchase and contact Ryobi customer support. Understanding your warranty coverage ensures proper repair or replacement if issues arise during normal use.
Understanding Your Warranty Coverage
Ryobi miter saw warranties generally cover defects in materials and workmanship for a specified period, often one to three years from the date of purchase. This doesn’t include wear items or damage from misuse. Carefully review your warranty documentation to understand limitations and required maintenance for valid claims.

How to File a Warranty Claim
To initiate a Ryobi warranty claim, gather your proof of purchase and the saw’s model number. Contact Ryobi customer service or visit their official website for claim forms and instructions. You may need to ship the defective part or entire saw for inspection, potentially incurring shipping costs.
Ryobi Miter Saw Manual Download Locations
Access your Ryobi miter saw manual easily through the official Ryobi website, offering downloadable PDFs for various models. Alternatively, explore third-party manual databases online, though verifying the manual’s accuracy for your specific model number is crucial. Ensure you have the correct model for a precise match.
Official Ryobi Website
The official Ryobi website serves as the primary source for authentic miter saw manuals. Navigate to their support section and utilize the model number search function to locate the correct PDF document. Downloading directly from Ryobi guarantees you receive the most up-to-date and accurate information for your specific tool.
Third-Party Manual Databases
Several online databases compile user manuals for various tools, including Ryobi miter saws. While convenient, verify the manual’s authenticity and model compatibility before relying on it. These resources can be helpful if the official Ryobi website is unavailable, but always prioritize information directly from the manufacturer.
Ryobi Miter Saw Blade Selection Guide
Choosing the correct blade significantly impacts cut quality. Consider tooth count – higher counts for finer finishes, lower for faster, rougher cuts. Blade material (carbide-tipped is common) affects durability and material compatibility. Ensure the blade is compatible with your specific Ryobi model for safe and optimal performance.
Tooth Count and Blade Material
Blade tooth count dictates cut smoothness; higher counts yield finer results, ideal for trim. Lower tooth counts excel at rapid, coarser cuts in softer woods. Carbide-tipped blades offer superior durability and maintain sharpness longer. Blade material selection depends on the materials you frequently cut with your Ryobi saw.
Blade Compatibility with Ryobi Models
Confirm blade compatibility with your specific Ryobi model—check the manual or Ryobi’s website. Most Ryobi miter saws utilize a 7-1/4 inch blade with a 5/8-inch arbor size. Using incorrect blades can compromise safety and cut quality. Always prioritize blades designed for compound miter saws.
Ryobi Miter Saw Stand Assembly and Use
Properly attaching your Ryobi miter saw to the A18MS01 stand enhances stability and accuracy. Ensure secure mounting using the provided hardware. Stands offer adjustable height and extension wings for longer materials. Benefits include improved ergonomics, portability, and safer operation compared to using a saw directly on the ground.
Attaching the Miter Saw to the Stand

Begin by positioning the Ryobi miter saw onto the stand’s mounting surface. Align the saw’s base with the stand’s designated slots. Securely fasten using the included mounting brackets and bolts – typically the A000220601 bracket. Tighten all hardware firmly, ensuring the saw remains stable and doesn’t wobble during operation.
Features and Benefits of Using a Stand
A Ryobi miter saw stand significantly enhances usability and safety. Stands provide a stable work platform, improving cut accuracy. Many feature adjustable legs for leveling on uneven surfaces. Portability is increased, facilitating jobsite movement. Extension wings support longer materials, while dust collection ports maintain a cleaner workspace.
Ryobi Miter Saw Dust Collection
Effective dust collection is crucial for a clean and safe workspace when using a Ryobi miter saw. Connect a shop vacuum or dust collector to the designated port. Regularly maintain the system by emptying the collection bag or canister. This minimizes airborne particles, improving visibility and respiratory health during operation.

Connecting to a Dust Collector
To connect a dust collector, locate the dust port on your Ryobi miter saw – typically a 2.5-inch opening. Securely attach a compatible dust hose, ensuring a tight seal to prevent leakage. Verify the collector’s power switch is off before connecting. Proper connection maximizes dust removal, keeping your workspace cleaner and safer.
Maintaining the Dust Collection System
Regularly inspect the dust collection hose for cracks or blockages, ensuring optimal suction. Empty the dust collector bag or canister frequently to maintain efficiency. Clean the Ryobi miter saw’s dust port and internal channels to prevent buildup. A well-maintained system improves air quality and prolongs the life of your equipment.
Ryobi Miter Saw Power and Battery Considerations
Ryobi offers both corded and cordless miter saws. Cordless models utilize 18V batteries; proper maintenance, including regular charging and storage, is crucial for longevity. For corded saws, ensure a stable power supply. Always disconnect the battery or power cord before performing any maintenance or blade changes for safety.
Corded vs; Cordless Models
Ryobi miter saws come in corded and cordless (18V ONE+) varieties. Corded models provide consistent power, ideal for extended use, while cordless offer portability. Battery life impacts cordless saw runtime; consider extra batteries for larger projects. Choose based on your workflow and access to power outlets for optimal performance.
Battery Maintenance and Charging
To maximize Ryobi 18V ONE+ battery life, avoid complete discharge and store batteries in a cool, dry place. Use the Ryobi-approved charger for optimal charging speeds and battery health. Regularly inspect batteries for damage. Proper maintenance ensures consistent power and extends the lifespan of your cordless miter saw.