
Canon PIXMA MX922 Instruction Manual: A Comprehensive Guide
This manual details the Canon PIXMA MX922’s features, setup, printing, scanning, and troubleshooting, including battery specifications (US18650V3) and PDF creation using Canon IJ Scan Utility.
The Canon PIXMA MX922 is a versatile all-in-one printer designed for home and small office use. It combines high-quality printing, scanning, and copying functionalities with convenient wireless connectivity. This manual provides comprehensive instructions for setting up and utilizing all features.
Users can expect detailed guidance on everything from initial setup and paper handling to advanced printing options like duplex and borderless printing. Furthermore, it covers scanning and copying procedures, wireless network configuration, and essential maintenance tips. Battery information (US18650V3) is also included.
Unboxing and Initial Setup
Carefully unpack your Canon PIXMA MX922, ensuring all components are present: the printer, power cord, print head, and software/driver CD. Remove all protective tape and packaging materials. Connect the power cord and turn on the printer.
Follow the on-screen prompts to select your language and region. Install the ink cartridges correctly. The printer will then initiate a preliminary setup process, including print head alignment. Refer to the included documentation for detailed steps and ensure a stable network connection for optimal performance.
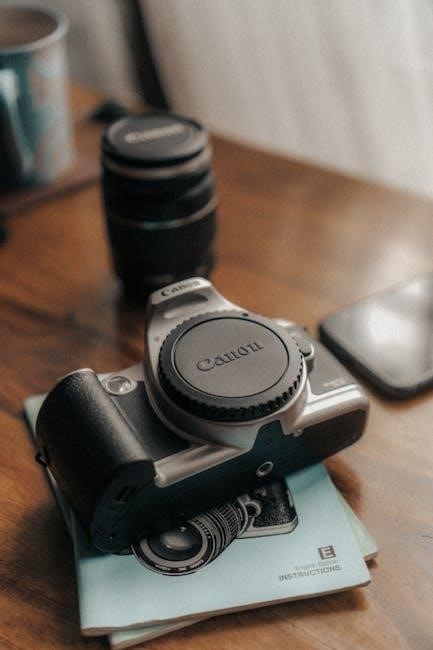
Hardware Overview
The Canon PIXMA MX922 boasts a sleek design with a user-friendly interface. It features an automatic document feeder (ADF), a color touchscreen display, and versatile paper handling capabilities. The printer incorporates a high-performance print head for exceptional print quality.
Its robust construction ensures durability, while the compact footprint allows for flexible placement. The MX922 utilizes a Lithium-Ion battery (US18650V3) for portable operation. Explore the control panel and paper trays to familiarize yourself with its physical components.
Control Panel Features
The Canon PIXMA MX922’s control panel centers around a color touchscreen, providing intuitive access to printer functions. Navigate menus for printing, scanning, copying, and setup options. Dedicated buttons offer quick access to common tasks like power, stop, and black/white printing.
The display shows ink levels, connection status, and error messages. Customize settings for paper size, print quality, and wireless connectivity. Explore the panel to unlock the printer’s full potential and streamline your workflow.
Paper Handling Options
The Canon PIXMA MX922 offers versatile paper handling with both rear and cassette trays. The rear tray accommodates various media, including envelopes and photo paper, for on-demand printing. The cassette tray holds standard paper sizes for high-volume printing.
Duplex printing is supported, saving paper by automatically printing on both sides. Adjust paper guides to ensure proper alignment and prevent jams. Explore different paper types for optimal print quality and professional results.
Software Installation
Installing the Canon PIXMA MX922 software is crucial for unlocking its full potential. Begin by downloading the necessary drivers and utilities from the official Canon website. The installation package includes the printer driver, scanner driver, and Canon IJ Scan Utility for PDF creation.

Follow the on-screen instructions carefully during the installation process. Ensure your computer meets the system requirements for optimal performance. Restart your computer after installation to complete the setup.
Driver Installation Process
The driver installation begins with running the downloaded executable file. Accept the license agreement and choose your connection method – USB or network. The installer will automatically detect your Canon PIXMA MX922.
Follow the prompts to select the components you wish to install, ensuring the printer and scanner drivers are included. The process may take several minutes; avoid interrupting it. Upon completion, test the installation by printing a test page.
Canon IJ Scan Utility – PDF Creation

Canon IJ Scan Utility allows for easy document and photo scanning directly to PDF format. Launch the utility, select your desired scanning settings – resolution, color mode, and paper size. Choose “PDF” as the file type in the output settings.
Preview your scan, then click the “Scan” button. The utility offers options for single or multi-page PDF creation. Customize file names and destinations before finalizing the process, ensuring organized document management.
Basic Printing Operations
Initiating a print job with the Canon PIXMA MX922 is straightforward. Ensure the printer is powered on and connected, either via USB or a wireless network. Open the document you wish to print from your computer. Select “Print” from the file menu and choose the PIXMA MX922 as your printer.
Adjust print settings like paper type and quality. Alternatively, utilize Canon PRINT for mobile printing, offering convenient printing directly from smartphones and tablets.
Printing from a Computer
To print from your computer, open the desired document and select “Print” from the application’s file menu. Choose “Canon PIXMA MX922” from the list of available printers. Click “Properties” or “Preferences” to adjust settings like paper size, type, and print quality. Confirm your selections and click “OK” to initiate printing.
Ensure the printer is online and has sufficient paper. Monitor the print queue for status updates. Troubleshoot any errors by checking connections and printer status.
Mobile Printing with Canon PRINT
Utilize the Canon PRINT app for convenient mobile printing. Download and install the app on your smartphone or tablet. Ensure your PIXMA MX922 is connected to the same Wi-Fi network as your mobile device. Open the Canon PRINT app and select your printer.
Choose the document or photo you wish to print. Adjust settings as needed and tap the “Print” icon. Enjoy wireless printing from your mobile device!
Advanced Printing Features
Explore the PIXMA MX922’s advanced capabilities for enhanced printing experiences. Enable Duplex Printing for automatic two-sided printing, reducing paper consumption and saving resources. Utilize Borderless Printing to create stunning photos and documents that extend to the edge of the paper.
Customize print settings for optimal quality and experiment with various paper types. Access these features through the printer driver settings on your computer.
Duplex Printing (Two-Sided Printing)
Activate Duplex Printing within the printer driver settings to automatically print on both sides of the paper. Select the “Two-Sided Printing” option and choose your preferred binding edge – long-edge or short-edge. This feature significantly reduces paper usage, promoting environmental responsibility and cost savings.
Ensure compatible paper is loaded for optimal results. Preview your document before printing to confirm proper alignment and layout.
Borderless Printing
Enable Borderless Printing through the printer driver settings for photos and documents that extend to the edge of the paper. Select the appropriate paper type and size within the settings to ensure compatibility. Choose a high-resolution setting for optimal image quality when utilizing this feature.
Note that borderless printing may consume slightly more ink. Always use Canon genuine photo paper for best results and to prevent smudging.
Scanning and Copying
The Canon PIXMA MX922 excels at both scanning and copying. Utilize the control panel or software to initiate these functions. Select document or photo mode for optimized results. Adjust resolution settings for desired clarity; higher resolutions yield larger file sizes.
For PDF creation, leverage the Canon IJ Scan Utility. Copying offers options for multiple copies and adjustments like darkness and layout. Ensure originals are placed correctly on the scanner glass.
Scanning Documents and Photos
The Canon PIXMA MX922 offers versatile scanning capabilities for both documents and photos. Select the appropriate mode on the control panel – document for text, photo for images. Utilize the Canon IJ Scan Utility for advanced settings like resolution and color correction.
Place originals face down on the scanner glass, aligning with the guides. Preview the scan before finalizing to ensure proper cropping and settings. Save scanned files in various formats, including PDF, JPEG, and TIFF.
Copying Documents and Photos
The Canon PIXMA MX922 facilitates quick and easy copying of documents and photos directly from the machine. Place the original on the scanner glass, ensuring it’s aligned with the guides. Select the desired copy settings – color or black & white, number of copies, and paper size – via the control panel.
Press the copy start button to initiate the process. Adjust settings like darkness and reduction/enlargement for optimal results. The MX922 efficiently produces clear and accurate copies for various needs.
Wireless Network Setup
Connecting your Canon PIXMA MX922 to a wireless network unlocks convenient printing and scanning from multiple devices. Access the wireless setup wizard through the printer’s control panel or using the Canon IJ Scan Utility on your computer. Select your network name (SSID) from the available list and enter your network password accurately.
Ensure a strong Wi-Fi signal for reliable connectivity. Troubleshooting may involve restarting the printer and router, or checking network settings.

Connecting to Wi-Fi
To connect your Canon PIXMA MX922 to Wi-Fi, navigate to the printer’s setup menu using the control panel. Select “Wireless LAN setup” and then choose your network from the list of available networks. Enter your Wi-Fi password carefully when prompted, ensuring correct capitalization.
The printer will attempt to connect; a successful connection is indicated by a steady Wi-Fi indicator light. Utilize the Canon IJ Scan Utility for assistance if needed.
Troubleshooting Wireless Connectivity
If your Canon PIXMA MX922 fails to connect to Wi-Fi, first ensure the printer is within range of your router. Restart both the printer and your router. Verify the correct Wi-Fi password was entered during setup. Check for interference from other wireless devices.
Run the wireless network test from the printer’s control panel. Consult the Canon IJ Scan Utility for diagnostic tools and further assistance in resolving connectivity issues.
Maintenance and Troubleshooting
Regular maintenance ensures optimal Canon PIXMA MX922 performance. Periodically perform print head alignment using the printer’s utility to maintain print quality. Address paper jams promptly; carefully remove any obstructions, following the illustrated guide.
Clean the scanner glass with a lint-free cloth. Refer to the Canon IJ Scan Utility for troubleshooting common errors. Battery issues (US18650V3) may require replacement. Consult the manual for detailed error code explanations.
Print Head Alignment
Print head alignment is crucial for optimal Canon PIXMA MX922 print quality. Access the alignment function through the printer’s maintenance settings, typically within the software or control panel. The printer will print a pattern; carefully examine it and input the corresponding values as prompted.
Repeat the process if initial results are unsatisfactory. Proper alignment corrects misaligned nozzles, reducing streaks or blurry prints. Regular alignment, especially after ink changes, maintains consistent output. Refer to the manual’s diagrams for visual guidance.
Paper Jam Removal
Addressing paper jams on your Canon PIXMA MX922 requires careful attention. First, power off the printer and open all access panels – rear, front, and inside. Gently remove any visible paper fragments, avoiding tearing. Check the paper path thoroughly, including rollers and trays.

Ensure no small pieces remain, as these can cause future jams. Consult the manual’s diagrams for specific locations. Restart the printer and test with a fresh stack of paper. Avoid forcing paper; this can damage the printer’s mechanism.
Battery Information (Lithium-Ion)
The Canon PIXMA MX922 utilizes a Lithium-Ion battery, specifically the US18650V3 model, manufactured by Sony. This battery powers the printer during wireless operation and provides portability. Typical capacity is around 2.1Ah when discharging at 0.21tA with a 2.5V cut-off.
Always handle Lithium-Ion batteries with care, avoiding extreme temperatures and physical damage. Ensure proper disposal according to local regulations. The battery’s specifications adhere to UL1642 safety standards (File No. MH12566).
Battery Specifications (US18650V3)
The US18650V3 Lithium-Ion battery exhibits key specifications. Cell type is 18650, adhering to UL1642 safety standards (MH12566). Markings include “THISS 18650HR15 2019.08.03 3.6V”. Typical capacity reaches 2.1Ah during 0.21tA discharge with a 2.5V cut-off.
While some users report cells from Black & Decker tools claiming 2.5Ah, actual capacity may vary, potentially around 1500mAh. Proper charging and handling are crucial for optimal performance and longevity.
Canon Lake Fishing Reports (Related Canon Name)
Fishing reports from lakes named “Canon” or nearby areas offer recreational insights. Cannon Lake in Faribault, Minnesota, presents a unique experience with widely dispersed anglers. The Cannon River, a Mississippi tributary, boasts smallmouth bass and diverse fishing opportunities.
Reports from June 5, 2002, inquire about White Bass runs, while St. Croix River reports (March 21, 2010) detail Walleye, Sauger, Sturgeon, and Bass fishing. These reports provide a glimpse into local angling conditions.
St. Croix River Fishing Reports
St. Croix River fishing reports, dated March 21, 2010, highlight a diverse fishery. Anglers target Walleye, Sauger, Sturgeon, and Bass in this Minnesota waterway. The river’s conditions support a variety of species, attracting both seasoned and novice fishermen;
These reports offer valuable insights into seasonal fishing patterns and successful techniques. Understanding the river’s ecosystem is crucial for a rewarding angling experience. Regular updates provide current information for planning your fishing trip.
HD Camera Suggestions for Video Recording (Related to potential user needs)
Considering budget-friendly HD camera options for YouTube videos and general use is wise. Recommendations from January 15, 2018, suggest exploring lower to middle-range cameras. Prioritize decent video quality without the expense of a dedicated camcorder.

Focus on cameras offering a balance between price and performance. Research models with good video stabilization and audio capabilities. User reviews can provide valuable insights into real-world performance.
Budget-Friendly HD Camera Options
Seeking affordable HD cameras for video recording requires careful consideration. Options should deliver decent video quality without exceeding a strict budget. Focus on cameras with 1080p resolution as a minimum standard for clear footage.
Explore models from brands known for value, like Canon or Sony’s entry-level lines. Prioritize features like image stabilization and adequate low-light performance. User reviews from March 21, 2010, can help identify reliable, cost-effective choices.