jesus and the jewish roots of the eucharist pdf

Understanding the Eucharist requires recognizing Jesus’s Jewish identity and the first Christians’ Jewish heritage; exploring texts like “Jesus and the Jewish Roots of the Eucharist” is vital.

Many wrongly assume Jesus abolished Jewish practices, yet the Gospels reveal a different narrative, deeply rooted in first-century Jewish beliefs and traditions.

Dr. Pitre’s work illuminates the sacrament’s profound connection to Jewish rituals, offering a richer appreciation for its origins and significance within the divine drama.

The Overlooked Jewishness of Jesus

Frequently, discussions surrounding the Eucharist neglect the foundational Jewish context of Jesus’s life and teachings. He wasn’t simply a religious figure operating outside Judaism, but a devout Jew immersed within its traditions, scriptures, and expectations. To truly grasp the Last Supper and its implications, we must actively remember that Jesus, his disciples, and the earliest followers were all Jewish.

The New Testament consistently portrays Jesus participating in Jewish practices, demonstrating his adherence to Jewish law and customs. Ignoring this crucial aspect creates a distorted understanding of his ministry and the origins of the Eucharist. Resources like Brant Pitre’s work emphasize reclaiming this often-overlooked Jewishness, revealing a deeper, more authentic interpretation.

Acknowledging this Jewish foundation isn’t about diminishing the universality of the Christian message, but about enriching our comprehension of its historical roots.

The Eucharist as a Jewish Meal

The Eucharist isn’t a spontaneous invention, but rather a transformation of existing Jewish meal practices. Understanding the Last Supper as a Jewish meal—specifically, a Passover Seder—is paramount. Jesus didn’t create something entirely new; He reinterpreted and fulfilled existing rituals, imbuing them with new meaning.

Jewish meals were often deeply symbolic, incorporating elements like bread and wine, and accompanied by blessings and prayers. These weren’t merely sustenance, but opportunities for remembering God’s covenant and experiencing His presence. Brant Pitre’s research highlights how Jesus utilized these familiar elements to establish the Eucharist.

Recognizing this Jewish character allows for a richer appreciation of the Eucharist’s symbolism and its connection to the broader narrative of salvation history.

The Passover Connection

The Last Supper’s profound link to Passover reveals Jesus as the Paschal Lamb, fulfilling ancient prophecies and establishing a “New Passover” for His followers.

The Last Supper as a Passover Seder

Evidence suggests the Last Supper wasn’t simply a meal, but a full-fledged Passover Seder, meticulously observed by Jesus and His disciples, deeply rooted in Jewish tradition.

Pitre’s research highlights how Jesus’s actions during the Supper mirrored the traditional order of the Seder, including the unleavened bread and the four cups of wine, each holding symbolic weight.

The timing, occurring on the day of Preparation for Passover, further solidifies this connection, demonstrating Jesus’s deliberate fulfillment of the Passover narrative.

Understanding this context transforms our perception of the Eucharist, revealing it not as a replacement for Passover, but as its ultimate fulfillment in Christ.

Unveiling the Rituals: Unleavened Bread and Wine

The unleavened bread (matzah) and wine weren’t arbitrary choices, but integral components of the Passover Seder, laden with symbolic meaning for the Jewish participants at the Last Supper.

Matzah represented the haste of the Exodus, the Israelites leaving Egypt with no time for their bread to rise, symbolizing freedom from slavery and a reliance on God’s provision.

Wine, specifically the four cups consumed during the Seder, signified joy, redemption, and God’s promises to Israel, each cup corresponding to a stage in the Passover narrative.

Jesus intentionally utilized these familiar elements, transforming their meaning to signify His body and blood, offered for the new covenant, building upon existing Jewish understanding.

The Lamb of God: A Passover Sacrifice

Central to the Passover celebration was the sacrificial lamb, whose blood protected the Israelites from the angel of death, foreshadowing a greater sacrifice to come. Jesus, identified as the “Lamb of God” (John 1:29), fulfills this ancient typology.

Just as the Passover lamb’s blood offered redemption from physical slavery in Egypt, Jesus’s blood offers redemption from spiritual slavery to sin and death, establishing a new exodus.

The timing of the Last Supper coinciding with Passover preparation highlights this connection; Jesus is the Passover sacrifice, offered at the very time the traditional sacrifice would be made.

This understanding, rooted in Jewish sacrificial theology, reveals the Eucharist not as a replacement of Passover, but as its ultimate fulfillment in Christ.

Biblical Foundations in Jewish Scripture

Jewish scriptures provide crucial context for understanding the Eucharist, prefiguring it through events like manna in the wilderness and the covenantal sacrifices of the Old Testament.

The Manna in the Wilderness: A Prefiguration

The manna provided to the Israelites during their wilderness journey serves as a powerful prefiguration of the Eucharist, mirroring its provision of spiritual nourishment. This miraculous sustenance, given daily from heaven, foreshadows Jesus, the “bread of life” (John 6:35), who offers eternal life through participation in the sacrament.

Just as manna sustained physical life, the Eucharist sustains spiritual life, becoming a tangible connection to God’s grace. The Israelites were instructed to collect only what they needed each day, reflecting the Eucharist’s call to receive God’s gift with gratitude and humility.

This parallel highlights the Eucharist not as a new invention, but as the fulfillment of God’s ongoing provision for His people, rooted deeply within Jewish scripture and tradition.

Sacrifice and Covenant in the Old Testament

Old Testament sacrifices were central to the covenant relationship between God and Israel, symbolizing atonement for sin and expressing gratitude. These rituals, particularly the Passover lamb, prefigured the ultimate sacrifice of Jesus Christ, the “Lamb of God” (John 1:29), who offered Himself for the sins of the world.

The covenant established with Moses involved specific offerings and rituals, demonstrating obedience and faith. Similarly, the Eucharist, as a memorial of Christ’s sacrifice, renews the New Covenant, offering forgiveness and eternal life through participation in His body and blood.

Understanding these Old Testament foundations reveals the Eucharist as the fulfillment of God’s promises, not a replacement, but a transformation of ancient practices.

Understanding Jewish Meal Practices

Jewish meals were highly ritualized, featuring blessings like the Birkat Hamazon and Kiddush, sanctifying food and expressing gratitude to God, mirroring Eucharistic elements.

The Birkat Hamazon: Grace After Meals

The Birkat Hamazon, a central Jewish practice, is a lengthy prayer recited after meals, expressing gratitude to God for provision and blessings. It’s structured around specific themes – blessings for the land, Jerusalem, and God’s kindness.

This post-meal blessing wasn’t merely a formality; it was considered as important as the meal itself, demonstrating a continuous acknowledgement of God’s presence in daily life.

Interestingly, parallels can be drawn to the Eucharist, where thanksgiving is central. The Birkat Hamazon’s structure and emphasis on God’s covenantal faithfulness offer insight into the Jewish context informing Jesus’s Last Supper and the subsequent institution of the Eucharist.

The Kiddush: Sanctification of the Meal

The Kiddush, a foundational Jewish ritual, involves reciting a blessing over wine to sanctify the Sabbath and festivals, transforming an ordinary meal into a sacred event. This act of sanctification recalls God’s creation and redemption of Israel.

Central to the Kiddush is the wine, symbolizing joy, celebration, and God’s presence. The blessing isn’t simply a prayer before eating, but an integral part of the meal’s holiness.

Understanding the Kiddush illuminates the significance of wine in the Last Supper, where Jesus declared, “This cup is the new covenant in my blood.” It highlights how Jesus re-contextualized a familiar Jewish practice.

Brant Pitre’s Research and Insights

Pitre’s work, “Jesus and the Jewish Roots of the Eucharist,” unveils the Last Supper’s Jewish context, revealing how Jesus fulfilled ancient Passover rituals and prophecies.

“Jesus and the Jewish Roots of the Eucharist” ‒ Key Arguments

Brant Pitre’s central argument posits that to truly grasp the Eucharist, one must understand its deeply embedded Jewish origins and the first-century Jewish mind of Jesus and his disciples;

He demonstrates how the Last Supper wasn’t a spontaneous invention, but a meticulously orchestrated Passover Seder, brimming with symbolic meaning understood by its Jewish participants.

Pitre meticulously unpacks the rituals – the unleavened bread representing the haste of the Exodus, the wine symbolizing the blood of the covenant – revealing their profound connection to Jesus as the new Passover Lamb.

Furthermore, he argues that Jesus didn’t abolish Jewish law, but fulfilled it, transforming the Passover meal into the New Covenant meal, offering a deeper, spiritual reality.

The book challenges common misconceptions, urging readers to reclaim the Jewish roots of their faith and appreciate the Eucharist’s rich heritage.

The Importance of First-Century Jewish Beliefs

Understanding first-century Jewish beliefs is paramount to comprehending the Eucharist, as Jesus and his initial followers were immersed in this cultural and religious context.

Their worldview, shaped by the Hebrew Scriptures and centuries of tradition, provided the framework for interpreting Jesus’s words and actions at the Last Supper.

Concepts like covenant, sacrifice, and the expectation of a Messiah were not abstract theological ideas, but deeply held convictions influencing their understanding of Jesus.

Ignoring this Jewish background risks misinterpreting the Eucharist as a purely Greek or Roman concept, divorced from its original meaning and intent.

Pitre’s research emphasizes that the apostles’ faith in Jesus was fundamentally Jewish, shaping their early Christian practice and understanding of the sacred meal.

The Significance of the “New Covenant”

Jeremiah’s prophecy of a New Covenant finds fulfillment in the Eucharist, becoming the central meal establishing a renewed relationship with God through Christ.

Jeremiah’s Prophecy and its Fulfillment

The prophet Jeremiah foretold a “New Covenant” (Jeremiah 31:31-34), differing from the Mosaic Covenant, written on stone, to one inscribed on the hearts of the people. This promise resonates deeply within the context of the Last Supper and the institution of the Eucharist.

Jesus, during the Last Supper, explicitly connects the bread and wine to the establishment of this New Covenant, stating, “This cup that is poured out for you is the new covenant in my blood” (Luke 22:20). This isn’t a replacement of the old, but a fulfillment, offering a deeper, more intimate relationship with God.

The Eucharist, therefore, isn’t merely a symbolic act, but a tangible participation in the New Covenant, a continual offering and reception of God’s grace, transforming believers from within.

The Eucharist as the New Covenant Meal

Viewing the Eucharist through a Jewish lens reveals it as the definitive New Covenant meal, building upon the traditions of Passover and other Jewish festive meals. It’s not simply a remembrance of Jesus’ sacrifice, but a participation in that sacrifice, continually made present.

The Last Supper, understood as a Passover Seder, establishes this connection. Jesus reinterprets the Passover rituals, presenting Himself as the ultimate Paschal Lamb, whose blood inaugurates a new exodus – from sin to salvation.

This meal, therefore, isn’t a replacement for Jewish meals, but their culmination, offering a deeper, more profound experience of God’s covenant love and presence through the bread and wine.

The Apostles’ Jewish Background

The apostles, deeply rooted in Jewish beliefs, shaped early Christian practice; Paul’s understanding of the Eucharist stemmed from this heritage, influencing its initial reception.

How Jewish Beliefs Shaped Early Christian Practice

Early Christians, initially Jewish, didn’t abandon their traditions but reinterpreted them through Jesus. Their understanding of sacrifice, covenant, and meals—central to Judaism—profoundly influenced Eucharistic practice.

The Last Supper, understood as a Passover meal, wasn’t a break from Jewish custom but a fulfillment of it. Concepts like the Kiddush (sanctification) and Birkat Hamazon (grace after meals) provided a framework for early Eucharistic celebrations.

Paul’s writings, referencing the Passover lamb (1 Corinthians 5:7-8), demonstrate this continuity. He connected Jesus to Jewish sacrificial theology, framing the Eucharist as a participation in Christ’s sacrifice, a “new covenant” meal.

This Jewish foundation is crucial for understanding the Eucharist’s original meaning and significance.

Paul’s Understanding of the Eucharist

Paul, a Jewish Pharisee converted to Christianity, deeply understood the Eucharist through a Jewish lens. His letters reveal a connection between the Last Supper and the Passover, viewing Jesus as the Paschal Lamb sacrificed for humanity’s redemption (1 Corinthians 5:7-8).

He framed the Eucharist not as replacing Jewish sacrifice, but as its fulfillment, a participation in Christ’s once-for-all offering. This understanding aligns with Jewish covenant theology, establishing a “new covenant” in Jesus’ blood.

Paul’s emphasis on “sharing” (koinonia) in the body and blood of Christ echoes Jewish communal meal practices, highlighting unity and fellowship within the believing community.

His perspective demonstrates the Eucharist’s inherent Jewish roots and its continuity with Israel’s religious heritage.

Debunking Misconceptions

Jesus didn’t abolish Jewish Law, but fulfilled it, and the Eucharist isn’t a replacement for Passover, but its transformative culmination, deepening covenant understanding.

Jesus Didn’t Abolish Jewish Law, He Fulfilled It

A common misconception is that Jesus came to dismantle Jewish religious practices, but a careful reading of scripture reveals a different truth. He actively participated in Jewish life, observing the Law and celebrating Jewish feasts.

Instead of abolishing the Law, Jesus fulfilled it, meaning He brought it to its intended completion and revealed its deeper meaning. This fulfillment is evident in the New Covenant established through His sacrifice.

Understanding this distinction is crucial for grasping the Jewish context of the Eucharist; it wasn’t a rejection of Judaism, but a radical transformation within it, a new Passover.

Pitre’s research emphasizes that Jesus’s actions and teachings were deeply rooted in first-century Jewish beliefs, not a departure from them.

The Eucharist is Not a Replacement, But a Transformation

The Eucharist isn’t a discarding of Jewish meal practices, but rather their profound transformation in light of Christ’s sacrifice; It doesn’t erase the Passover; it becomes the new Passover, fulfilling its prophetic significance.

Jesus didn’t introduce something entirely new, but perfected and deepened existing Jewish rituals, imbuing them with a new reality through His body and blood.

This perspective, highlighted in works like Pitre’s, reveals the Eucharist as a continuation of God’s covenant with Israel, not a break from it. It’s a New Covenant meal, building upon the Old.

The Last Supper wasn’t a farewell to Jewish tradition, but its culmination, a foreshadowing of the ultimate sacrifice and the promise of eternal life.

The Real Presence and Jewish Concepts

Jewish tradition affirms divine presence; the Eucharist connects to Passover, where God’s presence dwelt among them, now realized in Christ’s body and blood.

Divine Presence in Jewish Tradition

Throughout Jewish scripture and practice, the concept of God’s presence – the Shekhinah – is central. This isn’t merely a philosophical idea, but a lived reality woven into daily life and ritual observance.

The Temple, for example, was understood as the dwelling place of God, a tangible manifestation of His presence among His people. Similarly, the manna in the wilderness wasn’t just sustenance, but a sign of God’s providential care and intimate connection.

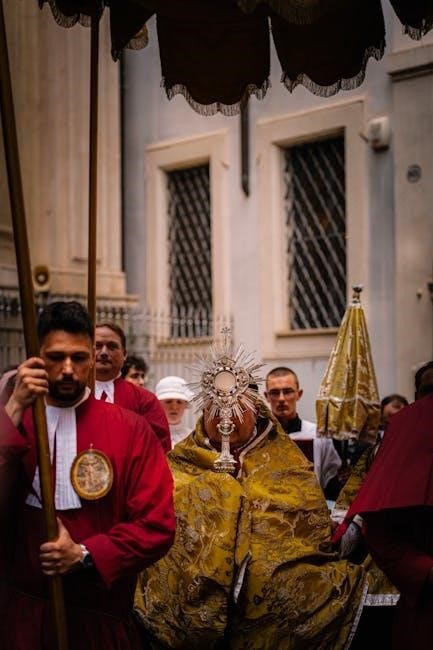
This understanding of divine presence provides a crucial framework for grasping the Catholic doctrine of the Real Presence in the Eucharist, where Christ is truly, substantially, and sacrificially present.

Pitre’s research highlights how Jesus, as a devout Jew, would have understood and utilized these existing concepts to reveal a new and deeper reality in the Eucharist.

Connecting the Real Presence to Passover

The Passover Seder, commemorating the Exodus, powerfully foreshadows the Eucharist’s Real Presence. The unleavened bread, representing the haste of the Israelites’ departure, becomes a symbol of Christ’s body, broken for us.

Similarly, the four cups of wine, each signifying a promise of redemption, point to the new covenant sealed in Christ’s blood. The sacrificial lamb, central to the Passover meal, finds its ultimate fulfillment in Jesus, the “Lamb of God.”

Pitre argues that Jesus intentionally reinterpreted these Passover rituals, transforming them into a new memorial – a lasting presence of His sacrifice and a foretaste of the heavenly banquet.

Understanding the Jewish roots of the Eucharist illuminates how Jesus didn’t abolish Passover, but perfected it, offering a deeper and more profound encounter with the divine.

Reclaiming the Jewish Roots

Rediscovering the Jewish context of the Eucharist deepens our appreciation for its meaning and fosters greater understanding within Christian-Jewish dialogue, enriching faith.

A Deeper Appreciation for the Eucharist

Recognizing the Eucharist’s Jewish origins transforms our understanding of this central sacrament; it’s not merely a symbolic act, but a fulfillment of ancient promises.

Brant Pitre’s research reveals how Jesus intentionally re-contextualized Passover, establishing a “New Covenant” meal, echoing Jeremiah’s prophecy and offering a deeper spiritual nourishment.

Understanding the Last Supper as a Jewish Seder, complete with unleavened bread and wine, unveils the profound symbolism embedded within the ritual, connecting it to the Exodus.

This perspective allows us to see Jesus not as abolishing Jewish law, but as fulfilling it, offering a transformative experience rooted in centuries of tradition and faith.

Implications for Christian-Jewish Dialogue

Acknowledging the Jewish roots of the Eucharist fosters a deeper respect and understanding between Christians and Jews, dismantling historical misconceptions and promoting reconciliation.

Recognizing Jesus’s Jewish identity and the first Christians’ heritage challenges the narrative of replacement theology, highlighting continuity rather than rupture.

Brant Pitre’s work provides a common ground for dialogue, demonstrating that the Eucharist isn’t a rejection of Judaism, but a fulfillment of its prophetic hopes.

This shared heritage encourages collaborative exploration of scripture and tradition, building bridges of understanding and fostering mutual appreciation for both faiths.

335i manual

The BMW 335i manual, particularly the E90/E92/E93 generations, represents a pinnacle of driver engagement. Vietnam offers access to these models, with showrooms like BMW Sala and Phu My Hung providing sales and service.

Overview of the E90/E92/E93 335i

The E90 (sedan), E92 (coupe), and E93 (convertible) 335i models, produced from 2006-2013, are highly sought after. They feature a potent inline-6 engine and rear-wheel drive, embodying BMW’s driving focus. In Vietnam, BMW offers these through various showrooms – Sala, Phu My Hung, and others – providing both sales and dedicated service centers. These vehicles blend performance with a luxurious interior, appealing to enthusiasts. The BMW 3 Series is officially distributed by BMW Vietnam, offering test drives to experience its renowned driving dynamics. The X7, while different, showcases BMW’s commitment to blending elegance and performance, a trait shared with the 335i.

Why Choose a Manual Transmission?

For purists, the 335i’s manual transmission delivers unparalleled driver control and engagement. It fosters a direct connection to the vehicle, enhancing the driving experience. BMW historically built its brand on manual transmissions, creating the “ultimate driving machine.” Choosing manual allows complete command over gear selection and engine braking. While trends shift, the appeal remains strong. Even with electric models like the iX1 and i4 available in Vietnam, the manual 335i offers a unique, tactile experience, distinct from automatic variants, and potentially a future collectible.

Engine and Performance

The 335i’s engine, either the N54 or N55, delivers robust power; BMW’s focus on driving dynamics shines through, offering exhilarating performance and a responsive feel.

N54/N55 Engine Differences

The N54 and N55 engines, both found in 335i manuals, possess distinct characteristics. The N54, earlier in production, utilizes twin-turbochargers and a direct injection system, known for its tuning potential but potential for high-pressure fuel pump failures.

Conversely, the N55 features a single twin-scroll turbocharger, improving responsiveness and thermal efficiency. While generally considered more reliable, it may offer slightly less peak power than a well-tuned N54. Both engines deliver a thrilling driving experience, but understanding these differences is crucial for potential owners in Vietnam considering a used 335i.

Turbocharger System Details

The 335i manual’s turbocharger system is central to its performance. Early models (N54) employ twin-turbochargers, offering reduced turbo lag and a broader powerband. These utilize wastegates to regulate boost pressure, crucial for maintaining engine health.

Later N55 engines feature a single, twin-scroll turbocharger, enhancing low-end torque and efficiency. Intercoolers, vital for cooling compressed air, prevent detonation. Regular inspection of turbocharger lines and boost control systems is essential, particularly for Vietnamese climates, ensuring optimal performance and longevity.

Performance Modifications for the 335i Manual

Numerous modifications unlock the 335i manual’s potential. ECU tuning significantly boosts horsepower and torque, requiring careful mapping for reliability. Upgraded downpipes and exhaust systems improve airflow, complementing the turbocharger.

For Vietnamese enthusiasts, heat management is key; larger intercoolers combat high temperatures. Lightweight flywheels enhance acceleration, while stronger clutches handle increased power. Consider professional installation, especially for complex upgrades, to maintain the BMW’s renowned driving dynamics and avoid compromising its integrity.

Transmission Specifics

The 335i manual utilizes the robust Getrag GS6-17BG transmission. Understanding its design and common issues is crucial for long-term reliability and optimal performance.

Getrag GS6-17BG Transmission Details

The Getrag GS6-17BG is a widely-regarded 6-speed manual transmission known for its durability and positive shift feel. It features a robust internal construction designed to handle the significant torque output of the N54 and N55 engines found in the 335i. Gear ratios are carefully selected to balance acceleration and cruising efficiency.

This transmission employs a dual-mass flywheel to mitigate engine vibrations, enhancing driving comfort. Synchronizer rings are crucial components, and their condition directly impacts shift quality. Proper lubrication with the correct oil type is paramount for longevity, preventing wear and ensuring smooth operation. The GS6-17BG is a key element of the engaging driving experience.

Common Issues with the 6-Speed Manual

While robust, the 335i’s 6-speed manual (Getrag GS6-17BG) isn’t immune to issues. Common complaints include worn synchronizers, leading to grinding during shifts, particularly 2nd and 3rd gear. Clutch wear is typical, manifesting as slippage under load.

Shift linkage bushings can degrade, causing imprecise shifting. Oil leaks from the transmission housing are also reported. Inspecting the dual-mass flywheel for excessive play is crucial, as failure can be costly. Regular fluid changes and proactive maintenance can mitigate these potential problems, ensuring continued enjoyment.

Maintenance Schedule for the Manual Transmission

Maintaining the 335i’s manual transmission is vital for longevity. BMW recommends fluid changes every 30,000 miles (48,000 km) or 3 years, whichever comes first, using BMW-approved gear oil. Inspect shift linkage bushings for wear and replace as needed.

Regularly check for oil leaks around the transmission housing. The dual-mass flywheel should be inspected for play during clutch service (typically around 60,000 miles). Proper maintenance, performed by BMW service centers in Vietnam like those in Da Nang or Binh Duong, ensures smooth operation.

Driving Experience

The 335i manual delivers a raw, connected feel, embodying BMW’s “ultimate driving machine” ethos. It’s a thrilling experience, enhanced by precise shifting and responsive control.

Clutch Feel and Engagement

The BMW 335i manual’s clutch offers a progressive engagement, providing excellent feedback to the driver. It isn’t overly heavy, making it manageable for daily driving, yet firm enough for spirited performance. Precise control is key, allowing for smooth transitions during both upshifts and downshifts.

The pedal travel is relatively short, contributing to a more direct connection. Mastering the clutch feel is crucial for techniques like rev-matching and heel-toe downshifting, unlocking the car’s full potential. A well-maintained clutch ensures consistent performance and prevents slippage, vital for optimal power delivery.

Shifting Techniques for Optimal Performance

To maximize the 335i manual’s performance, smooth and deliberate shifting is paramount. Focus on fully depressing the clutch and executing quick, precise movements of the gear lever. Avoiding abrupt shifts minimizes power interruption and maintains momentum.

Short-throw shifters, available as upgrades, further enhance speed and precision. Anticipating gear changes based on engine RPM and road conditions is crucial. Mastering these techniques unlocks quicker acceleration and a more engaging driving experience, truly embodying BMW’s “ultimate driving machine” philosophy.

Rev Matching and Heel-Toe Downshifting

Rev matching is essential for seamless downshifts in the 335i manual, preventing abrupt engine braking and maintaining vehicle stability. Simultaneously blipping the throttle while downshifting raises engine RPM to match the lower gear’s speed.

Heel-toe downshifting, a more advanced technique, combines braking and throttle control for smooth corner entry. Mastering this skill allows for precise control and minimizes disruption to the car’s balance, enhancing the overall driving experience and performance;

Maintenance and Reliability

Regular maintenance is crucial for the 335i manual’s longevity. BMW Vietnam provides service centers, ensuring proper care and addressing potential failure points proactively.

Regular Maintenance Tasks

Consistent upkeep is vital for a healthy 335i manual. This includes frequent oil changes – utilizing BMW’s recommended specifications – and diligent inspection of fluids like brake and coolant. Regularly check the clutch fluid and consider replacement every few years. Inspecting suspension components, steering systems, and brake pads is also essential.

Don’t neglect the cooling system; overheating can severely damage the N54/N55 engines. BMW Vietnam’s service centers offer comprehensive maintenance packages, ensuring adherence to factory standards. Proactive maintenance minimizes costly repairs and maximizes the vehicle’s lifespan.

Common Failure Points and Repairs

The BMW 335i manual, while robust, has known weak points. High-pressure fuel pumps (HPFP) on the N54 are notorious for failure, requiring replacement. Oil leaks from the valve cover and oil filter housing gasket are frequent. Turbocharger issues, including shaft play, can occur. Clutch wear is expected, necessitating eventual replacement.

Addressing these promptly prevents cascading damage. BMW Vietnam’s dealerships and specialized mechanics can handle these repairs. Online forums offer valuable diagnostic insights, aiding in cost-effective solutions.

Oil Recommendations for the Transmission

Selecting the correct oil is crucial for the Getrag GS6-17BG manual transmission in the 335i. BMW originally specified a specific weight, but many owners report excellent results with Redline MT-90, a 75W90 synthetic gear oil known for its durability and smooth shifting.

Regular fluid changes – every 30,000 to 60,000 miles – are vital. Avoid automatic transmission fluids; they are incompatible. Proper lubrication minimizes wear and ensures optimal performance, extending the transmission’s lifespan.

Modifications and Upgrades

Enhance your 335i manual with upgrades like short shifters, weighted shift knobs, and robust clutch kits. These modifications improve feel and performance.

Short Shifter Installation

Installing a short shifter on your 335i manual dramatically alters the driving experience, reducing throw length for quicker, more precise gear changes. Several reputable brands offer kits specifically designed for the BMW GS6-17BG transmission. The installation process typically involves removing the center console, shifter assembly, and replacing the stock components with the new short shifter parts.

Proper alignment and securing all fasteners to the correct torque specifications are crucial. Some kits may require minor adjustments or modifications. Expect a noticeable improvement in shift feel, making spirited driving even more engaging. Always consult a detailed installation guide or seek professional assistance if unfamiliar with the procedure.

Shift Knob Options and Impact

The shift knob on your 335i manual is more than just an aesthetic choice; it significantly impacts feel and control. Options range from OEM BMW knobs to aftermarket alternatives in various materials like aluminum, carbon fiber, or leather. Weight plays a crucial role – heavier knobs offer a more substantial feel, while lighter ones allow for quicker shifts.

Shape and texture also matter, influencing grip and comfort. A well-chosen shift knob complements the short shifter, enhancing the overall driving experience. Consider your driving style and preferences when selecting a knob for your 335i.

Clutch Upgrade Options

For heavily modified 335i manuals, the stock clutch often becomes a limiting factor. Upgrading is crucial for handling increased power and torque. Options include organic, ceramic, and hybrid clutches, each offering different characteristics.

Organic clutches provide a comfortable street driving experience but may slip under high boost. Ceramic clutches offer superior grip but can be harsh. Hybrid clutches strike a balance. Consider your usage – track days demand a robust ceramic or hybrid, while daily driving benefits from organic comfort.

Troubleshooting Common Problems

Common 335i manual issues include difficult shifting, clutch slippage, and grinding gears. Proper diagnosis is key, often requiring inspection of linkages and internal components.

Difficulty Shifting Gears

Experiencing trouble selecting gears in your 335i manual can stem from several sources. A worn clutch, low transmission fluid, or issues with the shift linkage are frequent culprits. Inspecting the linkage for play or damage is crucial, as is ensuring proper fluid levels. Internal transmission wear, though less common, can also contribute.

Sometimes, a simple adjustment of the shift linkage can resolve the problem. However, persistent difficulty may indicate a need for clutch replacement or transmission rebuild, especially if accompanied by grinding noises. Consulting a BMW specialist in Vietnam, like those at BMW service centers, is recommended for accurate diagnosis and repair.

Clutch Slippage Issues

Clutch slippage in a 335i manual manifests as engine RPMs rising without a corresponding increase in vehicle speed, particularly during acceleration. This indicates the clutch isn’t fully engaging, often due to wear or contamination. Oil or grease on the clutch disc significantly reduces friction.

A glazed clutch surface can also cause slippage. Diagnosis involves checking the clutch disc’s condition. Replacement is usually necessary. Vietnamese BMW service centers, such as those in Binh Duong or Da Nang, can provide expert assessment and clutch replacement services, ensuring optimal performance.

Grinding Gears Diagnosis

Grinding gears in a 335i manual typically signals synchronization issues within the transmission. This often occurs when shifting too quickly, or with a worn synchronizer ring. Improper clutch engagement can exacerbate the problem, preventing complete gear disengagement.

Diagnosis involves listening for the specific gear where grinding occurs. Vietnamese BMW dealerships, including locations in Nha Trang and Bien Hoa, possess diagnostic tools to pinpoint the source. Repair may involve transmission rebuild or synchronizer replacement, restoring smooth shifting.

Buying a Used 335i Manual

Inspect a used 335i manual thoroughly, checking transmission history and clutch condition. BMW Vietnam showrooms and service centers can assist with pre-purchase inspections.

What to Look for During Inspection

When inspecting a used 335i manual, prioritize a comprehensive assessment of the drivetrain. Begin with a thorough check of the clutch’s engagement point and feel for any slippage, especially during acceleration. Examine the shift linkage for smooth, precise movements, noting any excessive play or resistance.

Listen carefully for unusual noises emanating from the transmission during operation. Inspect for any signs of fluid leaks around the transmission housing and driveshaft. Verify the vehicle’s service history, specifically looking for records of transmission maintenance. Consider a pre-purchase inspection at a BMW service center in Vietnam for expert evaluation.

Checking the Transmission History

A detailed transmission history is crucial when evaluating a 335i manual. Utilize the vehicle’s VIN to obtain a comprehensive report from BMW Vietnam or a reputable vehicle history provider. Scrutinize service records for evidence of fluid changes, clutch replacements, and any reported transmission issues.

Inquire about previous owners and their driving habits, as aggressive use can accelerate wear. Confirm if the vehicle has been subjected to any performance modifications that might strain the transmission. Contact BMW service centers in Vietnam to verify the authenticity of service claims.

Fair Market Value Considerations

Determining a fair price for a used 335i manual in Vietnam requires careful assessment. Factors include mileage, condition, modification level, and service history. Compare listings from BMW dealerships like BMW Nguyen Van Troi and online marketplaces.

Rarity and demand for manual transmissions generally command a premium. Consider the cost of potential repairs or maintenance identified during inspection. Research recent sales data for similar vehicles to establish a realistic price range, ensuring a sound investment.

Community and Resources

Online forums and dedicated BMW communities offer invaluable support for 335i manual owners. BMW Vietnam provides dealership support and parts access.

Online Forums and Communities

Numerous online platforms cater specifically to BMW 335i enthusiasts, fostering a vibrant community for manual transmission owners. These forums serve as crucial resources for troubleshooting, sharing modifications, and accessing expert advice. Members frequently discuss maintenance schedules, common issues like clutch slippage, and performance upgrades.

Dedicated groups often organize local meets in Vietnam, allowing owners to connect and share their passion. Websites and social media groups provide a space to buy, sell, and trade parts, enhancing the ownership experience. Active participation within these communities can significantly improve your 335i’s upkeep and enjoyment.

Parts Suppliers and Specialists

Sourcing parts for the BMW 335i manual requires careful consideration, with options ranging from official BMW dealerships in Vietnam to specialized aftermarket suppliers. BMW Vietnam showrooms offer genuine parts, ensuring quality and compatibility, though often at a premium price.

Numerous online retailers specialize in BMW performance parts, providing a wider selection and competitive pricing. Local Vietnamese mechanics with BMW expertise can also source parts and offer installation services. Prioritize reputable suppliers to guarantee the reliability and longevity of your 335i’s components.

BMW Dealership Support

BMW dealerships across Vietnam, including locations like BMW Sala (0907 808 880) and BMW Phu My Hung (0938 901 800), offer comprehensive support for the 335i manual. This includes scheduled maintenance, genuine parts replacement, and expert diagnostics.

Dealership technicians possess specialized knowledge of the N54/N55 engines and the Getrag GS6-17BG transmission. While potentially more expensive than independent shops, dealerships provide peace of mind and uphold BMW’s quality standards, crucial for maintaining the vehicle’s performance and value.

Comparison to Automatic Variants

The 335i manual delivers a more connected driving experience than automatics, prioritizing driver control and engagement—a core BMW principle, as highlighted by the brand’s history.

Performance Differences

While both manual and automatic 335i variants share the potent engine, the manual transmission often exhibits slightly quicker acceleration times due to minimized power loss through a torque converter; Drivers can maintain optimal engine RPMs for peak power delivery, enhancing responsiveness. The automatic, however, offers consistent shifts and can sometimes match or exceed manual times with skilled programming. BMW’s focus on the “ultimate driving machine” historically favored manuals, but modern automatics have narrowed the gap. Ultimately, the difference hinges on driver skill and preference, with both offering exhilarating performance, as showcased by models available through BMW Vietnam’s showrooms.

Driving Feel Comparison

The 335i manual delivers a uniquely connected driving experience, demanding active participation from the driver. Clutch feel, precise shifts, and engine responsiveness create a visceral sensation absent in automatics. This fosters a stronger bond between driver and machine, embodying BMW’s historical ethos. While automatics offer convenience, the manual prioritizes engagement. Exploring models through BMW Vietnam, like those at BMW Nguyen Van Troi, reveals this difference. The manual encourages skillful techniques like rev-matching, enhancing control and enjoyment on Vietnam’s diverse roads.

Resale Value Considerations

The BMW 335i manual, while appreciating among enthusiasts, presents a nuanced resale market. Rarity and condition significantly impact value, with well-maintained examples commanding premiums. Demand from collectors seeking the “ultimate driving machine” boosts prices. However, broader market trends favor automatics, potentially limiting the pool of buyers in Vietnam. Resources like online forums can gauge current values. Comparing to automatic variants, manuals may hold value better long-term, especially as they become increasingly scarce, mirroring BMW’s legacy.

Future Collectibility

The 335i manual embodies BMW’s driving heritage, increasing its appeal to collectors. Its rarity and demand, coupled with a growing appreciation for manual transmissions, suggest strong investment potential.

The Appeal of Manual BMWs

BMW historically built its brand around the “ultimate driving machine,” and manual transmissions were central to that identity; The 335i manual continues this tradition, offering a uniquely connected driving experience that automatic variants simply cannot replicate. This direct control resonates with enthusiasts who value driver involvement and a visceral connection to the car.

As automatic transmissions become increasingly dominant, manual BMWs like the 335i are becoming increasingly rare and sought after, enhancing their desirability within the collector community. The purist driving experience is a key factor driving this appeal.

Rarity and Demand

The 335i manual, especially well-maintained examples, is experiencing increasing rarity. As BMW shifted towards automatics, fewer manual transmission models were produced, creating a supply constraint. This scarcity, coupled with growing demand from enthusiasts seeking a pure driving experience, is driving up values.

In Vietnam, finding a 335i manual requires diligent searching, potentially through online forums or specialist importers. The limited availability contributes to its collectibility and potential for future appreciation.

Investment Potential

The BMW 335i manual presents a compelling investment opportunity for automotive enthusiasts. Its increasing rarity, driven by shifting manufacturer preferences and growing enthusiast demand, suggests potential for appreciation. Well-preserved, low-mileage examples are likely to yield the highest returns.

Considering Vietnam’s growing BMW market, particularly through official channels like BMW Vietnam, a carefully selected 335i manual could prove a sound financial and enjoyable acquisition.

BMW Vietnam Specific Information

BMW Vietnam offers 3 Series sales and service through showrooms in cities like Sala, Phu My Hung, and Nguyen Van Troi; 335i manual availability varies.

BMW Showroom Locations in Vietnam

BMW Vietnam boasts a comprehensive network of showrooms across the country, facilitating access to models like the 335i, though manual availability fluctuates. Key locations include BMW Sala (0907 808 880), BMW Phu My Hung (0938 901 800), and BMW Nguyen Van Troi (093 888 9572). Further options exist in Nha Trang (0901 871 739), Binh Duong (0901 889 798), Can Tho (0901 806 689), Bien Hoa (0901 889 686), Dak Lak (0901 881 400), and Da Nang (0909 779 356). Prospective buyers can explore the 3 Series and inquire about the 335i manual at these dealerships, arranging test drives to experience BMW’s renowned driving dynamics.

BMW Service Centers in Vietnam

Maintaining a 335i manual requires access to qualified service centers, and BMW Vietnam provides a robust network. While specific 335i manual expertise may vary, authorized centers offer comprehensive diagnostics and repairs. Showrooms often integrate service facilities, like those at Sala and Phu My Hung. Additional support is available nationwide, ensuring convenient maintenance for owners. BMW Vietnam’s official website lists all service locations, facilitating easy access to genuine parts and skilled technicians. Regular servicing is crucial for preserving the 335i’s performance and reliability.

Local 335i Manual Availability

Finding a 335i manual in Vietnam requires diligent searching, as they are becoming increasingly rare. While BMW Vietnam currently focuses on newer models, the used market is the primary source. Showrooms like BMW Sala and others may occasionally have pre-owned examples. Online marketplaces and enthusiast communities are valuable resources. Expect limited availability and potentially higher prices due to the model’s desirability and collectibility. Thorough inspection is vital when considering a purchase, verifying transmission condition and service history.

telugu karthika puranam pdf

Karthika Puranam, available as a Telugu PDF, details the sacred month of Karthika Masam, offering parayana stories spanning thirty days.

This Android application by S2developers serves as an educational resource, deeply rooted in Hindu traditions and cultural significance.

The digital format enhances accessibility, allowing devotees to easily engage with the Puranam’s narratives and practices during this auspicious period.

What is Karthika Puranam?

Karthika Puranam, specifically in its Telugu PDF format, is a revered Hindu scripture dedicated to the glory of the month of Karthika Masam. It’s a comprehensive collection of stories, legends, and devotional practices associated with this particularly sacred time in the Hindu calendar.

The PDF version, readily available through applications like the one developed by S2developers, provides a convenient and accessible way for devotees to immerse themselves in the Puranam’s teachings. It details the significance of rituals like Deepa Daanam (lighting lamps) and Vrata (fasting) observances, central to Karthika Masam worship.

Essentially, it’s a guide to understanding and experiencing the spiritual benefits of this month, offering daily parayana stories – a total of thirty – for focused devotion and contemplation. The Telugu translation ensures cultural relevance and accessibility for speakers of the language.

Significance of Karthika Masam

Karthika Masam holds immense spiritual significance in Hinduism, and the Telugu Karthika Puranam PDF elucidates its importance. This month is particularly dedicated to Lord Shiva and Goddess Parvati, with devotees believing that focused worship during this time yields substantial spiritual merit.

The Telugu PDF details how practices like lighting lamps (Deepa Daanam) are considered especially potent during Karthika Masam, symbolizing the dispelling of darkness and ignorance. Fasting (Vrata) is also a common observance, fostering self-discipline and devotion.

The Puranam emphasizes that engaging with its narratives – the thirty days of parayana stories – amplifies the benefits of these practices. Accessing the scripture via a PDF, like the one from S2developers, makes these teachings readily available, encouraging widespread participation in the month’s sacred observances and deepening faith.

Historical Background of the Puranam

The origins of Karthika Puranam are deeply embedded in ancient Hindu scriptures and oral traditions. While a definitive, singular historical record is elusive, the Puranam’s themes and narratives likely evolved over centuries, reflecting the devotional practices surrounding Lord Shiva and Karthika Masam.

The availability of the Telugu version as a PDF, such as the application by S2developers, represents a more recent stage in its dissemination. Prior to digital formats, the Puranam was primarily transmitted through handwritten manuscripts and recited by storytellers.

The translation into Telugu itself signifies its regional importance and adaptation to local cultural contexts. The PDF format ensures wider accessibility, preserving and propagating this ancient text for contemporary devotees, bridging the gap between historical tradition and modern practice.

The Content of Karthika Puranam

The Telugu PDF of Karthika Puranam contains thirty days of parayana stories, detailing legends and the importance of devotion during Karthika Masam.

Stories and Legends within the Puranam

Karthika Puranam, in its Telugu PDF format, is replete with captivating stories and legends that illuminate the sanctity of the Karthika Masam. These narratives often center around the glory of Lord Shiva and Goddess Parvati, detailing their divine plays and the blessings bestowed upon devotees.

The parayana stories, spread across thirty days, recount tales of virtuous individuals who attained spiritual merit through dedicated worship and observance of rituals during this month. Many stories emphasize the power of Deepa Daanam – the lighting of lamps – as a symbol of dispelling darkness and ignorance.

Furthermore, the Puranam features accounts of miraculous events and divine interventions, reinforcing the belief in the efficacy of devotion and the importance of righteous conduct. These legends serve as moral compasses, guiding devotees towards a path of spiritual growth and fulfillment, readily accessible within the digital Telugu PDF.

Deities Featured Prominently

The Telugu PDF version of Karthika Puranam prominently features Lord Shiva and Goddess Parvati as central deities. Stories within the Puranam consistently highlight Lord Shiva’s benevolence and power, emphasizing his role as the destroyer of evil and the bestower of grace.

Goddess Parvati, embodying divine feminine energy, is depicted as Shiva’s consort and a compassionate mother figure. Her presence signifies strength, devotion, and the nurturing aspect of the divine. Other deities, while present, often appear in relation to Shiva and Parvati, contributing to their narratives.

The Puranam also reveres Vishnu and other members of the Hindu pantheon, but the core focus remains firmly on the Shiva-Parvati dynamic. Accessing the Telugu PDF allows devotees to delve deeper into the specific attributes and legends associated with these prominent deities.

The Importance of Lord Shiva

Within the Telugu PDF of Karthika Puranam, Lord Shiva’s significance is paramount, representing the ultimate source of cosmic energy and liberation. The Puranam details numerous stories illustrating his compassion, power, and role in upholding dharma. He is revered as the destroyer of ignorance and the granter of boons to sincere devotees.

The narratives emphasize Shiva’s connection to the sacred month of Karthika, linking the lighting of lamps (Deepa Daanam) and other rituals directly to his blessings. The PDF elucidates how devotion to Shiva during this time can lead to spiritual advancement and fulfillment.

His presence is not merely symbolic; the Puranam portrays him as actively involved in the lives of his devotees, offering guidance and protection. Studying the Telugu text reveals the depth of Shiva’s importance in Hindu cosmology.

The Role of Goddess Parvati

The Telugu PDF of Karthika Puranam highlights Goddess Parvati as the divine consort of Lord Shiva, embodying Shakti – the dynamic energy of the universe. She isn’t merely a companion, but an active participant in the narratives, often intervening on behalf of devotees and demonstrating immense compassion.

Stories within the Puranam showcase Parvati’s strength, wisdom, and nurturing qualities. Her role is integral to Shiva’s cosmic functions, representing the balance between asceticism and worldly engagement. The PDF details how worshipping Parvati during Karthika Masam brings blessings of prosperity and well-being.

She is often depicted as a protector, removing obstacles and granting wishes. The text emphasizes the inseparable bond between Shiva and Parvati, symbolizing the union of masculine and feminine energies.

Karthika Puranam in Telugu Literature

Telugu translations of Karthika Puranam are readily available as free Android applications, like the one by S2developers, offering accessible PDF versions.

Availability of Telugu Translations

Telugu translations of the Karthika Puranam are becoming increasingly accessible, largely due to the proliferation of digital platforms. A prominent example is the free Android application developed by S2developers, categorized under Education & Reference. This app specifically provides all chapters of the Karthika Puranam in Telugu, formatted for easy reading and study.

These digital versions often come in PDF format, allowing users to download and access the text offline. The application boasts features like adjustable text size, enhancing readability for a wider audience. Beyond dedicated apps, portions of the Puranam may also be found on various websites dedicated to Hindu scriptures and mythology, though verifying the authenticity of these sources is crucial.

The convenience of these Telugu PDF translations allows devotees to readily engage with the sacred text during the auspicious Karthika Masam and beyond, fostering a deeper understanding of its stories and significance.

Different Versions and Authors

Identifying distinct versions and specific authors of the Telugu Karthika Puranam presents a challenge, as much of the tradition relies on oral transmission and subsequent transcriptions. While the core narratives remain consistent, variations in storytelling and interpretation likely exist across different regional renditions.

The readily available digital versions, like the Android application by S2developers offering a Telugu PDF, don’t explicitly credit a single author, suggesting a compilation from established sources. Historically, Puranic literature often evolved through the contributions of numerous scholars and storytellers over centuries.

Further research into ancient Telugu manuscripts and scholarly commentaries would be needed to pinpoint specific authorship details. Currently, the focus remains on accessing and preserving the existing Telugu translations, ensuring the continued availability of this sacred text for devotees.

Linguistic Features of the Telugu Text

The Telugu text within the Karthika Puranam PDF generally employs a classical style, characteristic of traditional Puranic literature. Expect a blend of tatbhava (Sanskrit loanwords) and tadbhava (Sanskrit-derived words nativized to Telugu), contributing to a rich and nuanced vocabulary.

Sentence structures tend to be complex, utilizing elaborate descriptions and poetic phrasing. The language often incorporates traditional meters and alliteration, enhancing the narrative’s aesthetic appeal. The S2developers application, providing digital access, preserves this linguistic heritage.

Devanagari script is commonly used for Sanskrit words embedded within the Telugu text. Understanding these linguistic features requires familiarity with classical Telugu grammar and a basic knowledge of Sanskrit terminology, enriching the reading experience.

Accessing Karthika Puranam PDF

Karthika Puranam in Telugu PDF format is readily available through Android applications like the one developed by S2developers for easy access.

Online Sources for PDF Downloads

Finding a Telugu Karthika Puranam PDF online requires careful navigation, as reliability varies significantly. While dedicated websites focusing on Hindu scriptures may host versions, verifying their authenticity is crucial. Several online repositories and digital libraries could potentially offer the text, but users should exercise caution regarding copyright and potential malware.

Android applications, such as the one by S2developers, provide a more secure and curated access point. However, direct PDF downloads from unofficial sources carry risks. It’s advisable to prioritize established platforms known for religious texts or utilize app stores for a safer experience. Always scan downloaded files with reputable antivirus software before opening them to protect your device.

Remember to cross-reference content with trusted sources to ensure accuracy and completeness of the Karthika Puranam text.

Mobile Applications Featuring the Puranam

Several mobile applications offer convenient access to the Telugu Karthika Puranam, providing a user-friendly alternative to PDF downloads. The application developed by S2developers, specifically designed for the auspicious Karthika Masam, is a prominent example. These apps often feature adjustable text sizes and easy navigation through the thirty days of parayana stories.

Mobile apps generally offer a safer and more reliable experience compared to downloading PDFs from various websites, mitigating risks associated with malware or inaccurate content. They frequently include additional features like daily notifications or offline access.

Searching app stores using keywords like “Karthika Puranam Telugu” will reveal available options. Always check user reviews and developer reputation before installing any application to ensure quality and security.

Reliability of Online PDFs

The reliability of Telugu Karthika Puranam PDFs available online varies significantly. Downloading from unofficial sources carries inherent risks, including potential exposure to malware, viruses, or corrupted files. Content accuracy is also a concern, as unauthorized PDFs may contain errors or altered text compared to authentic versions.

It’s crucial to exercise caution and prioritize downloads from reputable websites associated with established religious organizations or publishers. Always scan downloaded files with updated antivirus software before opening them. Consider mobile applications, like the one by S2developers, as a potentially more secure alternative.

Cross-referencing content with trusted sources and comparing multiple PDFs can help identify discrepancies. Prioritize digital safety and content integrity when accessing this sacred text online.

Practices During Karthika Masam

The Telugu Karthika Puranam PDF guides devotees through practices like Deepa Daanam (lamp lighting) and Vrata (fasting) during the sacred month.

Deepa Daanam (Lighting Lamps)

Deepa Daanam, central to Karthika Masam practices detailed within the Telugu Karthika Puranam PDF, symbolizes dispelling darkness and ignorance, embracing enlightenment and divine grace.

Lighting lamps, traditionally with oil and a cotton wick, is performed daily throughout the month, often dedicated to Lord Shiva and Goddess Parvati. The PDF likely elaborates on the specific mantras and rituals associated with this practice.

Devotees believe the light represents the presence of the divine, fostering positive energy and spiritual growth. The act of offering light is considered highly auspicious, accumulating merit and blessings.

The Karthika Puranam emphasizes the importance of consistent lamp lighting, highlighting its power to purify the surroundings and uplift the soul. It’s a visible expression of devotion and a powerful tool for connecting with the divine.

Vrata (Fasting) Observances

The Telugu Karthika Puranam PDF extensively details Vrata (fasting) observances during the sacred month of Karthika Masam, outlining various types and their significance. Fasting is considered a powerful spiritual discipline, fostering self-control and devotion.

Different vratas are prescribed, ranging from complete abstinence from food and water to consuming only fruits and milk. The PDF likely specifies the rules and procedures for each vrata, including appropriate mantras and prayers.

Observing a vrata is believed to purify the body and mind, bringing one closer to the divine. It’s a demonstration of dedication and surrender to God.

The Karthika Puranam emphasizes the importance of performing the vrata with sincerity and devotion, highlighting its potential to grant blessings and fulfill wishes. It’s a key practice for spiritual advancement.

Temple Visits and Worship

The Telugu Karthika Puranam PDF underscores the importance of frequent temple visits and dedicated worship during Karthika Masam. This month is particularly auspicious for seeking the blessings of deities, especially Lord Shiva and Goddess Parvati.

The PDF likely details specific rituals and prayers recommended for this period, including the offering of lamps (Deepa Daanam) and special pujas. Visiting Shiva temples is considered highly beneficial, with devotees often performing abhishekam (ritual bathing of the deity).

Worship isn’t limited to temples; establishing a home shrine and performing daily prayers are also encouraged.

The Karthika Puranam emphasizes the power of sincere devotion and the belief that consistent worship during this month can lead to spiritual growth and fulfillment of desires. It’s a time for heightened spiritual practice.

Karthika Puranam and Daily Life

The Telugu Karthika Puranam PDF deeply influences Telugu culture, connecting to serials like Karthika Deepam and remaining relevant in modern spiritual practices.

Influence on Telugu Culture

Karthika Puranam, particularly in its Telugu PDF format, holds a significant place within the cultural fabric of Andhra Pradesh and Telangana. The narratives and teachings within the Puranam have permeated various aspects of daily life, influencing traditions, rituals, and societal values.

The stories often serve as moral compasses, guiding individuals in ethical conduct and devotion. The widespread availability of the Telugu PDF version has further democratized access to these teachings, allowing a broader audience to connect with their cultural heritage. This accessibility is particularly notable given the popularity of the Karthika Deepam television serial, which draws heavily from the themes and stories found within the Puranam.

The serial’s success demonstrates the enduring appeal of these narratives and their continued relevance in contemporary society, solidifying the Puranam’s influence on Telugu cultural identity.

Connection to Karthika Deepam Serial

The immensely popular Telugu daily soap, Karthika Deepam, draws substantial inspiration from the narratives detailed within the Karthika Puranam, readily accessible through Telugu PDF versions. The serial frequently incorporates storylines, characters, and philosophical themes originating from the Puranam, resonating deeply with a wide audience.

While the serial has introduced dramatic twists to sustain viewership, its core foundation remains rooted in the traditional tales and devotional aspects of the Karthika Puranam. This connection has significantly boosted public interest in the Puranam itself, prompting many viewers to seek out the original text in its Telugu PDF format to explore the source material.

The serial acts as a modern retelling, bringing the ancient stories to a new generation and reinforcing the Puranam’s cultural relevance.

Relevance in Modern Times

Despite being an ancient scripture, the Telugu Karthika Puranam, now widely available as a convenient PDF, maintains significant relevance in contemporary life. The core teachings emphasizing devotion, righteousness, and the importance of family values continue to resonate with modern audiences.

The accessibility of the PDF format allows individuals to easily integrate the Puranam’s principles into their daily routines, fostering a deeper connection to their cultural heritage. Digital platforms and mobile applications featuring the text further enhance its reach, particularly among younger generations.

Moreover, the continued popularity of related cultural events and the Karthika Deepam serial demonstrate the enduring power of these traditional narratives in shaping societal values and inspiring spiritual practices.

Bigg Boss Telugu & Karthika Deepam Connection

Karthika Deepam’s Vantalakka (Viswanath) is set to appear on Bigg Boss Telugu season 9, bridging the daily soap’s popularity with reality television culture.

Celebrity Involvement & Popular Culture

The intersection of celebrity presence and cultural phenomena is vividly illustrated by Viswanath, famously known as Vantalakka from the immensely popular Telugu daily soap Karthika Deepam. His participation in Bigg Boss Telugu season 9 demonstrates a strategic leveraging of established fanbase recognition.

This crossover highlights how narratives deeply embedded in Telugu culture, like those explored within the Karthika Puranam – accessible through readily available Telugu PDF versions – can indirectly influence the dynamics of contemporary entertainment.

The widespread availability of the Puranam as a digital resource, like the Android application by S2developers, suggests a growing engagement with traditional scriptures alongside mainstream media. This confluence reflects a unique cultural landscape where ancient stories and modern reality shows coexist and mutually influence public interest.

Media coverage amplifies this connection, drawing attention to both the celebrity’s journey and the cultural roots they represent.

Media Coverage and Public Interest

The digital accessibility of the Telugu Karthika Puranam PDF, alongside the popularity of shows like Karthika Deepam, fuels significant media coverage and public engagement. News outlets frequently report on the show’s potential conclusion and narrative twists, demonstrating sustained viewership interest.

Simultaneously, the availability of the Puranam as an Android application – developed by S2developers – and through various online sources, indicates a growing desire to directly access and understand the foundational stories underpinning cultural practices.

This dual presence – a long-running television serial and readily available sacred texts – creates a feedback loop, where media coverage of the show sparks curiosity about the Puranam, and vice versa. Public interest is further amplified by celebrity involvement, like Viswanath’s appearance on Bigg Boss Telugu, bridging traditional narratives with contemporary entertainment.

Online discussions and social media trends reflect this heightened awareness.

Additional Resources

Explore related Puranas, Hindu mythology websites, and further reading on Karthika Masam to deepen your understanding of the Telugu Karthika Puranam PDF.

Related Puranas and Scriptures

Karthika Puranam, even in its Telugu PDF form, finds resonance with broader Hindu scriptural traditions. Understanding its connections enriches appreciation. The Vishnu Purana, with its detailed cosmology and devotional narratives, shares thematic overlaps, particularly regarding the importance of sacred months and vrata observances.

Similarly, the Shiva Purana, naturally, provides a complementary perspective, elaborating on Lord Shiva’s glories – central to Karthika Masam worship. The Skanda Purana, focusing on Kartikeya (Murugan), also offers relevant insights. Beyond Puranas, texts like the Linga Purana and various Agamas detail Shiva-related rituals and philosophies.

Exploring these scriptures alongside the Telugu Karthika Puranam PDF provides a holistic view of the devotional landscape and the interconnectedness of Hindu beliefs, enhancing the spiritual experience during this sacred time.

Websites Dedicated to Hindu Mythology

Numerous online resources delve into Hindu mythology, complementing the study of the Telugu Karthika Puranam PDF. Websites like HinduismFacts.org offer comprehensive information on Puranas, deities, and festivals, providing contextual understanding. ISKCON websites, while Vaishnava-focused, often contain valuable insights into broader Hindu cosmology and practices.

Uday India provides a wealth of articles on Hindu rituals, traditions, and scriptures. Additionally, platforms like Sacred Texts archive translations of various Puranas, though finding a direct Telugu version might require specific searches.

Remember to critically evaluate sources and cross-reference information. These websites serve as valuable supplements to the Telugu PDF, enriching your exploration of Karthika Masam and its associated lore.

Further Reading on Karthika Masam

Expanding beyond the Telugu Karthika Puranam PDF, several resources illuminate the significance of Karthika Masam. Exploring works on Hindu calendar systems and festival traditions provides broader context. Books detailing the worship of Lord Shiva and Goddess Parvati, central figures in the Puranam, are highly recommended.

Articles on Deepa Daanam (lamp lighting) and Vrata (fasting) observances offer practical guidance and spiritual insights. Websites dedicated to Hindu dharma often feature detailed explanations of monthly observances, including Karthika Masam.

Consider researching regional variations in Karthika Masam practices within Andhra Pradesh and Telangana, as customs may differ. These supplementary materials deepen understanding and enhance appreciation of the Puranam’s teachings.

honeywell th8321u1006 installation manual pdf

Honeywell TH8321U1006 Installation Manual PDF: A Comprehensive Plan

Accessing the Honeywell TH8321U1006 installation manual in PDF format is crucial for a smooth setup․ Numerous online resources‚ like Unilogcorp‚ offer downloadable instructions․

Honeywell provides comprehensive manuals‚ including those for the VisionPRO 8000 series‚ detailing wiring and programming․ Customer care support is readily available via their website․

These manuals cover everything from basic installation to advanced features like dehumidification control and automatic changeover‚ ensuring a successful thermostat experience․

The Honeywell TH8321U1006 is a premier‚ programmable thermostat designed for universal application‚ offering both comfort and energy efficiency․ As part of the VisionPRO 8000 series‚ it boasts a user-friendly interface and advanced features‚ including dehumidification control and automatic/manual changeover capabilities․ This thermostat is a significant upgrade for homes seeking precise temperature regulation and optimized energy consumption․

Understanding the TH8321U1006 requires accessing its detailed installation manual‚ readily available in PDF format online․ These manuals‚ often found on sites like Unilogcorp‚ provide step-by-step guidance for installation‚ wiring‚ and programming․ The thermostat’s compatibility extends to various heating and cooling systems‚ making it a versatile choice for many homeowners․

Key features include a clear touchscreen display‚ programmable schedules for heating and cooling‚ and the ability to manage dehumidification independently․ The Honeywell Home trademark signifies quality and reliability‚ backed by comprehensive customer support resources․ Proper installation‚ guided by the official PDF manual‚ is essential to unlock the full potential of this sophisticated thermostat and ensure years of reliable performance․

Understanding the VisionPRO 8000 Series

The Honeywell VisionPRO 8000 series represents a leap forward in home comfort technology‚ offering a range of programmable thermostats designed for optimal performance and user experience․ The TH8321U1006 is a flagship model within this series‚ inheriting its advanced features and robust build quality․ These thermostats are engineered for compatibility with a wide array of heating and cooling systems‚ providing versatile control over your home environment․

Central to the VisionPRO 8000 series is its emphasis on intuitive programming and energy savings․ The series incorporates features like customizable schedules‚ remote access capabilities (with compatible accessories)‚ and precise temperature control․ Accessing the official installation manual in PDF format is crucial for understanding the full potential of these features‚ as detailed on resources like Unilogcorp․

Honeywell prioritizes ease of installation and use within the VisionPRO 8000 line․ The series’ thermostats are designed to simplify home climate management‚ offering a balance of functionality and convenience․ The trademark Honeywell Home assures quality and reliability‚ backed by extensive support documentation and customer care services‚ all accessible through the provided manuals․

Where to Find the Official PDF Manual

Locating the official Honeywell TH8321U1006 installation manual in PDF format is paramount for a successful and safe installation process․ Several reliable online sources offer direct downloads of this essential document․ A primary resource is Unilogcorp‚ which hosts the PDF for easy access․ Additionally‚ Honeywell’s official website‚ through the Honeywell Home portal (yourhome․honeywell․com)‚ provides access to a comprehensive library of manuals and support materials․

The Manual Library is another valuable repository‚ often indexing older and current Honeywell product documentation․ Searching directly for “Honeywell TH8321U1006 manual PDF” on major search engines will also yield relevant results‚ though verifying the source’s legitimacy is crucial․ Always prioritize downloads from official Honeywell channels or authorized distributors to ensure you have the most accurate and up-to-date information․

Remember to save a copy of the PDF to your device for offline access during installation․ Having the manual readily available will streamline the process and help troubleshoot any potential issues that may arise‚ ensuring a properly configured and efficient Honeywell VisionPRO 8000 thermostat system․

Safety Precautions Before Installation

Prior to commencing the installation of your Honeywell TH8321U1006 thermostat‚ adhering to strict safety precautions is absolutely essential․ Always disconnect power to your heating and cooling system at the breaker box to prevent electrical shock․ Confirm the power is off with a non-contact voltage tester before handling any wiring․

Exercise caution when working with wiring‚ as incorrect connections can damage the thermostat or your HVAC system․ If you are uncomfortable working with electrical wiring‚ it is strongly recommended to consult a qualified HVAC technician․ Read and thoroughly understand the installation manual before beginning‚ paying close attention to all warnings and cautions․

Be mindful of potential hazards such as sharp edges within the wall cavity or around existing wiring․ Wear appropriate safety glasses to protect your eyes․ Honeywell explicitly states the importance of reading and saving the instructions‚ emphasizing safety as a primary concern․ Ignoring these precautions could result in personal injury or damage to your equipment․

Tools Required for Installation

Successfully installing your Honeywell TH8321U1006 thermostat necessitates having the correct tools readily available․ A Phillips head screwdriver is fundamental for removing the old thermostat and securing the new baseplate․ A flathead screwdriver may also be needed for certain wiring connections․

A non-contact voltage tester is crucial for verifying that power is completely disconnected to the HVAC system before handling any wires – a vital safety step․ Wire strippers are essential for preparing the wires for connection to the thermostat terminals‚ ensuring a secure and reliable connection․ Pliers can be helpful for bending or manipulating wires as needed․

A level will ensure the thermostat base is mounted straight‚ providing a professional and aesthetically pleasing installation․ A pencil is useful for marking screw holes and wiring locations․ Finally‚ having a digital multimeter can be beneficial for troubleshooting any wiring issues‚ though not strictly required for a standard installation․ Referencing the installation manual will confirm any specialized tools needed for your specific system․

Thermostat Compatibility Check

Before embarking on the installation of your Honeywell TH8321U1006‚ a thorough compatibility check is paramount․ This thermostat is designed for conventional heating and cooling systems‚ but certain configurations may require additional considerations․ It’s crucial to determine your existing system’s voltage – most residential systems operate on 24V‚ which the TH8321U1006 supports․

Systems with line voltage (120V or 240V) thermostats are not compatible and require a different solution․ Verify if you have a heat pump system‚ as specific wiring configurations are necessary for proper operation․ The TH8321U1006 supports heat pumps‚ but correct wiring is essential․

If you have a millivolt system‚ commonly found in fireplaces‚ this thermostat is generally not compatible․ Carefully examine your existing thermostat’s wiring; if it has fewer than five wires‚ compatibility may be an issue․ Consulting the Honeywell installation manual and potentially a qualified HVAC technician will confirm compatibility and prevent installation problems․

Wiring Basics: Identifying Your System

Understanding your existing HVAC system’s wiring is fundamental before installing the Honeywell TH8321U1006․ Most systems utilize a color-coded wiring scheme‚ but variations exist․ Common wires include Red (power)‚ Green (fan)‚ White (heat)‚ Yellow (cool)‚ and a common wire (usually Blue or Black)․

Carefully label each wire as you disconnect it from your old thermostat – this is critical for accurate reconnection․ If you encounter wires not listed above‚ consult the Honeywell installation manual or a qualified HVAC professional․ Identifying whether you have a conventional system (furnace and air conditioner) or a heat pump is crucial․

Heat pump systems often have additional wires for reversing valve control․ The TH8321U1006 supports various system types‚ but correct wiring is paramount․ Take detailed pictures of your existing wiring configuration before disconnecting anything․ Incorrect wiring can damage your HVAC equipment or the thermostat itself․ Prioritize safety and accuracy throughout the wiring process․

Understanding Heat and Cool Wiring

The Honeywell TH8321U1006 utilizes standard heat and cool wiring configurations․ Typically‚ the Red wire provides 24V power‚ while the Yellow wire activates the cooling system․ The White wire controls the heating function․ A common wire (usually Blue or Black) completes the circuit‚ providing a return path for the 24V signal․

Proper identification of these wires is essential․ Incorrect connections can lead to the system not functioning correctly or potential damage․ The installation manual’s wiring diagrams are invaluable resources for verifying connections․ If your system has multiple stages of heating or cooling‚ you’ll encounter additional wires (e․g․‚ Yellow 2 for second-stage cooling)․

Ensure the wires are securely connected to the corresponding terminals on the thermostat base․ Loose connections can cause intermittent operation․ Double-check all wiring against the manual before powering on the system․ Remember‚ safety first – turn off power to the HVAC system at the breaker before working with any wiring․

Dehumidification Control Wiring

The Honeywell TH8321U1006 offers integrated dehumidification control‚ a feature requiring specific wiring․ Typically‚ the dehumidification wire is designated as ‘Dh’ or ‘D’․ This wire activates an external dehumidifier when humidity levels exceed the setpoint‚ independent of the cooling system․ The manual details the correct terminal for this connection on the thermostat base․

Wiring for dehumidification can vary depending on the dehumidifier’s control method․ Some dehumidifiers require a simple on/off signal‚ while others utilize more sophisticated control schemes․ Consult both the thermostat manual and the dehumidifier’s documentation for precise wiring instructions․ Incorrect wiring can prevent the dehumidification function from operating correctly․

Properly configured dehumidification enhances indoor comfort by maintaining optimal humidity levels․ Ensure the ‘Dh’ wire is securely connected and that the dehumidifier is compatible with the thermostat’s control signal․ Refer to the Honeywell Home trademark guidelines for proper usage and safety precautions during installation․

Step-by-Step Installation Guide

Begin by carefully reviewing the Honeywell TH8321U1006 installation manual PDF․ Safety is paramount; disconnect power to your HVAC system at the breaker before commencing․ The first step involves removing your existing thermostat‚ carefully labeling each wire as you disconnect it․ This prevents confusion during the new thermostat’s wiring․

Next‚ mount the thermostat base to the wall using the provided screws‚ ensuring it’s level․ Connect the wires to the corresponding terminals on the new thermostat base‚ referencing your wire labels and the wiring diagram in the manual․ Double-check all connections for security․

Once wired‚ attach the thermostat display to the base․ Restore power to your HVAC system and follow the on-screen prompts for initial setup‚ including setting the date‚ time‚ and system type․ Program your desired heating and cooling schedules for optimal comfort and energy efficiency․ Consult Honeywell Customer Care if issues arise during installation․

Removing Your Old Thermostat

Before beginning‚ absolutely disconnect power to your HVAC system at the circuit breaker․ This is a critical safety precaution․ Carefully remove the cover of your existing thermostat‚ often by gently prying it off or releasing a latch․ Consult the Honeywell TH8321U1006 installation manual PDF for specific guidance if needed․

Take a clear photograph of the existing wiring before disconnecting anything․ This serves as a vital reference during the installation of your new thermostat․ Systematically disconnect each wire‚ immediately labeling it with the corresponding terminal designation․ Use the provided wire labels or masking tape and a pen․

Loosen the screws holding the old thermostat base to the wall and carefully remove it․ Clean the wall surface to prepare for mounting the new thermostat base․ Ensure no wires are pinched or damaged during removal․ Proper labeling is key to a smooth transition and avoids miswiring․

Connecting the Wires to the TH8321U1006

Referring to the photograph and labels created during old thermostat removal‚ carefully connect each wire to the corresponding terminal on the TH8321U1006 base․ The Honeywell TH8321U1006 installation manual PDF provides a detailed wiring diagram – use it diligently․ Ensure each wire is securely inserted into the terminal; a loose connection can cause malfunctions․

Common terminals include Rh (hot)‚ Rc (cooling)‚ W (heat)‚ Y (cool)‚ G (fan)‚ and C (common)․ The ‘C’ wire is often crucial for powering the thermostat; if absent‚ a ‘C-wire adapter’ might be necessary․ Double-check all connections against your wiring diagram and the manual․

Gently tug on each wire to confirm it’s firmly held in place․ Avoid stripping the wire insulation further․ If you encounter difficulty‚ revisit the manual or consult Honeywell Customer Care․ Incorrect wiring can damage your HVAC system‚ so precision is paramount․

Mounting the Thermostat Base

Before mounting‚ ensure the wires are neatly tucked into the wall opening‚ avoiding any pinching or strain․ Position the TH8321U1006 base plate against the wall‚ aligning it with the previously drilled mounting holes․ The Honeywell TH8321U1006 installation manual PDF illustrates proper base plate alignment․

Utilize the provided screws to secure the base plate to the wall․ Avoid over-tightening‚ as this could damage the plate or the wall․ Ensure the base is level for a professional appearance and proper thermostat function․ A level base ensures accurate temperature readings․

Double-check that all wires remain securely connected and are not obstructed by the base plate․ The base should sit flush against the wall․ Refer to the manual for specific mounting instructions related to different wall types․ Proper mounting is crucial for long-term stability and reliable operation․

Powering On and Initial Setup

After securely mounting the thermostat base and connecting the wires‚ it’s time to power on the TH8321U1006․ The Honeywell TH8321U1006 installation manual PDF details the initial power-up sequence․ Typically‚ the thermostat will automatically power on once it detects a consistent power supply from the wiring․

Upon powering on‚ the thermostat will initiate a self-test and display a welcome screen․ Follow the on-screen prompts to begin the initial setup process․ This usually involves selecting your preferred language‚ date format‚ and time zone․ The manual provides step-by-step guidance through this process․

The initial setup also includes a system check‚ where the thermostat verifies the correct wiring configuration․ Pay close attention to any error messages displayed during this phase‚ as they indicate potential wiring issues․ Refer to the troubleshooting section of the PDF for assistance․ Correct setup ensures optimal performance․

Setting the Date and Time

Accurate date and time settings are fundamental for proper thermostat operation and scheduling․ The Honeywell TH8321U1006 installation manual PDF provides clear instructions on how to configure these settings․ After powering on‚ navigate to the settings menu using the touchscreen interface․

Within the settings menu‚ locate the “Date and Time” option․ You’ll typically be presented with separate fields for setting the month‚ day‚ and year․ Similarly‚ you’ll find options to adjust the hour and minute․ Ensure you select the correct AM or PM designation for accurate timekeeping․

The manual emphasizes the importance of verifying the time zone setting․ Selecting the correct time zone ensures that the thermostat accurately reflects local time‚ especially crucial for programmed schedules․ Some models may automatically synchronize with network time if connected to Wi-Fi․ Double-check all entries before saving‚ as incorrect settings can disrupt scheduling․

Programming Your Heating Schedule

The Honeywell TH8321U1006 installation manual PDF details a flexible heating schedule programming process․ Access the scheduling function through the thermostat’s main menu‚ typically labeled “Schedule” or “Programming”․ The interface allows for customized settings for each day of the week․

You can define multiple periods within each day‚ each with a specific target temperature․ Common periods include “Wake‚” “Leave‚” “Return‚” and “Sleep․” For each period‚ set the desired temperature and the time it begins․ The thermostat will automatically adjust the heating system to maintain that temperature during the designated timeframe․

The manual highlights the option to copy schedules from one day to another‚ simplifying the setup process․ Consider your daily routines when creating the schedule – lower temperatures during unoccupied periods save energy․ Review the programmed schedule carefully to ensure it aligns with your comfort preferences and energy-saving goals․ Save the schedule once completed․

Programming Your Cooling Schedule

The Honeywell TH8321U1006 installation manual PDF provides detailed instructions for programming a customized cooling schedule․ Similar to heating‚ access the cooling schedule through the thermostat’s menu‚ often labeled “Cool Schedule” or within the main “Schedule” section․ The interface mirrors the heating schedule setup‚ allowing for day-specific configurations․

Define cooling periods – “Wake‚” “Leave‚” “Return‚” and “Sleep” – and assign target temperatures for each․ Lower temperatures during occupied hours provide comfort‚ while higher temperatures during unoccupied periods conserve energy․ The manual emphasizes setting temperatures that balance comfort and efficiency․

Utilize the copy function to replicate schedules across multiple days‚ streamlining the process․ Carefully review the programmed cooling schedule to ensure it aligns with your preferences and energy-saving objectives․ Consider factors like humidity and outdoor temperature when setting cooling temperatures․ Save the schedule after making all adjustments․ The manual also details temporary overrides for immediate comfort adjustments․

Using the Dehumidification Control

The Honeywell TH8321U1006 installation manual PDF details the dehumidification control feature‚ available on the Premier White Universal Programmable Thermostat․ This function allows independent operation of the cooling system for humidity reduction‚ even when cooling isn’t required․ Access the dehumidification settings through the thermostat’s menu‚ typically found under “System” or “Fan” options․

Enable dehumidification mode to activate the fan‚ circulating air and removing moisture․ The manual explains that the cooling system will operate as needed to maintain the set humidity level․ Adjust the desired humidity percentage to your comfort level; lower percentages equate to drier air․

The manual clarifies that dehumidification can be scheduled‚ allowing automatic humidity control during specific times․ Monitor indoor humidity levels to optimize settings․ Proper wiring‚ as outlined in the installation guide‚ is crucial for this feature to function correctly․ Remember to consult the PDF for detailed wiring diagrams and troubleshooting tips related to dehumidification control․

Understanding Automatic and Manual Changeover

The Honeywell TH8321U1006 installation manual PDF thoroughly explains the difference between automatic and manual changeover modes․ Changeover refers to the thermostat’s ability to switch between heating and cooling․ Automatic changeover allows the thermostat to intelligently determine when to switch based on indoor temperature and setpoints‚ offering convenience and energy efficiency․

Manual changeover‚ indicated by a “0” setting in the manual‚ requires the user to manually select heating or cooling mode․ This provides greater control but demands active monitoring of the weather and indoor comfort levels․ The PDF details how to access these settings within the thermostat’s menu system․

Honeywell emphasizes that proper wiring is essential for correct changeover operation․ The manual includes detailed wiring diagrams for various system configurations․ Understanding your system’s wiring is crucial before selecting a changeover mode․ By utilizing the information within the PDF‚ users can optimize their comfort and energy savings based on their specific needs and preferences․

Troubleshooting Common Installation Issues

The Honeywell TH8321U1006 installation manual PDF dedicates a section to resolving typical issues encountered during setup․ A frequent problem is incorrect wiring‚ leading to the system not responding or operating erratically․ The PDF stresses verifying wire connections against the provided diagrams‚ ensuring each wire is securely fastened to the correct terminal․

Another common issue is a lack of power to the thermostat․ The manual guides users through checking the power supply‚ including verifying the C-wire connection‚ which is often essential for consistent operation․ If the display is blank or unresponsive‚ the PDF suggests checking the breaker and ensuring proper voltage․

Furthermore‚ the Honeywell document addresses programming difficulties‚ offering step-by-step instructions and troubleshooting tips․ It also highlights the importance of resetting the thermostat to factory defaults if encountering persistent problems․ Accessing Honeywell Customer Care‚ as detailed in the PDF‚ provides additional support for complex issues․

Accessing Honeywell Customer Care

The Honeywell TH8321U1006 installation manual PDF prominently features resources for accessing their dedicated Customer Care team․ Recognizing that installation and programming can present challenges‚ Honeywell provides multiple avenues for support‚ ensuring users aren’t left struggling with their new thermostat․

The PDF directs users to the official Honeywell Home website – http://yourhome․honeywell․com – as a primary source of assistance․ This online portal offers a wealth of self-help resources‚ including FAQs‚ troubleshooting guides‚ and downloadable documentation․ Beyond the website‚ Honeywell offers direct phone support‚ allowing users to speak with a knowledgeable representative․

The manual emphasizes that contacting Customer Care is beneficial for complex wiring issues‚ programming questions‚ or any situation where the PDF instructions aren’t sufficient․ Honeywell’s commitment to customer satisfaction is evident in their readily available support channels‚ designed to facilitate a seamless thermostat experience․

Understanding the Honeywell Home Trademark

The Honeywell TH8321U1006 installation manual PDF includes a specific section addressing the “Honeywell Home” trademark․ This isn’t merely a legal formality; it clarifies the relationship between Honeywell International Inc․ and the branding associated with their smart home products‚ including this thermostat․

The PDF explicitly states that the “Honeywell Home” trademark is utilized under license․ This means Honeywell International Inc․ doesn’t solely own the trademark outright‚ but has been granted permission to use it by the actual trademark holder․ This licensing agreement ensures consistent branding and quality control across a range of smart home devices․

Understanding this detail is important for consumers‚ as it highlights a collaborative effort in bringing these technologies to market․ The manual’s inclusion of this information demonstrates Honeywell’s transparency and adherence to legal standards regarding intellectual property․ It assures users they are interacting with a legitimately branded and supported product․

Copyright Information and Legal Disclaimers

The Honeywell TH8321U1006 installation manual PDF prominently features copyright information‚ asserting that all rights are reserved by Honeywell International Inc․ dating back to 2004․ This declaration protects the intellectual property contained within the manual‚ including text‚ diagrams‚ and installation instructions․

Furthermore‚ the PDF includes crucial legal disclaimers․ One key disclaimer states that by utilizing the provided Honeywell literature – in this case‚ the installation manual – the user implicitly agrees that Honeywell will not be held liable for any damages or issues arising from improper installation or use of the thermostat․

This disclaimer underscores the importance of carefully following the instructions and seeking professional assistance if needed․ The manual also likely contains limitations of liability regarding the accuracy of information and potential changes to product specifications․ These legal safeguards are standard practice‚ protecting Honeywell while emphasizing user responsibility․ It’s a vital section for understanding the terms of use;

Resources for Additional Support

Beyond the Honeywell TH8321U1006 installation manual PDF‚ several resources offer supplementary support for users․ Honeywell’s official website‚ yourhome․honeywell․com‚ serves as a primary hub for assistance‚ providing FAQs‚ troubleshooting guides‚ and contact information for Customer Care․

Online forums and communities dedicated to home automation and HVAC systems are invaluable․ Platforms like Reddit and dedicated HVAC forums often host discussions where users share experiences‚ solutions‚ and wiring diagrams related to the TH8321U1006․ The Manual Library also provides access to a broader range of Honeywell manuals․

Additionally‚ Unilogcorp‚ where the PDF manual is hosted‚ may offer related resources or links․ For complex installations or wiring scenarios‚ consulting a qualified HVAC technician is highly recommended․ These combined resources ensure users have ample support throughout the installation and operation of their Honeywell thermostat‚ maximizing its functionality and longevity․

jazzy scooter manual

Jazzy Scooter Manual: An Overview

This manual provides essential guidance for Jazzy scooter owners, covering operation, safety, maintenance, and troubleshooting—ensuring a smooth and enjoyable experience.

Welcome to the world of Jazzy Scooters! These mobility devices are designed to enhance independence and provide a convenient means of transportation for individuals with limited mobility. Jazzy scooters represent a commitment to quality, innovation, and user-friendly design.

Whether navigating indoors or exploring the outdoors, a Jazzy scooter offers a comfortable and reliable solution. This manual serves as a comprehensive guide, detailing everything from initial setup and safe operation to routine maintenance and troubleshooting. Understanding your scooter’s features and following these guidelines will maximize your enjoyment and ensure long-lasting performance.

Understanding Jazzy Scooter Models

Jazzy Scooters offers a diverse range of models, each tailored to specific needs and lifestyles. From compact, travel-friendly scooters to heavy-duty models with extended range, there’s a Jazzy scooter for every user. Key distinctions include weight capacity, battery life, maximum speed, and available features like adjustable seating and suspension systems.

This manual applies to most Jazzy scooter models, but always refer to the specific documentation included with your scooter for detailed information regarding its unique features and specifications. Familiarizing yourself with your model’s capabilities is crucial for safe and efficient operation.

Safety First: Operating Your Jazzy Scooter

Prioritize safety with pre-ride checks and responsible operation. Understand weight limits, terrain considerations, and always be aware of your surroundings for a secure ride.

Pre-Ride Safety Checks

Before each use, a thorough inspection is crucial for safe operation. Verify the battery is fully charged and securely connected. Check tire pressure and tread depth, ensuring proper inflation for optimal performance and stability; Inspect the brake system, confirming responsive and reliable stopping power.

Examine all levers, controls, and the steering mechanism for smooth operation. Ensure all fasteners are tight and secure, preventing unexpected loosening during use. Finally, assess the surrounding environment for potential hazards like obstacles or uneven surfaces, planning a safe route before commencing your journey.

Safe Operating Procedures

Always operate your Jazzy scooter in a well-lit and open area, avoiding crowded spaces or areas with heavy traffic. Maintain a safe speed, adjusting to the surrounding conditions and your comfort level. Be mindful of pedestrians and obstacles, yielding the right-of-way as necessary.

Avoid sudden starts, stops, or sharp turns, which can compromise stability. Use caution when navigating slopes or uneven terrain, maintaining a controlled descent or ascent. Never operate the scooter under the influence of alcohol or drugs, prioritizing safety at all times.

Weight Capacity and Distribution

Adhering to the specified weight capacity is crucial for safe operation. Exceeding the limit can compromise stability, maneuverability, and potentially damage the scooter’s components. Ensure even weight distribution while riding, positioning yourself centrally on the platform.

Avoid carrying excessively heavy loads or concentrating weight on one side, as this can lead to imbalance and increase the risk of tipping. Regularly check the scooter’s tires and ensure they are properly inflated to support the intended weight.

Battery and Charging

Proper battery care maximizes lifespan and performance. This section details Jazzy scooter battery types, charging protocols, maintenance tips, and troubleshooting guidance.

Battery Types and Specifications

Jazzy scooters typically utilize sealed lead-acid (SLA) or lithium-ion batteries, each offering distinct advantages. SLA batteries are cost-effective and reliable, while lithium-ion provides lighter weight and extended range.

Voltage varies by model, commonly 24V or 32V, impacting performance. Amp-hour (Ah) ratings determine runtime; higher Ah equates to longer usage. Always verify the correct battery type and specifications listed on your scooter or in the original documentation before replacement. Using incorrect batteries can damage the scooter and void the warranty.

Charging Procedures and Best Practices

To maximize battery life, always use the charger specifically designed for your Jazzy scooter model. Connect the charger to a standard wall outlet and then to the scooter’s charging port. Avoid overcharging; disconnect once the indicator light signals a full charge.

It’s best to charge batteries in a well-ventilated area and avoid extreme temperatures. For optimal performance, allow batteries to discharge partially before recharging—avoiding complete depletion. Regular, shallow charges are preferable to infrequent, deep discharges.

Battery Maintenance and Lifespan

Proper battery care is crucial for extending the lifespan of your Jazzy scooter’s power source. Regularly inspect battery terminals for corrosion, cleaning them with a baking soda solution if necessary. Keep batteries charged even during periods of infrequent use to prevent sulfation.

Avoid storing batteries in extreme temperatures, as this can significantly reduce their capacity. Battery lifespan varies, but typically ranges from 18 to 36 months with consistent, proper maintenance and charging practices.

Maintenance and Repairs

Regular upkeep ensures optimal performance and longevity of your Jazzy scooter; this section details essential procedures for tires, brakes, and general cleaning.

Tire Maintenance and Replacement

Maintaining proper tire pressure is crucial for a smooth and safe ride on your Jazzy scooter. Regularly check tire inflation – recommended PSI varies by model, so consult your scooter’s specifications. Inspect tires for wear and tear, including cuts, bulges, or uneven tread.

Replace tires when the tread is significantly worn or damaged, as this impacts traction and stability. When replacing, ensure the new tires are the correct size and type for your Jazzy scooter model. Consider professional assistance if you are unfamiliar with tire replacement procedures to guarantee a secure fit and optimal performance.

Brake System Inspection and Adjustment

Regularly inspect your Jazzy scooter’s brake system for optimal safety. Check brake levers for responsiveness and ensure they engage firmly. Examine brake cables or lines for fraying, kinks, or leaks. Inspect brake pads for wear; replace them if they are thin or damaged, as diminished braking power is a serious safety hazard.

Adjust brakes as needed to maintain proper stopping distance. If adjustments are beyond your comfort level, seek professional assistance from a qualified technician to ensure the brake system functions correctly and reliably.

General Cleaning and Upkeep

Maintaining a clean Jazzy scooter extends its lifespan and ensures optimal performance. Regularly wipe down the frame, seat, and control panel with a damp cloth and mild detergent. Avoid abrasive cleaners that could damage the finish. Inspect for loose screws or bolts and tighten them as needed.

Protect electrical components from moisture. Store your scooter in a dry place and avoid operating it in wet conditions. Periodic lubrication of moving parts will contribute to smooth operation and prevent premature wear.

Troubleshooting Common Issues

This section details solutions for typical problems, like scooters failing to power on, charging difficulties, or motor malfunctions—helping you resolve issues quickly.

Scooter Won’t Turn On

If your Jazzy scooter fails to power on, begin with the simplest checks. Ensure the battery is securely connected and fully charged – a loose connection or depleted battery are common culprits. Verify the key is properly inserted and turned to the ‘on’ position.

Inspect the scooter’s wiring harness for any visible damage or loose connections. Check the circuit breaker or fuse box, replacing any blown fuses immediately. If these steps don’t resolve the issue, consult a qualified technician for further diagnosis, as it could indicate a more complex electrical problem.

Battery Not Charging

If your Jazzy scooter battery isn’t charging, first confirm the charger is securely plugged into both the scooter and a functioning wall outlet. Inspect the charger’s indicator light – it should illuminate, signaling power flow. Examine the charging port on the scooter for any debris or damage that might impede connection.

A faulty charger is a frequent cause; try a known working charger if possible. If the battery is old, its capacity may have diminished, requiring replacement. Consult a technician if issues persist, as internal battery problems may exist.

Motor Issues and Solutions

Experiencing motor problems with your Jazzy scooter? Begin by checking the key switch and throttle control for proper function. A loose connection or damaged wiring can disrupt power to the motor; inspect these components carefully. Listen for unusual noises – grinding or clicking sounds may indicate internal motor damage.

If the motor runs intermittently, the issue could be a faulty motor controller. For persistent problems, professional diagnosis and repair are recommended, as motor repairs can be complex.

Jazzy Dance Studios Connection

Though seemingly unrelated, “Jazzy” shares a name with vibrant dance studios offering diverse styles like salsa, hip-hop, and contemporary dance lessons globally.

History and Locations of Jazzy Dance Studios

Jazzy Dance Studios began expanding in April 2015, initially establishing a location in Lisbon’s Saldanha district. This marked a shift, aiming to redefine traditional dance academy concepts;

Further expansion led to studios in Parede Futebol Clube, focusing on contemporary, urban, and social dance styles for all ages. Currently, Jazzy boasts locations in Porto and Dublin, offering a wide range of classes.

The studios prioritize a passionate dance environment, with Jazzy Dublin also showcasing the musical talents of singer Yasmine Byrne, known professionally as Jazzy.

Jazzy Dance Styles Offered

Jazzy Dance Studios provides a diverse range of dance instruction, encompassing Social Dances like Bachata, Salsa, and Kizomba, typically enjoyed as partnered routines.

Classical styles, including Contemporary and Classical dance, are also available, alongside vibrant Street Dances such as Afro, Girlie, High Heels, Hip Hop Funk, Pop Dance, and House.

For those seeking global rhythms, Bollywood and Bhangra are offered, plus Wellbeing and Conditioning classes like stretching and barre. Jazzy Kids programs cater to children aged 3-16, fostering a love for dance!

Warranty Information

Your Jazzy scooter is protected by a comprehensive warranty, covering parts and labor for a specified period; review details for claim procedures.

Understanding Your Jazzy Scooter Warranty

The Jazzy scooter warranty safeguards against manufacturing defects in materials and workmanship. It typically covers the scooter’s frame, electronic components, and certain other parts for a defined duration, often differing based on the component.

Regular maintenance, as outlined in this manual, is crucial for warranty validity. Damage resulting from misuse, accidents, unauthorized repairs, or normal wear and tear is generally excluded. Carefully review the warranty document included with your scooter for specific terms, conditions, and limitations.

Keep your proof of purchase readily available, as it’s essential for any warranty claim.

Warranty Claim Process

To initiate a warranty claim, first contact Jazzy Scooter’s customer support with your scooter’s model number, serial number, and a detailed description of the issue. You’ll likely need to provide proof of purchase and photos or videos documenting the defect.

Jazzy will then assess your claim and, if approved, provide instructions for repair or replacement. Authorized service centers may be required for repairs.

Retain all documentation related to your claim, including communication records and repair invoices, for your records.

Resources and Support

Access the official Jazzy Scooter website for FAQs, manuals, and support. Contact customer service for assistance or locate authorized repair services nearby.

Official Jazzy Scooter Website

The official Jazzy Scooter website serves as a central hub for all product-related information and support. Here, you’ll discover comprehensive resources including downloadable user manuals for various models, frequently asked questions addressing common concerns, and detailed specifications for each scooter.

Furthermore, the website provides access to safety guidelines, warranty details, and a parts catalog to assist with maintenance and repairs. You can also find instructional videos demonstrating proper operation and troubleshooting techniques. Regularly checking the website ensures you have the latest updates and information regarding your Jazzy scooter.

Customer Support Contact Information

For personalized assistance with your Jazzy scooter, dedicated customer support is readily available. You can reach the support team via phone during business hours for immediate troubleshooting and guidance. Alternatively, email support offers a convenient method for submitting detailed inquiries and receiving comprehensive responses.

The official website also features a live chat option for real-time assistance. When contacting support, have your scooter’s model number and serial number readily available to expedite the process and ensure accurate assistance.

Finding Local Repair Services

To locate authorized Jazzy scooter repair services in your area, utilize the official Jazzy website’s dealer locator tool. This resource provides a comprehensive directory of certified technicians equipped to handle maintenance and repairs. Alternatively, contacting Jazzy customer support directly can yield recommendations for reputable local providers.

Ensure any chosen service center employs trained professionals familiar with Jazzy scooters to guarantee quality workmanship and maintain your scooter’s warranty validity.

2003 ford taurus fuse box guide

2003 Ford Taurus Fuse Box Guide: A Comprehensive Overview

Navigating the 2003 Ford Taurus’s electrical system requires understanding its fuse box locations and diagrams․ This guide provides detailed information for owners seeking to troubleshoot and maintain their vehicle’s electrical components effectively․

Restoration efforts and user manuals highlight the importance of this nearly 21-year-old system, offering resources for keeping it operational․

The 2003 Ford Taurus, like all modern vehicles, relies heavily on a complex electrical system to power a multitude of functions․ From essential systems like ignition and fuel delivery to convenience features like power windows and the audio system, electricity is the lifeblood of the car’s operation․ Understanding the basics of this system is crucial for any Taurus owner, especially when it comes to diagnosing and resolving electrical issues․

At the heart of the electrical system lies a network of circuits, each protected by fuses and relays․ These components act as safety devices, preventing damage to the wiring and components in the event of a short circuit or overload․ The 2003 Taurus utilizes multiple fuse boxes – an interior fuse box and an underhood fuse box – to distribute power throughout the vehicle․

Proper maintenance and troubleshooting of the electrical system require familiarity with fuse box locations, fuse types, and circuit diagrams․ This guide aims to provide a comprehensive overview of the 2003 Ford Taurus electrical system, empowering owners to confidently address common electrical problems and ensure the continued reliable operation of their vehicle․ Recognizing mismatched uniforms from the 2003 Iraq War highlights the challenges of rapid deployment and logistical complexities․

Locating the Fuse Boxes

The 2003 Ford Taurus features two primary fuse box locations: an interior fuse box and an underhood fuse box․ Identifying these locations is the first step in addressing any electrical concerns․ The interior fuse box is typically located on the driver’s side of the dashboard, often concealed behind a removable panel․ Accessing it usually involves releasing clips or screws to remove the cover․

The underhood fuse box, as the name suggests, is situated within the engine compartment․ It’s commonly found near the battery, often secured to the inner fender or firewall․ This box is generally more robust and houses fuses for higher-amperage circuits, protecting components like the alternator and starter․

Carefully consult your owner’s manual for the precise location of each fuse box, as slight variations may exist depending on the specific trim level․ Remember that attempting electrical work without proper knowledge can be dangerous․ Like restoration efforts for older games, pinpointing these locations is key to maintaining functionality․ Always disconnect the negative battery terminal before working on any electrical components․

Understanding Fuse Box Layouts – Interior Fuse Box

The interior fuse box of a 2003 Ford Taurus is organized to protect circuits powering interior components․ Typically, fuses are arranged in rows and labeled with corresponding circuit descriptions․ Common circuits protected within this box include those for the power windows, power locks, interior lighting, radio, cigarette lighter, and instrument cluster․

Fuse diagrams, often found on the fuse box cover itself or within the owner’s manual, are crucial for identifying the correct fuse for a specific system․ These diagrams illustrate the fuse number and the associated component it protects․ Pay close attention to the amperage rating of each fuse; using a fuse with a higher rating can cause serious damage to the electrical system․

Like the dedication to keeping older simulations alive, understanding this layout is vital for maintaining the vehicle․ Some fuse positions may be empty, designated for optional equipment not installed in your particular Taurus․ Careful observation and referencing the fuse diagram will ensure accurate identification and replacement․

Understanding Fuse Box Layouts – Underhood Fuse Box

Located within the engine compartment, the underhood fuse box safeguards circuits powering essential vehicle systems․ This box generally houses fuses for higher-amperage components, such as the engine control module (ECM), fuel pump, cooling fans, and anti-lock braking system (ABS)․ Its layout, similar to the interior box, utilizes a diagram on the cover or in the owner’s manual to denote each fuse’s function․

Unlike interior circuits, those protected by the underhood box often relate to engine operation and safety features․ Identifying the correct fuse is paramount, as incorrect replacement can lead to critical system failures․ The arrangement may include relay sockets alongside fuses, adding complexity to the layout․

Just as restoration efforts preserve older systems, understanding this box is key to maintaining the Taurus’s core functionality․ Be mindful of potential corrosion due to the underhood environment, which can affect fuse connections․ Always consult the diagram before attempting any repairs or replacements․

Fuse Box Diagrams – Interior (Detailed)

The interior fuse box, typically found beneath the dashboard on the driver’s side, protects circuits for interior components․ A detailed diagram, often located on the fuse box cover itself or within the owner’s manual, is crucial for identification․ This diagram illustrates each fuse’s specific function, ranging from power windows and door locks to the radio and interior lighting․

Fuse designations are usually numbered, with corresponding descriptions indicating the protected circuit․ Common fuses control features like the cigarette lighter, instrument cluster illumination, and the anti-theft system․ Understanding the diagram allows for targeted troubleshooting when a specific interior function fails․

Similar to restoration projects preserving older technology, accurate interpretation of this diagram is vital․ Note that some diagrams may use symbols or abbreviations, requiring careful attention․ Always refer to the official Ford documentation for the most accurate and reliable information when working with the interior fuse box․

Fuse Box Diagrams – Underhood (Detailed)

Located within the engine compartment, typically near the battery, the underhood fuse box safeguards critical systems․ A detailed diagram, usually affixed to the fuse box lid, is essential for identifying each fuse’s purpose․ This diagram covers circuits for the engine, transmission, cooling system, and various sensors․

Fuses in this box often protect high-amperage components like the fuel pump, radiator fan, and ignition system․ Accurate identification is paramount, as incorrect fuse replacement can lead to serious engine or electrical issues․ The diagram will specify the fuse rating (in amps) required for each circuit․

Like the preservation of older sim racing content, maintaining the integrity of this system relies on precise information․ Pay close attention to any symbols or abbreviations used on the diagram․ Always consult the official Ford owner’s manual or a reliable repair guide for the most accurate underhood fuse box layout and fuse specifications․

Common Fuse Issues and Troubleshooting

Frequently, issues with the 2003 Ford Taurus’s electrical system stem from blown fuses․ Common culprits include the power windows, radio, interior lights, and cigarette lighter․ Repeatedly blown fuses indicate a deeper problem, such as a short circuit or overloaded circuit․

Troubleshooting begins with identifying the affected circuit․ Consult the fuse box diagrams (interior and underhood) to pinpoint the relevant fuse․ If a fuse is blown, replace it with a fuse of the exact same amperage rating․ Never use a higher amperage fuse, as this can cause significant damage․

If the replacement fuse blows immediately, a short circuit is likely present․ This requires further investigation, potentially involving tracing the wiring harness for damaged insulation or faulty components․ Like restoring older software, patience and methodical testing are key․ If you’re uncomfortable with electrical work, seek assistance from a qualified mechanic to avoid further complications․

Identifying Blown Fuses

Visually inspecting fuses is the first step in identifying a blown fuse within the 2003 Ford Taurus․ A blown fuse typically exhibits a broken filament or a dark, scorched appearance inside the clear plastic casing․ However, sometimes the visual indication is subtle, making it difficult to detect with the naked eye․

A more reliable method involves using a test light or a multimeter․ A test light will not illuminate when placed across a blown fuse, indicating an open circuit․ A multimeter, set to continuity mode, will show no continuity when testing a blown fuse․ This confirms the fuse is no longer conducting electricity․

Remember to always turn off the ignition and remove the key before inspecting or testing fuses․ Carefully pull the fuse straight out using fuse pullers (often included in the fuse box) to avoid damaging the fuse or the fuse box itself․ Like diagnosing issues in older simulations, methodical checking is crucial․

Replacing Fuses: A Step-by-Step Guide

Before replacing any fuse in your 2003 Ford Taurus, ensure the ignition is switched off and the key removed – safety first! Locate the blown fuse (as detailed previously) and note its amperage rating․ Never substitute a fuse with a higher amperage, as this could cause serious electrical damage․

Using a fuse puller (or needle-nose pliers with insulated handles), gently remove the blown fuse straight out․ Insert the new fuse of the exact same amperage rating into the empty slot, ensuring it’s firmly seated․ A slight click often indicates proper installation․

After replacing the fuse, test the corresponding circuit to confirm functionality․ If the fuse blows again immediately, there’s likely a short circuit or an overload in the system requiring further investigation․ Like restoring older software, patience and precision are key․ Documenting changes can also be helpful for future troubleshooting․

Fuse Types and Ratings for 2003 Taurus

The 2003 Ford Taurus primarily utilizes two fuse types: blade-style (also known as ATO/ATC) and cartridge fuses․ Blade fuses are the most common, found in both the interior and underhood fuse boxes․ Cartridge fuses are typically reserved for higher amperage circuits, often related to the starting system or power distribution․

Fuse ratings vary significantly depending on the protected circuit․ Common ratings include 5A, 10A, 15A, 20A, 25A, and 30A․ Some circuits may utilize 40A or even higher-rated fuses․ Always refer to the fuse box diagram (detailed in other sections) to identify the correct amperage for each fuse location․

Incorrect fuse ratings can lead to malfunctions or, more seriously, electrical fires․ Using a higher amperage fuse than specified can overload the wiring, while a lower amperage fuse will repeatedly blow, causing inconvenience․ Like maintaining older systems, using the correct components is crucial for reliable operation․

Relays vs․ Fuses: What’s the Difference?

Fuses and relays are both critical components of the 2003 Ford Taurus’s electrical system, but they serve distinct purposes․ A fuse is a safety device designed to protect circuits from overcurrent․ It contains a metal wire that melts and breaks the circuit if the current exceeds its rated capacity, preventing damage to wiring and components․

Relays, conversely, are electrically operated switches․ They allow a low-current circuit to control a high-current circuit․ Think of them as remote-controlled switches․ They’re used for components requiring significant power, like headlights, the starter motor, or the fuel pump․ Relays don’t prevent overcurrent; they enable high-current operation․

Often, a relay will be protected by a fuse․ The fuse safeguards the relay’s control circuit, while the relay manages the power to the actual component․ Understanding this distinction is vital for troubleshooting electrical issues, as a faulty relay won’t necessarily blow a fuse, and a blown fuse doesn’t always indicate a bad relay․ Like restoration efforts, knowing the parts is key․

Specific Circuit Protection – Power Windows & Locks

The 2003 Ford Taurus power windows and door locks are protected by dedicated fuses within both the interior fuse box and, potentially, the underhood fuse box․ Typically, a single fuse safeguards the entire power window circuit, controlling all windows simultaneously․ A separate fuse protects the power door lock system, including both manual and remote operation․

Fuse locations can vary slightly depending on the specific Taurus configuration (e․g․, trim level, options)․ However, consulting a detailed fuse box diagram is crucial for accurate identification․ Common fuse amperage ratings for these circuits range from 15 to 30 amps․ A blown fuse will result in complete failure of either all power windows or all power locks․

Troubleshooting involves first checking the relevant fuses․ If a fuse repeatedly blows, it indicates a short circuit within the window or lock mechanism, wiring harness, or control switch․ Further investigation, potentially involving a multimeter, is then necessary to pinpoint the source of the short, much like restoration efforts require careful diagnosis․

Specific Circuit Protection – Lighting Systems

The 2003 Ford Taurus lighting systems – including headlights, taillights, turn signals, and interior lights – are individually protected by numerous fuses distributed across both the interior and underhood fuse boxes․ Headlights often have separate high and low beam fuses, while parking lights and turn signals share circuits․ Interior lighting, encompassing dome lights, map lights, and trunk lights, also has dedicated fuse protection․

Fuse amperage ratings vary significantly based on the lighting component․ Headlights typically require higher amperage fuses (15-20 amps) due to their power draw, whereas smaller indicator lights utilize lower amperage fuses (5-10 amps)․ A blown fuse will affect only the corresponding lighting circuit, allowing for targeted troubleshooting․

Diagnosing lighting issues begins with inspecting the relevant fuses․ Repeated fuse failures suggest a short circuit or excessive load on the lighting system․ Careful examination of wiring, bulbs, and switches is essential, mirroring the meticulous approach needed in restoration projects․ Always refer to the fuse box diagram for precise fuse locations and ratings․

Specific Circuit Protection – Ignition & Fuel Systems

The 2003 Ford Taurus’s ignition and fuel systems rely on a complex network of fuses for safe and reliable operation․ Critical components like the fuel pump, ignition coil, and engine control module (ECM) each have dedicated fuse protection, typically located within the underhood fuse box due to the higher current demands․

Fuses safeguarding these systems generally range from 10 to 20 amps, depending on the specific component․ A blown fuse in the fuel pump circuit will prevent the engine from receiving fuel, resulting in a no-start condition․ Similarly, an ignition system fuse failure will disrupt spark, also causing a no-start situation․

Troubleshooting ignition or fuel system issues necessitates a systematic approach․ Begin by verifying the fuses related to these systems․ If a fuse repeatedly blows, it indicates a short circuit or a failing component requiring further investigation․ Like restoration efforts, careful diagnosis is key․ Always consult the fuse box diagram for accurate fuse identification and location, ensuring proper circuit protection․

Tools Needed for Fuse Box Work

Successfully addressing fuse box issues in a 2003 Ford Taurus requires a minimal, yet essential, toolkit․ A fuse puller is paramount; this small plastic tool allows for safe removal of fuses without damaging the fuse box or risking electrical shock․ A test light or multimeter is crucial for verifying whether a fuse is blown and for checking for power at various circuits․

Additionally, a set of needle-nose pliers can be helpful for gripping and manipulating fuses in tight spaces․ Having a flashlight or headlamp ensures adequate visibility, especially when working in dimly lit areas under the hood․ A diagram of the fuse box layout, readily available in the owner’s manual or online, is indispensable for identifying the correct fuse․

Finally, a small flathead screwdriver might be needed for certain fuse box cover clips․ Like any restoration project, having the right tools streamlines the process and minimizes the risk of damage․ Prioritize safety and always disconnect the negative battery terminal before commencing any electrical work․

Safety Precautions When Working with Electrical Systems

Working with the electrical system of your 2003 Ford Taurus demands strict adherence to safety protocols․ Always disconnect the negative battery terminal before beginning any work․ This prevents accidental shorts and potential electrical shock, safeguarding both you and the vehicle’s sensitive electronics․

Never work on the electrical system in wet conditions․ Moisture significantly increases the risk of electrocution․ Ensure the work area is well-lit to clearly see the fuse box and wiring․ Avoid wearing metallic jewelry, as it can conduct electricity․ Use insulated tools specifically designed for automotive electrical work․

If you are unfamiliar with automotive electrical systems, consult a qualified mechanic․ Incorrectly installed fuses or wiring can lead to further damage or even a fire hazard․ Always double-check your work before reconnecting the battery․ Remember, prioritizing safety is paramount when dealing with electrical components․ Treat every wire as if it is live․

Resources for Further Information (Ford Owner Manuals)

The most comprehensive resource for your 2003 Ford Taurus’s electrical system is the original Ford Owner Manual․ This manual contains detailed fuse box diagrams, fuse ratings, and explanations of various electrical components․ Locating a physical copy is ideal, but digital versions are often available online through Ford’s official website or reputable automotive information databases․

Ford also provides online support and forums where owners can share information and troubleshooting tips․ These platforms can be invaluable for specific issues not covered in the owner’s manual․ Additionally, many automotive repair websites offer detailed diagrams and guides specifically for the 2003 Taurus․

Remember to verify the information’s accuracy, as online sources can vary in quality․ Utilizing official Ford documentation whenever possible ensures you’re working with reliable data․ Consider subscribing to Ford’s owner portal for access to updated information and recall notices related to your vehicle’s electrical systems․

Frequently Asked Questions (FAQs) About 2003 Taurus Fuses

Q: Where are the fuse boxes located? A: The 2003 Taurus has two fuse boxes – one inside the cabin (typically under the dashboard) and another under the hood, often near the battery․ Q: What if a fuse keeps blowing? A: Repeatedly blown fuses indicate a short circuit or overload in the associated system․ Further investigation is needed to identify and resolve the underlying issue․

Q: Can I use a higher amperage fuse? A: No! Using a fuse with a higher rating than specified can damage wiring and components, potentially causing a fire․ Always replace fuses with the correct amperage․ Q: What’s the difference between a fuse and a relay? A: Fuses protect circuits from overcurrent, while relays use a small current to control a larger current, acting as a switch․

Q: Where can I purchase replacement fuses? A: Auto parts stores, online retailers, and even some general merchandise stores carry replacement fuses․ Q: Is it safe to work on the electrical system myself? A: While basic fuse replacement is generally safe, disconnecting the battery is crucial․ Complex repairs should be left to qualified professionals․

Where to Purchase Replacement Fuses

Finding replacement fuses for your 2003 Ford Taurus is straightforward, with numerous convenient options available to vehicle owners․ Major auto parts retailers like AutoZone, Advance Auto Parts, and O’Reilly Auto Parts consistently stock a wide variety of fuse types and amperages, both in-store and online․ These stores often provide assistance in identifying the correct fuse for your specific circuit․

Online marketplaces such as Amazon and eBay offer competitive pricing and a vast selection, allowing for convenient home delivery․ Ford dealerships are another reliable source, guaranteeing genuine Ford parts, though typically at a higher price point․ General merchandise stores like Walmart and Target also carry basic fuse assortments, suitable for common replacements․

Local hardware stores may stock a limited selection of fuses, potentially useful in emergencies․ When purchasing, always verify the fuse amperage and type match your vehicle’s specifications to prevent damage․ Consider purchasing a fuse assortment kit for future needs, ensuring you have the right fuse on hand when required․

vishnu sahasranamam in telugu with meaning pdf

Vishnu Sahasranamam in Telugu with Meaning PDF: A Comprehensive Plan

Kasibhotla Satyanarayana’s insightful Telugu commentary, Vishnu Sahasra Sudarsana Vyakhya, offers a deep dive into the sacred Vishnu Sahasranamam scripture, released recently.

Vishnu Sahasranamam, meaning “the thousand names of Vishnu,” is a revered Hindu stotram, a hymn glorifying Lord Vishnu. This sacred text isn’t merely a list of names; each name (namam) is a potent descriptor of the divine, revealing a facet of Vishnu’s infinite nature and cosmic power.

For devotees seeking a deeper connection with the divine in the Telugu language, accessing the Vishnu Sahasranamam with meaning in Telugu PDF format is incredibly valuable. These PDFs often include transliteration, word-by-word meanings, and comprehensive commentaries, making the stotram accessible to a wider audience.

The availability of resources like Kasibhotla Satyanarayana’s Vishnu Sahasra Sudarsana Vyakhya in Telugu significantly enhances understanding. This commentary, recently released, provides profound insights into the nuances of each name, bridging the gap between the Sanskrit original and the Telugu-speaking devotee. It’s a gateway to unlocking the spiritual power embedded within these thousand names.

Significance of Vishnu Sahasranamam

The Vishnu Sahasranamam holds immense spiritual significance for Vaishnavas and Hindus alike. Chanting these thousand names is believed to bestow numerous benefits, including purification of the mind, liberation from the cycle of birth and death (moksha), and attainment of peace and prosperity.

For Telugu speakers, accessing a Vishnu Sahasranamam with meaning in Telugu PDF amplifies this significance. Understanding the meaning behind each name deepens devotion and allows for a more meaningful connection with Lord Vishnu. The PDF format offers convenience and portability, enabling daily practice and study.

Resources like Kasibhotla Satyanarayana’s commentary, Vishnu Sahasra Sudarsana Vyakhya, are particularly valuable. His work, recently unveiled, provides a nuanced understanding of each namam, revealing its philosophical and spiritual depth. This detailed Telugu interpretation unlocks the stotram’s power, making it a potent tool for spiritual growth and transformation for the Telugu-speaking community.

Historical Background of the Stotram

The Vishnu Sahasranamam originates from the epic Mahabharata, specifically the Bhishma Parva. During the Kurukshetra war, Yudhishthira, seeking guidance on dharma and victory, asks Bhishma Pitamaha about the means to attain supreme bliss. Bhishma then recites the thousand names of Lord Vishnu, revealing the path to liberation.

While the core text remains in Sanskrit, the desire to make it accessible led to translations in various regional languages, including Telugu. The availability of a Vishnu Sahasranamam with meaning in Telugu PDF reflects this long-standing tradition of disseminating spiritual knowledge.

Scholars like Kasibhotla Satyanarayana have contributed significantly to this accessibility through detailed commentaries like Vishnu Sahasra Sudarsana Vyakhya. His recent release demonstrates a continuing effort to preserve and propagate the stotram’s wisdom. Understanding its origins within the Mahabharata enriches the experience of reciting and studying the names, even through a Telugu PDF resource.

The Source Text: Mahabharata

The Vishnu Sahasranamam isn’t a standalone scripture but is embedded within the vast narrative of the Mahabharata. It appears in the Bhishma Parva, during a crucial moment of the Kurukshetra war. Yudhishthira, facing immense moral and strategic challenges, seeks guidance from the venerable Bhishma.

Bhishma’s response is the recitation of the thousand names of Lord Vishnu, a powerful exposition of divine attributes and cosmic order. This context within the Mahabharata is vital; it frames the Sahasranamam as a practical guide for navigating life’s complexities and achieving spiritual liberation.

Accessing a Vishnu Sahasranamam with meaning in Telugu PDF allows devotees to connect with this ancient wisdom. Commentaries, such as Kasibhotla Satyanarayana’s Vishnu Sahasra Sudarsana Vyakhya, further illuminate the connection to the Mahabharata, enriching the understanding of each name’s significance within the larger epic framework. The PDF format facilitates widespread study and contemplation of this foundational text.

Structure of the Vishnu Sahasranamam

The Vishnu Sahasranamam, meaning “thousand names of Vishnu,” is meticulously structured. It comprises 1,008 names, including the initial salutation, ‘Om,’ and the concluding name, ‘Sriyam.’ These names aren’t randomly listed; they are categorized thematically, revealing layers of meaning.

The structure facilitates a progressive understanding of the divine. Names initially describe fundamental aspects of existence, then move towards attributes, forms, and ultimately, the supreme reality. A Vishnu Sahasranamam with meaning in Telugu PDF often highlights these structural divisions, aiding comprehension.

Kasibhotla Satyanarayana’s commentary, Vishnu Sahasra Sudarsana Vyakhya, provides detailed analysis of this structure. Studying the arrangement within a Telugu PDF enhances the recitation experience, allowing devotees to appreciate the logical flow and interconnectedness of each divine name. This organized format is key to unlocking the stotram’s profound wisdom.

Importance of Recitation

Recitation of the Vishnu Sahasranamam is considered profoundly beneficial in Hindu tradition. Chanting these 1,008 names is believed to purify the mind, body, and speech, fostering spiritual growth. A Vishnu Sahasranamam with meaning in Telugu PDF makes this practice accessible to Telugu-speaking devotees, enabling deeper engagement with the verses.

Regular recitation is said to remove obstacles, grant prosperity, and ultimately lead to liberation (moksha). The power lies not just in the sound but in understanding the meaning behind each name. Kasibhotla Satyanarayana’s Vishnu Sahasra Sudarsana Vyakhya, often available as a Telugu PDF, illuminates these meanings.

Consistent practice, guided by a Telugu translation, cultivates devotion and strengthens one’s connection with Lord Vishnu. The act of reciting, coupled with comprehension, transforms the stotram into a powerful tool for self-realization and spiritual advancement.

Benefits of Chanting

Chanting the Vishnu Sahasranamam, especially with a Telugu with meaning PDF for understanding, yields numerous benefits. It’s believed to bestow mental peace, reduce stress, and enhance concentration. Devotees often experience a sense of inner calm and improved emotional well-being through regular practice.

Beyond psychological benefits, chanting is said to purify karmas and remove negative energies. Accessing a Telugu PDF, like those based on Kasibhotla Satyanarayana’s commentary – Vishnu Sahasra Sudarsana Vyakhya – allows for a more profound connection with the divine names.

Furthermore, consistent recitation is thought to attract prosperity, protect against misfortune, and foster spiritual growth. The power of the names, understood through Telugu translation, creates a positive vibration, leading to overall well-being and a closer relationship with Lord Vishnu.

Telugu Translation: Key Considerations

When seeking a Vishnu Sahasranamam Telugu with meaning PDF, understanding the nuances of translation is crucial. The Sanskrit names are rich in symbolism, and a literal translation may not always capture the full essence. A good translation, like those found in commentaries such as Kasibhotla Satyanarayana’s Vishnu Sahasra Sudarsana Vyakhya, considers the cultural and philosophical context.

Key considerations include accurately conveying the divine attributes and forms described in each name. The Telugu language offers various synonyms; selecting the most appropriate one is vital for preserving the original meaning. Different translators may offer varying interpretations, so comparing multiple PDFs can be beneficial.

Furthermore, the chosen Telugu script and transliteration style impact readability. A clear, well-formatted PDF enhances the learning experience, allowing devotees to connect deeply with the sacred names and their profound significance.

Kasibhotla Satyanarayana’s Commentary

Kasibhotla Satyanarayana’s Vishnu Sahasra Sudarsana Vyakhya stands as a highly respected Telugu commentary on the Vishnu Sahasranamam. This work is frequently sought after in Vishnu Sahasranamam Telugu with meaning PDF formats due to its depth and clarity. The commentary doesn’t merely translate the names; it provides a comprehensive explanation of their philosophical and spiritual significance.

Satyanarayana’s scholarship delves into the etymology of each name, connecting them to Vedic scriptures and Vaishnava traditions. He elucidates the subtle nuances, making the complex text accessible to a wider audience. The Vyakhya is known for its detailed analysis of each attribute of Lord Vishnu, revealed through the thousand names.

Devotees often rely on this commentary for a deeper understanding during recitation and contemplation. Finding a reliable PDF version of his work is a priority for many seeking a profound connection with the Vishnu Sahasranamam.

Vishnu Sahasra Sudarsana Vyakhya ‒ Overview

Vishnu Sahasra Sudarsana Vyakhya, authored by Kasibhotla Satyanarayana, is a cornerstone resource for those studying the Vishnu Sahasranamam in Telugu. This commentary is widely available as a Vishnu Sahasranamam Telugu with meaning PDF, facilitating easy access for devotees. It’s celebrated for its meticulous approach to interpreting each of the thousand names of Lord Vishnu;

The Vyakhya goes beyond simple translation, offering detailed explanations rooted in Vedic philosophy and Vaishnava theology. Satyanarayana’s work illuminates the interconnectedness of the names, revealing the multifaceted nature of the divine. It explores the symbolism and deeper meanings embedded within each appellation.

This commentary is invaluable for both beginners and advanced practitioners, providing a framework for understanding and appreciating the profound wisdom contained within the Vishnu Sahasranamam. Its PDF format ensures its continued accessibility and preservation.

Availability of Telugu PDFs

Fortunately, numerous sources offer the Vishnu Sahasranamam in Telugu with meaning PDF format, making this sacred text readily accessible. Digital libraries and dedicated websites specializing in Hindu scriptures are primary repositories. Many Vaishnava organizations and temples also provide downloadable PDFs of both the original Sanskrit text and various Telugu translations, including those with commentaries like Kasibhotla Satyanarayana’s Vishnu Sahasra Sudarsana Vyakhya.

A quick online search reveals several platforms hosting these PDFs, catering to different user preferences regarding font size, layout, and accompanying materials. Some PDFs include audio recitations, enhancing the learning experience.

However, users should exercise caution and verify the authenticity of the source before downloading to ensure the accuracy of the text and avoid corrupted files. Reputable websites and organizations are recommended for reliable access to this invaluable spiritual resource.

Popular PDF Sources & Websites

Several online platforms consistently rank as popular sources for the Vishnu Sahasranamam in Telugu with meaning PDF. Websites dedicated to Hindu scriptures, such as Pujari and Stotras, frequently host multiple versions, including those with Kasibhotla Satyanarayana’s commentary, Vishnu Sahasra Sudarsana Vyakhya.

Archive.org, a digital library, often contains scanned copies of older, rare editions. Additionally, various Telugu devotional websites and blogs dedicated to Vaishnavism regularly offer downloadable PDFs. Many temples and spiritual organizations also maintain websites with downloadable resources.

Scribd and similar document-sharing platforms may also host relevant PDFs, though verifying the source’s reliability is crucial. Remember to prioritize websites known for accurate transcriptions and authentic translations to ensure a meaningful and correct learning experience. Always check for copyright information before downloading and distributing.

Understanding the Names: A Categorical Approach

The Vishnu Sahasranamam, even in its Telugu with meaning PDF format, benefits greatly from a categorical understanding of the 1000 names. These names aren’t random; they’re meticulously organized to reveal different facets of the divine. Kasibhotla Satyanarayana’s commentary, Vishnu Sahasra Sudarsana Vyakhya, often highlights these groupings.

A common approach divides the names into sections describing Supreme Reality (Brahman), Divine Attributes (qualities like compassion and power), and Divine Forms (incarnations like Rama and Krishna). Analyzing names within these categories deepens comprehension. For example, names relating to strength reveal Vishnu’s protective aspect, while those concerning knowledge showcase his wisdom.

Studying the names thematically, rather than sequentially, unlocks a richer understanding of the underlying philosophy. PDF versions often include indices or annotations aiding this categorical exploration, enhancing the learning process and providing a structured approach to the stotram.

13.1 Names Describing Supreme Reality

Within the Vishnu Sahasranamam, particularly when studied through a Telugu with meaning PDF, a significant portion of names directly address the Supreme Reality – Brahman. These names transcend specific forms or attributes, pointing to the ultimate, unchanging essence of Vishnu. Concepts like ‘Sat’ (Truth), ‘Jnana’ (Knowledge), and ‘Ananta’ (Infinite) frequently appear.

Kasibhotla Satyanarayana’s commentary, Vishnu Sahasra Sudarsana Vyakhya, meticulously explains how these names denote the formless, all-pervading nature of the divine. Names like ‘Vijaya’ (Victory) and ‘Achyuta’ (Immovable) suggest the inherent power and stability of Brahman.

Understanding these names requires moving beyond literal translation and grasping the philosophical implications. A good PDF resource will offer contextual explanations, linking these names to Advaita Vedanta principles. They reveal Vishnu as the source and sustainer of all existence, beyond human comprehension.

13.2 Names Describing Divine Attributes

A Vishnu Sahasranamam Telugu with meaning PDF reveals a wealth of names detailing Vishnu’s divine attributes – gunas. These aren’t merely qualities, but inherent characteristics defining His nature and actions. Names like ‘Dharma’ (Righteousness), ‘Shanti’ (Peace), and ‘Kshama’ (Forgiveness) highlight His moral perfection.

Kasibhotla Satyanarayana’s Vishnu Sahasra Sudarsana Vyakhya provides nuanced interpretations, explaining how attributes like ‘Shreyaan’ (Most Auspicious) and ‘Vatsala’ (Affectionate) demonstrate Vishnu’s benevolent nature towards all beings. These attributes aren’t separate from Him; they are Him.

Studying these names through a Telugu PDF allows for a deeper cultural understanding, as the nuances of the Telugu language often capture subtleties lost in direct translation. The attributes reveal Vishnu as the embodiment of all virtues, a guiding light for devotees seeking spiritual growth and liberation.

13.3 Names Describing Divine Forms

A Vishnu Sahasranamam Telugu with meaning PDF meticulously details names representing Vishnu’s various divine forms – roopas. These aren’t simply physical appearances, but manifestations of His cosmic energy and power. Names like ‘Purushottama’ (Supreme Being) and ‘Narayana’ (Dweller in Waters) allude to specific forms and cosmic roles.

Kasibhotla Satyanarayana’s commentary, Vishnu Sahasra Sudarsana Vyakhya, elaborates on forms like Rama, Krishna, and Narasimha, connecting each name to associated stories and iconography. The PDF helps understand how each form embodies specific aspects of the divine, catering to different devotional approaches.

Exploring these forms through a Telugu PDF offers a culturally rich experience, as Telugu traditions often emphasize particular avatars. Understanding these forms isn’t about worshipping separate deities, but recognizing the one Supreme Reality manifesting in diverse ways to interact with creation and guide devotees towards liberation.

Key Names and Their Meanings in Telugu

A comprehensive Vishnu Sahasranamam in Telugu with meaning PDF will dissect crucial names, offering Telugu translations and explanations. For instance, ‘Janardana’ (one who torments evil beings) translates powerfully in Telugu, highlighting Vishnu’s role in upholding dharma. Similarly, ‘Achyuta’ (infallible) conveys unwavering truthfulness.

Kasibhotla Satyanarayana’s Vishnu Sahasra Sudarsana Vyakhya provides nuanced interpretations. The PDF clarifies how ‘Govinda’ (cowherd) relates to Krishna’s pastoral life, and ‘Madhava’ (born of Madhu) connects to a specific demon vanquished by Vishnu.

These aren’t mere word-for-word translations; the PDF aims to convey the underlying spiritual significance. Understanding these key names in Telugu unlocks deeper devotional resonance, allowing practitioners to connect with Vishnu’s attributes on a more profound level. The PDF serves as a guide to unlock the essence of each name.

Phonetic Pronunciation Guide (Telugu Script)

A valuable component of any Vishnu Sahasranamam in Telugu with meaning PDF is a detailed phonetic guide utilizing the Telugu script. Accurate pronunciation is vital for effective chanting and realizing the stotram’s benefits. The guide will transliterate Sanskrit sounds into their closest Telugu script equivalents.

For example, the ‘ra’ sound will be shown with its Telugu representation, differentiating between short and long ‘ra’ variations. Similarly, complex sounds like ‘ksh’ and ‘gn’ will be clearly illustrated. Kasibhotla Satyanarayana’s commentary, often included in comprehensive PDFs, aids in understanding these nuances.

This guide isn’t just for beginners; even experienced chanters can refine their pronunciation. The PDF will ideally include audio samples alongside the script, allowing users to hear the correct intonation. Mastering the Telugu phonetic representation enhances the meditative quality of the recitation.

Differences in Telugu Translations

When exploring a Vishnu Sahasranamam in Telugu with meaning PDF, it’s crucial to acknowledge the variations in translations. The Sanskrit verses are open to interpretation, leading to differing explanations of each name’s significance. Kasibhotla Satyanarayana’s translation, found in Vishnu Sahasra Sudarsana Vyakhya, is highly respected, but not the only one available.

Some translations prioritize literal accuracy, while others focus on conveying the underlying spiritual essence. These differences stem from varying philosophical perspectives and the translator’s understanding of Vaishnava traditions. A good PDF will often acknowledge these discrepancies, perhaps offering multiple interpretations.

Users should be aware that subtle nuances in Telugu vocabulary can also impact the meaning. Comparing different PDFs and commentaries can provide a richer, more comprehensive understanding of the Vishnu Sahasranamam. Recognizing these differences fosters a deeper appreciation for the scripture’s complexity.

Using the PDF for Daily Practice

A Vishnu Sahasranamam in Telugu with meaning PDF is an invaluable tool for consistent spiritual practice. Begin by selecting a PDF with a clear Telugu script and reliable commentary, such as those based on Kasibhotla Satyanarayana’s Vishnu Sahasra Sudarsana Vyakhya. Establish a dedicated time and quiet space for recitation.

Initially, focus on accurate pronunciation using the phonetic guide (if provided). Gradually incorporate understanding the meaning of each name in Telugu. Don’t rush; aim for mindful repetition rather than speed. The PDF allows you to follow along, referencing meanings as needed.

Consider reciting a specific number of names daily, increasing it over time. Supplement your practice with reflection on the divine qualities represented by the names. Regular engagement with the PDF will deepen your connection to Lord Vishnu and unlock the stotram’s transformative power.

The Role of a Guru in Learning

While a Vishnu Sahasranamam in Telugu with meaning PDF provides a solid foundation, guidance from a qualified Guru significantly enhances the learning experience. A Guru, steeped in Vaishnava tradition, can offer nuanced interpretations beyond what’s available in even detailed commentaries like Kasibhotla Satyanarayana’s Vishnu Sahasra Sudarsana Vyakhya.

They can correct pronunciation, clarify complex meanings, and reveal the subtle connections between the names. A Guru personalizes the learning process, addressing individual doubts and fostering deeper devotion. They can also explain the proper methodology for parayana (recitation) and its spiritual benefits.

The PDF serves as a valuable study aid, but a Guru provides the living transmission of knowledge. They illuminate the stotram’s essence, transforming it from a mere intellectual exercise into a profound spiritual journey. Seeking a Guru complements, rather than replaces, self-study with the PDF.

Common Misconceptions & Clarifications

When utilizing a Vishnu Sahasranamam in Telugu with meaning PDF, several misconceptions can arise. Some believe rote memorization suffices, neglecting the importance of understanding each name’s significance, as elucidated in texts like Kasibhotla Satyanarayana’s commentary, Vishnu Sahasra Sudarsana Vyakhya.

Another common error is mispronunciation, hindering the stotram’s efficacy. Telugu script PDFs aid pronunciation, but a Guru’s guidance is invaluable. Some assume all Telugu translations are identical; however, variations exist, reflecting differing interpretations.

It’s crucial to remember the Sahasranamam isn’t merely a list of names but a potent mantra for spiritual liberation. The PDF is a tool, not a substitute for devotion and sincere contemplation. Finally, believing benefits are automatic without dedicated practice is a fallacy; consistent recitation is key.

Vishnu Sahasranamam and Other Vaishnava Traditions

The Vishnu Sahasranamam, even when studied through a Telugu with meaning PDF, holds a central position within broader Vaishnava traditions. Its recitation is deeply interwoven with practices like arca (worship of deity forms), nama-sankirtana (chanting of names), and bhagavata-dharma (devotional service).

Understanding the stotram’s context within traditions like Sri Vaishnavism and Madhva Vaishnavism enriches its meaning. Commentaries, such as Kasibhotla Satyanarayana’s Vishnu Sahasra Sudarsana Vyakhya, often reflect specific philosophical viewpoints within these schools.

The Sahasranamam complements other key texts like the Divya Prabandham and the Bhagavad Gita, forming a holistic devotional path. Utilizing a Telugu PDF allows wider accessibility, but appreciating its place within the larger Vaishnava tapestry deepens spiritual understanding and practice.

Advanced Study Resources (Telugu)

Beyond readily available Vishnu Sahasranamam in Telugu with meaning PDF versions, deeper study necessitates exploring specialized resources. Kasibhotla Satyanarayana’s Vishnu Sahasra Sudarsana Vyakhya remains a cornerstone, often found in published book form alongside digital scans.

Researchers may benefit from accessing scholarly articles and translations available through university libraries and online databases focusing on Vaishnava philosophy. Websites dedicated to Telugu literature and religious texts can also yield valuable insights.

Furthermore, seeking guidance from experienced acharyas (teachers) proficient in both Sanskrit and Telugu is invaluable. They can illuminate nuanced interpretations and contextualize the Sahasranamam within broader scriptural traditions. Exploring related commentaries and sub-commentaries in Telugu will unlock a more profound understanding of each name’s significance.

The Enduring Power of the Names

The accessibility of the Vishnu Sahasranamam in Telugu with meaning PDF formats, coupled with commentaries like Kasibhotla Satyanarayana’s Vishnu Sahasra Sudarsana Vyakhya, ensures its continued relevance for generations. This ancient stotram transcends linguistic barriers, offering a pathway to spiritual growth for Telugu-speaking devotees.

The power lies not merely in rote recitation, but in contemplative understanding of each divine name. Through consistent study and practice, individuals can unlock the profound wisdom embedded within the Sahasranamam.

Ultimately, the enduring appeal of the Sahasranamam stems from its ability to connect devotees directly with the divine. Whether accessed through digital PDFs or traditional scholarly works, the names of Vishnu continue to inspire faith, devotion, and a deeper understanding of the Supreme Reality.

polaroid guest book instructions

Polaroid Guest Book Instructions: A Comprehensive Guide

Discover a modern twist on wedding traditions with a Polaroid guest book, offering a unique and interactive keepsake for your special day, as seen on stltoday.com.

What is a Polaroid Guest Book?

A Polaroid guest book represents a delightful departure from conventional sign-in books, embracing instant photography for a personalized touch. Instead of simply writing their names, guests capture a spontaneous Polaroid photo and affix it to a dedicated album or binder.

This creates a visually engaging and memorable keepsake, filled with faces and heartfelt messages from those who shared in your celebration. It’s more than just a record of attendance; it’s a collection of moments, emotions, and genuine well-wishes.

As highlighted by recent trends, couples are increasingly seeking unique alternatives to traditional guest books, and the Polaroid option provides a fun, interactive, and instantly gratifying experience for everyone involved.

Why Choose a Polaroid Guest Book?

Opting for a Polaroid guest book offers several compelling advantages over traditional methods. It provides an immediate and tangible memento, capturing not just signatures but the presence of your guests. This interactive element encourages participation and creates a lively atmosphere at your event.

Unlike a standard guest book, a Polaroid book becomes a cherished photo album filled with candid snapshots and personal messages. It’s a unique keepsake that you’ll treasure for years to come, offering a vibrant reminder of your special day.

As noted, it’s a modern alternative, appealing to couples seeking a personalized and memorable touch.

Materials Needed for a Polaroid Guest Book

Creating a Polaroid guest book station requires a few essential supplies. First, you’ll need a Polaroid camera – instant functionality is key! Next, ensure you have sufficient Polaroid film; remember, it can be expensive, so plan accordingly. A guest book album or binder is crucial for displaying the photos and messages.

Consider adding decorative pens and markers for guests to personalize their entries. Photo booth props can enhance the fun and create more engaging photos. Finally, adhesive options like washi tape or photo corners are needed to securely attach the Polaroids to the album pages.

Polaroid Camera Selection

Choosing the right Polaroid camera is vital for your guest book. Modern Polaroid cameras, like the Polaroid Now or Polaroid OneStep+, offer reliable instant photo capabilities. Vintage Polaroid cameras are also an option, but may require more maintenance and film availability can be limited.

Consider features like autofocus, exposure control, and built-in flash. The Polaroid Now is user-friendly, while the OneStep+ offers smartphone connectivity for creative control. Ensure the camera is in good working order and has fresh batteries before the event.

Polaroid Film Options & Considerations

Polaroid film options significantly impact the look and cost of your guest book. Currently, Polaroid offers i-Type film, designed for newer cameras, and 600 film, compatible with vintage models. i-Type is generally more affordable, but requires a camera with a built-in battery. 600 film contains a battery pack.

Be aware that Polaroid film is notoriously expensive, as noted on stltoday.com. Consider purchasing film in bulk to save money. Also, film performance can vary with temperature; keep film at room temperature before use for optimal results.

Guest Book Album/Binder Choice

Selecting the right album is crucial for showcasing your Polaroid memories. Options range from traditional photo albums with adhesive pages to specifically designed Polaroid guest book kits, like those from Adesso Albums mentioned on stltoday.com. Consider the size of your Polaroid photos – typically 3.5 x 4.2 inches – when choosing an album.

A binder with clear plastic sleeves offers flexibility and allows guests to easily view photos. Alternatively, a scrapbook-style album encourages creative embellishments. Ensure the album provides sufficient space for both the photo and a heartfelt message from each guest.

Setting Up Your Polaroid Guest Book Station

Create an inviting station dedicated to your Polaroid guest book. This area should be easily accessible and visually appealing to encourage participation; Include all necessary materials: the Polaroid camera, film, pens, and the chosen album or binder.

Consider adding props, as suggested for a more interactive experience. A small table draped with a decorative cloth can elevate the presentation. Ensure ample space for guests to comfortably take photos and write their messages. Clear signage with simple instructions, as discussed later, is also essential for a smooth process.

Location, Location, Location

Strategic placement of your Polaroid guest book station is crucial for maximizing guest participation. Choose a high-traffic area near the entrance of the reception, ensuring guests encounter it upon arrival. Avoid placing it directly in the path of the dance floor or buffet line to prevent congestion.

Consider a spot with good lighting, as optimal photo quality is key. A dedicated corner or a designated table away from loud music will encourage guests to linger and create thoughtful messages. Visibility is paramount – make it a focal point, subtly inviting contributions throughout the event.

Lighting for Optimal Photos

Achieving well-lit Polaroid photos is essential for a vibrant guest book. Avoid harsh direct sunlight, which can cause overexposure and washed-out images. Instead, opt for soft, diffused lighting. If the station is indoors, utilize existing ambient light sources, supplemented by portable LED panels if necessary.

Position the station to minimize shadows on guests’ faces. A slightly angled setup can help. Remember, Polaroid film has limitations; brighter environments generally yield better results. Test the lighting beforehand to ensure consistent, high-quality photos throughout the event, preserving precious memories.

Providing Clear Instructions for Guests

To ensure everyone participates comfortably, provide simple, step-by-step instructions at the Polaroid guest book station. A visually appealing sign with numbered steps is ideal. Include guidance on how to operate the camera, write a message, and adhere the photo to the album.

Consider a sample Polaroid photo and message as an example. Briefly explain the concept for those unfamiliar with instant photography. Clear instructions minimize confusion and encourage guests to contribute, creating a cherished collection of memories. A little guidance goes a long way!

Step-by-Step Instructions for Guests

First, carefully take a Polaroid photo of yourselves – embrace the fun! Second, gently shake the photo as instructed on the film packaging to initiate development. Third, once the image appears, use the provided pens to write a heartfelt message or well wishes next to the photo.

Finally, carefully peel off the adhesive backing and securely attach the photo to the designated page in the guest book album. Remember to allow sufficient drying time to prevent smudging. Enjoy capturing and sharing your memories!

Taking the Polaroid Photo

Ensure the Polaroid camera is loaded with fresh film and the flash is ready. Position yourselves within the camera’s recommended focal range for the clearest image. Press the shutter button firmly and hold the camera steady during the exposure – avoid movement!

Remember to protect the developing photo from direct sunlight immediately after ejection. Gently wave or fan the photo, do not shake vigorously, as per film instructions. This aids in the chemical process and ensures optimal image clarity. Capture a timeless memory!

Writing the Message

Once the Polaroid photo has developed sufficiently, carefully take a fine-tipped pen – consider decorative options! – and write your heartfelt message directly onto the photo’s white border. Keep the message concise and legible, ensuring it won’t fade over time.

Include your name, the date, and a special wish or memory for the couple. Personalize it with a funny anecdote or a kind sentiment; Avoid using gel pens or markers that might bleed or damage the photo’s surface. A lasting message is key!

Attaching the Photo to the Album

Carefully position the newly signed Polaroid photo onto the designated page within your chosen guest book album or binder. Utilize photo-safe adhesive – either pre-applied in the album, or photo corners, or a thin, archival-quality glue dot. Avoid traditional tape, as it can yellow and damage photos over time.

Ensure the photo is securely fastened, but not covered in adhesive. Leave a small space around the edges to prevent sticking. Consider the album’s layout and arrange photos aesthetically. A well-organized album will become a cherished keepsake for years to come.

Creative Ideas & Enhancements

Elevate your Polaroid guest book beyond simple photos and messages! Introduce a fun photo booth area with props like hats, glasses, and silly signs to encourage playful snapshots. Provide a selection of decorative pens and markers – metallic, glitter, or colorful – for guests to personalize their entries.

Add washi tape and other embellishments for a scrapbook-style touch. Consider themed props aligning with your wedding’s aesthetic. Encourage guests to write not just well wishes, but also memories or advice. These small details transform a guest book into a truly unique and memorable treasure.

Photo Booth Props

Transform your guest book station into a lively photo booth with a curated selection of props! Think beyond the basics – include oversized sunglasses, quirky hats, feather boas, and inflatable instruments. Mustaches on sticks and themed speech bubbles add instant fun. Consider props that reflect your wedding’s theme or your personalities as a couple.

DIY props are a cost-effective option, or purchase pre-made sets. Ensure props are easily accessible and encourage guests to get creative. A well-stocked prop collection guarantees entertaining and memorable Polaroid photos, enhancing the guest book experience.

Decorative Pens & Markers

Elevate your guest book’s aesthetic with a variety of decorative pens and markers! Offer guests options beyond standard black ink – think metallic golds and silvers, vibrant colors, and brush pens for calligraphy. Fine-tipped markers are ideal for detailed messages, while thicker markers create bold statements.

Consider including pens that complement your wedding color scheme. Ensure the pens write smoothly on Polaroid photos and won’t bleed through. A selection of high-quality pens encourages guests to write heartfelt and visually appealing messages, adding a personal touch to each photo.

Washi Tape & Embellishments

Introduce a playful and personalized touch with washi tape and embellishments! Washi tape, available in countless colors and patterns, allows guests to creatively frame their Polaroid photos within the album. Small stickers, decorative brads, and even tiny paper flowers can add extra flair.

Provide a curated selection that aligns with your wedding theme. Ensure the embellishments are acid-free to prevent damage to the photos over time. Guests can use these elements to highlight special dates, add whimsical designs, or simply enhance the overall visual appeal of their contributions.

Troubleshooting Common Issues

Despite careful planning, occasional hiccups can occur. Polaroid camera malfunctions, though rare, might necessitate a backup camera. Film exposure problems, resulting in overly dark or light photos, can sometimes be mitigated by adjusting the camera’s settings or the surrounding lighting.

Adhesive issues, like photos not sticking securely, can be resolved with photo corners or a high-quality, acid-free photo adhesive. Having these solutions readily available ensures a smooth guest book experience. Quick problem-solving minimizes guest frustration and keeps the fun flowing throughout the event.

Polaroid Camera Malfunctions

Unexpected camera issues can arise, even with well-maintained equipment. Common problems include film ejection failures or the camera simply not powering on. Always carry extra batteries, fully charged, as a first line of defense. If the camera malfunctions, gently check the film compartment for obstructions.

For more serious issues, having a backup Polaroid camera is crucial, preventing disruption to your guest book station. Knowing basic troubleshooting steps, like resetting the camera, can also be helpful. Remember to consult the camera’s manual for specific guidance and avoid forceful repairs.

Film Exposure Problems

Polaroid film is notoriously sensitive to light and temperature, impacting image development. Underexposed photos appear dark, while overexposed ones are washed out. Ensure guests are shooting in adequately lit spaces, avoiding direct sunlight which can cause glare. Consider the film’s ISO rating and adjust shooting conditions accordingly.

Temperature plays a vital role; cold temperatures slow development, and excessive heat can damage the film. Keep film packs at room temperature before use. If images consistently have exposure issues, test with a fresh pack of film to rule out a batch defect, acknowledging the expense noted on stltoday;com.

Adhesive Issues

Securing Polaroids into your guest book requires reliable adhesion, but issues can arise. Standard photo corners or double-sided tape are common choices, but some may lose stickiness over time. Ensure the album surface is clean and dry before applying adhesive. Consider photo-safe glue dots for a stronger, archival hold.

Avoid liquid glues, as they can warp the Polaroid film. If using tape, test a small area first to confirm it doesn’t damage the photo’s surface. Remember the investment in an Adesso Albums kit (mentioned on stltoday.com) often includes quality adhesive designed for this purpose, minimizing these concerns.

Preserving Your Polaroid Guest Book

Protecting your Polaroid guest book ensures a lasting memento of your event. Store the album in a cool, dry place away from direct sunlight, which can fade the Polaroid images over time. Avoid areas with high humidity or temperature fluctuations. Consider using acid-free sleeves for individual photos if extra protection is desired.

Regularly check for any signs of adhesive failure or photo deterioration. Handle the album with clean hands to prevent smudging or damage. As highlighted by resources like stltoday.com, this thoughtful preservation will allow future generations to enjoy this unique keepsake.

Storage Recommendations

Optimal storage is crucial for maintaining the vibrancy of your Polaroid guest book. Choose a location away from direct sunlight, as UV rays cause fading. Ideal environments are cool, dry, and have stable temperatures, avoiding attics or basements. Consider archival-quality boxes or albums designed for photo preservation.

Avoid stacking heavy items on top of the guest book, which could damage the photos or binding. Regularly inspect the storage area for pests or moisture. Following these recommendations, inspired by resources like stltoday.com, will safeguard your cherished memories for years to come.

Protecting from Damage

Safeguarding your Polaroid guest book from potential damage is essential for preserving these precious memories. Handle the album with clean, dry hands to prevent fingerprints and smudges. Consider a protective slipcover to shield it from dust and accidental spills. Avoid placing it in high-traffic areas where it could be bumped or knocked over.

Be mindful of humidity and temperature fluctuations, as these can affect the Polaroid photos. Inspired by preservation advice, like that found on stltoday.com, gentle care will ensure your guest book remains a beautiful keepsake for generations.

eq fletching guide

EverQuest Fletching Guide: A Comprehensive Overview (Updated 12/05/2025)

Welcome‚ aspiring arrow crafters! This guide‚ updated today‚ December 5th‚ 2025‚ will navigate you through EverQuest’s fletching skill. It’s remarkably easy to repeatedly craft bows and arrows.

Starting is simple‚ with vendor materials readily available for the initial 200 skill points. Beginner tasks offer free skill increases up to level 54‚ easing your progression.

Focus on reaching skill 56 for trivializing cheaper arrows‚ as detailed on the EverQuest Wiki‚ and avoid complex magic arrow crafting initially.

Fletching in EverQuest is the artisan skill dedicated to the creation of ranged weaponry – specifically‚ arrows and bows. It’s a valuable profession for players seeking self-sufficiency‚ a potential income stream‚ or simply a relaxing crafting outlet. Unlike some tradeskills reliant on extensive gathering‚ fletching benefits from readily available vendor-purchased components‚ particularly in the early stages.

The journey begins with accepting tasks from a fletching trainer‚ which are skill-level dependent. These initial quests provide a free and efficient method to boost your skill‚ up to approximately level 54 on live servers. The core loop involves repeatedly crafting bows and arrows‚ making it a relatively straightforward skill to level. However‚ mastering fletching requires understanding trivial values and optimizing material choices for efficiency.

While advanced fletching delves into specialized arrows with magical properties‚ the foundation lies in consistently producing standard arrows like round cut and parabolic cut varieties. This guide will provide a comprehensive overview‚ from beginner steps to advanced techniques‚ helping you become a proficient fletcher in the world of Norrath.

Why Fletch? Benefits and Uses

Fletching offers a multitude of benefits within EverQuest. Primarily‚ it allows players to create their own ammunition‚ reducing reliance on expensive vendor purchases or the auction house. This self-sufficiency is particularly valuable for ranged classes like Rangers‚ Archers‚ and Beastmasters‚ who consume arrows at a significant rate.

Beyond personal use‚ fletching presents a viable path to profit. Well-crafted arrows‚ especially those meeting specific stat requirements‚ are consistently in demand on the market. The repetitive nature of crafting – consistently making bows and arrows – lends itself to efficient production and potential earnings.

Furthermore‚ fletching provides a relaxing and engaging alternative to combat or questing. It’s a tradeskill that can be pursued at any level‚ offering a sense of accomplishment with each crafted item. While magic arrow creation exists‚ focusing on efficient‚ trivialized arrow production is often the most practical approach‚ especially for beginners seeking a steady income.

Getting Started: Beginner Fletching (Levels 1-50)

Begin your fletching journey by locating a trainer and accepting initial tasks. Early skill gains are easy‚ utilizing vendor materials for crafting. Focus on level 25 tasks!

Finding the Fletching Trainer

Locating a fletching trainer is your first step towards mastering the craft in EverQuest. These trainers are scattered throughout the various cities and settlements across Norrath‚ offering guidance and skill advancement opportunities. Generally‚ you’ll find them in guild halls or dedicated crafting areas within major hubs.

For new players‚ the trainers in Qeynos and Freeport are easily accessible starting points. Simply open your map and search for the fletching guild or trainer icon. Upon arrival‚ interact with the Non-Player Character (NPC) – often identified by a specific title or designation related to fletching.

The trainer will assign you initial tasks and provide the ability to purchase the foundational skills necessary to begin crafting. Remember that trainers typically have level requirements‚ so you may need to reach a certain character level before they’ll accept you as a student. Don’t hesitate to ask other players for directions if you’re having trouble finding a trainer in a specific location!

Initial Skill Progression: Easy Materials

Early fletching progression in EverQuest is remarkably straightforward‚ largely due to the accessibility of vendor-purchased materials. The initial focus should be on consistently crafting to build skill points‚ and fortunately‚ the required components are readily available from general goods merchants throughout most cities.

Specifically‚ you’ll be primarily utilizing wood‚ fletching glue‚ and feathers. These materials are inexpensive and consistently stocked‚ allowing for uninterrupted crafting sessions. Don’t worry about sourcing rare or difficult-to-obtain items at this stage; the goal is simply to gain experience and increase your skill level.

The beauty of this early phase is its simplicity. You’re essentially repeating the same crafting process over and over‚ making it an ideal activity for multitasking or relaxing while playing. Prioritize consistent crafting over attempting complex recipes until you reach a more comfortable skill level.

Early Quests and Tasks (Levels 1-25)

Beginning your fletching journey in EverQuest can be supplemented with introductory quests and tasks offered by fletching trainers. These tasks provide a valuable‚ and often free‚ method of increasing your skill level‚ particularly within the 1-25 range. Locate a fletching trainer in a major city – they will assign tasks based on your current skill.

Expect these early assignments to involve crafting specific quantities of basic arrows‚ such as round cut arrows. Completing these tasks not only grants skill increases but also familiarizes you with the crafting interface and material requirements. It’s a guided learning experience designed to ease you into the profession.

On live servers‚ you can learn most tradeskills up to a skill level of 54 by completing these simple tasks‚ making it a cost-effective way to establish a foundation in fletching. Embrace these opportunities to accelerate your progress and build a solid base for future endeavors.

Crafting Round Cut Arrows: The Foundation

Round cut arrows represent the cornerstone of early fletching in EverQuest. They are incredibly accessible‚ utilizing materials readily available from vendors‚ making them ideal for leveling your skill from 1 to approximately 36. The recipe is straightforward‚ requiring shafts‚ fletching‚ and heads – all easily purchased.

Focusing on round cut arrows allows for consistent crafting without the need for extensive gathering. This efficiency is crucial for rapid skill gains during the initial stages. Continuously crafting and selling back these arrows provides a steady‚ albeit modest‚ income stream while you progress.

Remember to craft in bulk to minimize downtime and maximize your skill increases. As your skill approaches 36‚ begin preparing to transition to parabolic cut fletches‚ but continue crafting round cut arrows until you’ve exhausted their usefulness for skill gains. They are truly the foundation!

Intermediate Fletching: Expanding Your Skills (Levels 51-100)

At levels 51-100‚ upgrade to parabolic cut fletches at skill 36. Vendor materials remain efficient‚ and crafting diverse arrow types—broadheads‚ bodkins—becomes accessible for varied combat scenarios.

Transitioning to Parabolic Cut Fletches (Skill 36+)

Reaching skill 36 marks a pivotal moment in your fletching journey. It’s time to abandon round cut fletches and embrace the superior parabolic cut. This isn’t merely a material change; it’s a necessary step to continue meaningful skill gains and access higher-tier arrow recipes.

Before diving in‚ sell back all remaining round cut fletches to the vendors. This recovers some capital and frees up inventory space for the new parabolic components. Purchasing parabolic cut fletches is now essential‚ as round cuts will no longer contribute to skill increases beyond level 36.

The transition is relatively straightforward‚ but requires a conscious shift in your crafting focus. Parabolic cut arrows offer improved performance characteristics‚ making them a worthwhile investment even if you intend to primarily craft for skill-ups. Remember to consistently check vendor stock‚ as availability can fluctuate depending on server population and demand.

This upgrade unlocks a new phase of fletching‚ preparing you for more complex recipes and ultimately‚ mastery of the craft. Don’t underestimate the importance of this change!

Optimizing for 56 Skill: Trivialize Point

The pursuit of fletching skill isn’t about crafting the best arrows‚ but about efficient gains. Skill 56 represents a crucial “trivialize point” – the level where you can consistently craft specific arrows without failure‚ maximizing experience per hour. This is achieved by crafting arrows that have a trivial skill requirement at 56.

Focus your efforts on the cheapest 150 range arrows available. These arrows offer the best balance between material cost and skill gain at this level. Crafting higher-range or more expensive arrows won’t yield faster progress; they simply waste resources on successful crafts.

Ignore the temptation to experiment with magic or poisoned arrows at this stage. While they may be valuable on the market‚ they offer no advantage for skill-up purposes and can be significantly more expensive. The wiki is your friend – consult it for confirmed trivial values.

Reaching 56 and exploiting this trivialize point is the most efficient path to 200 skill. It’s a grind‚ but a focused grind!

Vendor-Purchased Materials: Efficiency is Key

For the aspiring fletcher‚ especially in the early to intermediate stages‚ efficiency reigns supreme; This translates directly to utilizing vendor-purchased materials whenever possible. The initial 200 skill points are remarkably accessible because all necessary components are readily available from merchants throughout Norrath.

Forget the time-consuming and often costly endeavor of gathering your own wood‚ feathers‚ and metal. The cost of travel and the risk of competition from other players outweigh any potential savings. Vendors provide a consistent and reliable supply‚ allowing you to focus solely on the crafting process.

Specifically‚ when leveling from 1 to 50‚ and even beyond to 100‚ prioritize buying your materials. This streamlined approach minimizes downtime and maximizes skill gains. It’s a simple strategy‚ but one that dramatically accelerates your progress.

Embrace the convenience and cost-effectiveness of vendor materials – your skill and your wallet will thank you!

Crafting Different Arrow Types: Broadheads‚ Bodkins

As your fletching skill advances beyond the foundational round and parabolic cut arrows‚ you’ll unlock the ability to craft specialized arrowheads – broadheads and bodkins. These aren’t merely cosmetic variations; they serve distinct purposes and cater to different combat scenarios.

Broadheads‚ typically favored against fleshy targets‚ excel at inflicting bleeding wounds. They are ideal for hunting and engaging creatures with less armor. Bodkins‚ conversely‚ are designed to pierce armor effectively. These are your go-to choice when facing heavily armored opponents‚ maximizing your damage output.

Understanding these differences is crucial for optimizing your arrow selection. While crafting both types is beneficial‚ focusing on bodkins as your skill increases provides a significant advantage in Player versus Player (PvP) combat and challenging dungeons.

Experiment with crafting both‚ but prioritize bodkins for overall versatility and effectiveness. Remember to consult the EverQuest Wiki for specific stat comparisons and optimal usage scenarios.

Advanced Fletching: Mastering the Craft (Levels 101-200)

Beyond level 100‚ focus on material sourcing – gathering or purchasing – and specialized arrow crafting. Consider market demands for profit‚ and understand damage types.

Understanding Arrow Ranges and Damage Types

Mastering fletching extends beyond simply crafting arrows; it requires understanding how arrow characteristics impact combat effectiveness. Different arrow types excel at varying ranges and against specific enemy types. Generally‚ shorter-range arrows‚ like those around 150 range‚ are easier to trivialize during crafting‚ offering a cost-effective approach for early to mid-level players.

Damage types are crucial. While basic arrows deal piercing damage‚ advanced fletchers can create specialized arrows. Broadheads‚ for instance‚ might be optimized for increased damage against larger creatures‚ while bodkins are designed to penetrate armor effectively.

Consider the target’s armor class and resistances when selecting an arrow type. A heavily armored foe will require bodkins‚ whereas a creature with low armor might be more susceptible to broadhead damage. Experimentation and knowledge of enemy weaknesses are key to maximizing your arrow’s impact. The EverQuest Wiki provides detailed information on enemy vulnerabilities‚ aiding in informed arrow selection.

Ultimately‚ a skilled fletcher doesn’t just make arrows; they create tools tailored to specific combat scenarios‚ enhancing a player’s overall effectiveness.

Sourcing Materials: Gathering vs. Purchasing

Fletching material acquisition presents a fundamental choice: gathering or purchasing. Initially‚ vendor-purchased materials are highly recommended‚ particularly for levels 1-200. This approach simplifies the process‚ allowing for consistent skill gains without the time investment of resource collection. The early stages are remarkably easy using readily available vendor supplies.

However‚ as you advance and seek to craft higher-quality arrows‚ gathering becomes increasingly viable. Certain materials‚ especially those required for specialized arrows‚ may be scarce or expensive on the market. For these‚ foraging and hunting become essential.

Consider the opportunity cost of your time. Is the potential profit from gathering greater than the value of time spent leveling other skills or completing quests? Market fluctuations also play a role; monitor prices to determine when purchasing is more economical than gathering.

Ultimately‚ a balanced approach is often best. Utilize vendors for common materials and supplement with gathered resources for rarer components‚ optimizing both efficiency and profitability.

Crafting Specialized Arrows: Magic and Poisoned

Venturing into magic and poisoned arrow crafting represents a significant step in fletching mastery. These arrows offer enhanced combat capabilities‚ but demand more complex recipes and rarer materials. While tempting‚ initially focusing on these isn’t necessary; trivialize points are easily reached with simpler arrow types.

Magic arrows require specific magical components‚ often obtained through quest rewards or monster drops. The crafting process itself is similar to standard arrows‚ but the addition of magical essences imbues them with unique properties‚ like increased damage or elemental effects.

Poisoned arrows utilize various poisons‚ also acquired through quests or crafted by alchemists. Applying poison adds a damage-over-time effect‚ proving effective against certain enemies. Be mindful of poison potency and duration when selecting materials.

However‚ remember that there’s no need to make magic arrows. Focus on mastering the fundamentals before tackling these advanced techniques‚ optimizing your skill and minimizing wasted resources.

Fletching for Profit: Market Considerations

Turning your fletching skill into a profitable venture requires careful market analysis. While crafting is rewarding‚ understanding supply and demand is crucial for maximizing earnings. The EverQuest marketplace fluctuates‚ so consistent monitoring is essential.

Generally‚ basic arrow types‚ like those crafted during early skill progression‚ are readily available and often have lower profit margins. However‚ consistent sales volume can still generate income. Specialized arrows‚ particularly those with magical enhancements or potent poisons‚ command higher prices.

Consider server population and player activity. Servers with a large player base typically exhibit higher demand for consumables like arrows. Research competitor pricing to establish competitive rates. Timing is also key; peak hours often see increased sales.

Remember‚ efficient material sourcing is vital. Vendor-purchased materials offer convenience‚ but gathering can reduce costs. Ultimately‚ successful fletching for profit blends crafting skill with astute market awareness.

Fletching Recipes and Material Lists

Detailed breakdowns of recipes are essential for success. Round Cut and Parabolic Cut arrows form the foundation‚ requiring specific materials. Advanced recipes unlock with skill‚ offering diverse arrow options.

Consult the EverQuest Wiki for comprehensive lists‚ ensuring accurate material acquisition and efficient crafting.

Round Cut Arrow Recipe Breakdown

Round Cut arrows represent the cornerstone of beginner fletching in EverQuest‚ providing a readily accessible path to skill advancement. These arrows are remarkably simple to craft‚ utilizing entirely vendor-purchased materials‚ making them ideal for players just starting their fletching journey. The recipe itself consists of three core components: 1x Arrow Shaft‚ 1x Fletching‚ and 1x Head.

Specifically‚ you’ll need a Wooden Arrow Shaft‚ Round Cut Fletching (purchased from a fletching trainer or general goods vendor)‚ and a standard Arrow Head. The combination of these inexpensive components allows for rapid skill gains‚ particularly in the early levels (1-35). Focusing on mass production of Round Cut arrows is a highly efficient strategy for quickly leveling up your fletching skill.

Remember to consistently sell back any failed attempts to recoup some of your investment. As your skill increases‚ you’ll eventually transition to more advanced arrow types‚ but mastering the Round Cut arrow is a crucial first step.

Parabolic Cut Arrow Recipe Breakdown

Parabolic Cut arrows mark a significant step forward in EverQuest fletching‚ becoming available at skill level 36. Transitioning from Round Cut fletches to Parabolic Cut is crucial for continued progression‚ offering improved efficiency and setting the stage for crafting higher-quality arrows. The recipe mirrors the Round Cut arrow’s simplicity‚ maintaining the same three core components: 1x Arrow Shaft‚ 1x Fletching‚ and 1x Head.

However‚ the key difference lies in the fletching type – you’ll now require Parabolic Cut Fletching‚ obtainable from a fletching trainer. Combine this with a Wooden Arrow Shaft and an Arrow Head. At skill 56‚ these arrows trivialize‚ meaning you achieve a 100% success rate‚ maximizing your skill gains and minimizing wasted materials.

Prioritize selling off your remaining Round Cut fletches to make room for the more efficient Parabolic Cut variety. This upgrade is essential for optimizing your fletching experience and reaching higher skill levels.

Advanced Arrow Recipe Examples

Advanced fletching in EverQuest extends beyond basic arrow types‚ venturing into specialized creations like magic and poisoned arrows. While initially complex‚ mastering these recipes unlocks significant profit potential and caters to specific player needs. Let’s examine a few examples.

A Greater Poisoned Arrow typically requires a Parabolic Cut Arrow‚ a Vial of Greater Poison‚ and potentially a specific type of Arrow Head depending on the desired damage type. Similarly‚ crafting a Magic Arrow might involve a Parabolic Cut Arrow combined with a Mana Stone or a specific magical essence.

These recipes often demand higher fletching skill and access to rarer materials‚ sourced through gathering or purchasing from other players. Remember to consult the EverQuest Wiki for precise ingredient lists and skill requirements. Focusing on these advanced arrows‚ while initially costly‚ can yield substantial returns in the player marketplace.

Tips and Tricks for Efficient Fletching

Maximize gains by utilizing the EverQuest Wiki for recipes and trivial values. Minimize failures by understanding these values and focusing on skill 56 for trivializing arrows!

Utilizing the EverQuest Wiki

The EverQuest Wiki is an absolutely invaluable resource for any aspiring fletcher‚ offering a wealth of information to streamline your crafting journey. It’s the central hub for all things fletching‚ providing detailed recipe breakdowns‚ material lists‚ and crucially‚ trivial values for each craftable item.

Don’t attempt to memorize everything; instead‚ learn to navigate the Wiki effectively. Search for specific arrow types or fletching materials to quickly find the information you need. Pay close attention to the trivial values listed – these indicate the skill level required to guarantee a successful craft without failure.

The Wiki also details vendor locations for essential materials‚ saving you valuable time and effort. Regularly check the Wiki for updates‚ as information can change with game patches or discoveries. It’s a dynamic resource maintained by the community‚ ensuring its accuracy and relevance. Mastering the Wiki is akin to having a secret weapon in your fletching arsenal!

Minimizing Failure Rates

Failure in fletching can be frustrating‚ wasting valuable materials and time. Thankfully‚ several strategies exist to significantly minimize these occurrences. The key lies in understanding and utilizing trivial values. Always craft items at or above their listed trivial. Crafting below the trivial guarantees failure‚ while crafting at or above ensures success.

Initially‚ focus on crafting items that trivialize at your current skill level. As you gain skill‚ continually check the EverQuest Wiki for updated trivial values. Don’t rush to craft higher-level arrows before your skill is sufficient. Vendor-purchased materials are consistent‚ reducing the risk of variable quality impacting your crafts.

Remember‚ reaching skill 56 allows you to trivialize the cheapest 150 range arrows consistently. Avoid complex recipes like magic or poisoned arrows until your skill is considerably higher. Patience and adherence to trivial values are your greatest allies in achieving a high success rate.

Maximizing Skill Gains

Efficient skill progression is crucial when leveling fletching in EverQuest. Early on‚ completing beginner tasks assigned by the fletching trainer provides free skill increases up to level 54. However‚ this method plateaus quickly. After that‚ focus on crafting items that yield the highest skill gain per craft.

Initially‚ crafting round cut arrows is the most efficient method‚ utilizing readily available vendor materials. As your skill increases‚ transition to parabolic cut fletches at skill 36. Continuously monitor the EverQuest Wiki for updated trivial values to ensure each craft contributes to skill advancement.

Prioritize crafting items that are just above your current skill level. Avoid crafting items significantly higher than your skill‚ as the skill gain diminishes. Remember‚ the first 200 points are relatively easy due to the accessibility of vendor materials. Consistent crafting at the optimal trivial will accelerate your progress.

Understanding Fletching Trivial Values

Fletching trivial values are paramount for maximizing skill gains in EverQuest. A trivial value represents the skill level required to guarantee a successful craft without any skill-ups. Crafting items at or slightly above your current skill level‚ but below the item’s trivial‚ yields the most experience.

The EverQuest Wiki is your primary resource for finding these values. Regularly consult it to determine the optimal arrows to craft at each skill bracket. For example‚ aiming for a skill of 56 allows you to trivialize the cheapest 150 range arrows‚ providing efficient crafting.

When an item’s skill requirement exceeds its trivial‚ failure rates increase‚ and skill gains diminish. Therefore‚ constantly adjusting your crafting choices based on your skill and the item’s trivial is essential. Understanding and utilizing trivial values is the key to rapid and cost-effective fletching progression.

tour du mont blanc self-guided

Tour du Mont Blanc Self-Guided: A Comprehensive Plan

Embark on an unforgettable 170-kilometer journey! This guide details planning a self-supported trek around Mont Blanc, exploring France, Italy, and Switzerland’s stunning landscapes.

The Tour du Mont Blanc (TMB) is arguably Europe’s most iconic long-distance hiking trail, circling the majestic Mont Blanc massif. This incredible trek traverses three countries – France, Italy, and Switzerland – offering a diverse and breathtaking experience for hikers of varying levels.

Typically completed over 11 to 14 days, the TMB presents a challenging yet rewarding adventure. It’s a journey through alpine meadows, rugged mountain passes, and charming villages, immersing you in the heart of the Alps. Whether you’re an experienced trekker or a determined beginner, the TMB promises unforgettable views and a profound connection with nature.

This comprehensive plan focuses on undertaking the TMB self-guided, empowering you to explore at your own pace and create a truly personalized adventure.

Why Choose a Self-Guided Tour?

Opting for a self-guided Tour du Mont Blanc offers unparalleled freedom and flexibility. Unlike organized tours with fixed schedules, you dictate your pace, choosing where to linger and explore. This allows for spontaneous detours to hidden gems and a more immersive experience in the local culture.

Self-guided tours also tend to be more budget-friendly, as you avoid the premium charged by tour operators. You have complete control over accommodation choices, from rustic refuges to comfortable hotels.

For the independent and adventurous hiker, a self-guided TMB is the ultimate challenge and reward, fostering a deeper sense of accomplishment and connection with the mountains.

TMB Overview: Route and Distance

The Tour du Mont Blanc (TMB) is a classic 170-kilometer (approximately 106 miles) circuit encircling the Mont Blanc massif. The trail traverses through three countries: France, Italy, and Switzerland, offering diverse landscapes and cultural experiences.

Typically completed in 11-14 days, the route gains around 10,000 meters (32,800 feet) of elevation, presenting a significant physical challenge. The path combines well-maintained trails, alpine passes, and charming village sections.

The TMB isn’t a single, defined path, but rather a network of trails allowing for variations. Expect varied terrain, from lush valleys to rocky mountain slopes, making it a rewarding adventure for experienced hikers.

Best Time to Hike the Tour du Mont Blanc

The optimal window for hiking the Tour du Mont Blanc is typically from mid-June to mid-September. This period offers the most favorable weather conditions, with warmer temperatures and reduced snow cover at higher altitudes.

July and August are the warmest months, but also the busiest, meaning refuges and trails can be crowded. June and September provide a good balance of pleasant weather and fewer hikers.

Be prepared for variable conditions, even during peak season. Snow can linger on passes into July, and sudden storms are possible. Checking weather forecasts before and during your trek is crucial for a safe and enjoyable experience.

Physical Fitness Preparation

The Tour du Mont Blanc is a demanding trek requiring a good level of physical fitness. Prior training is essential for enjoyment and safety. Focus on building cardiovascular endurance through activities like hiking, running, and cycling;

Incorporate strength training to prepare your legs, core, and back for carrying a backpack over varied terrain. Practice hiking with a weighted pack, gradually increasing the weight and distance.

Regular hill work is crucial, simulating the ascents and descents of the TMB. Aim for several long hikes before your trip, ideally including back-to-back days to build stamina.

Essential Gear Checklist

Packing strategically is vital for a comfortable TMB experience. Prioritize lightweight, durable gear. A well-fitted backpack (50-70 liters) is fundamental, alongside waterproof hiking boots broken-in before your trek. Moisture-wicking socks are crucial to prevent blisters.

Layered clothing is key – base layers, insulating mid-layers (fleece or down), and a waterproof/windproof outer shell. Don’t forget a hat, gloves, and sunglasses. Essential extras include a headlamp, trekking poles, a first-aid kit, and a reusable water bottle.

Backpack Selection & Size

Choosing the right backpack is paramount for comfort. A capacity of 50-70 liters generally suits the TMB, accommodating multi-day supplies. Prioritize a pack with a supportive hip belt and adjustable torso length for a customized fit.

Consider weight distribution and accessibility of compartments. Look for features like external attachment points for trekking poles and a rain cover. Test the pack with weight before your trip! Lightweight materials are beneficial, but durability is essential for rugged terrain. Ensure a snug, balanced fit to prevent strain.

Hiking Boots & Socks

Invest in well-broken-in hiking boots! Sturdy, waterproof boots with ankle support are crucial for the TMB’s varied terrain. Prioritize comfort and a secure fit to prevent blisters. Spend time breaking them in on varied trails before your trek.

Pair your boots with quality hiking socks. Merino wool or synthetic blends are excellent choices, offering moisture-wicking properties and cushioning. Consider liner socks to further reduce friction. Carry extra socks to change during the day, keeping your feet dry and comfortable. Proper foot care is vital for enjoying the trail!

Clothing Layers for Variable Weather

Prepare for rapidly changing mountain conditions! The TMB experiences diverse weather, even in summer. Layering is essential for staying comfortable. Start with a moisture-wicking base layer, add an insulating mid-layer (fleece or down), and finish with a waterproof and windproof outer shell.

Pack versatile items like a lightweight down jacket, hiking pants (convertible are useful), and a warm hat and gloves. Don’t forget sun protection – a hat, sunglasses, and sunscreen are vital. Be prepared for rain, sun, and cool temperatures, potentially all in one day!

Accommodation Options

Choosing where to stay shapes your TMB experience! Three primary options exist: refuges (mountain huts), offering basic but sociable lodging; gîtes (rural accommodation), providing more privacy and often kitchen facilities; and hotels & B&Bs in villages, for added comfort and amenities.

Refuges require booking well in advance, especially during peak season. Gîtes are a good compromise, while village stays necessitate more planning for transport. Consider a mix to balance cost, comfort, and the authentic mountain experience. Pre-booking is highly recommended for all options, particularly for a self-guided tour.

Refuges (Mountain Huts)

Refuges are the heart of the TMB experience! These mountain huts offer dormitory-style accommodation, providing a social and convenient base for hikers. Expect basic facilities – bunk beds, shared bathrooms, and communal dining areas. Reservations are absolutely essential, often months in advance, especially during July and August.

Half-board (dinner and breakfast) is typically included, simplifying meal planning. Refuges offer a unique atmosphere, fostering camaraderie among hikers. Be prepared for limited privacy and potential noise. They represent a truly immersive way to experience the mountains, but booking early is paramount!

Gîtes (Rural Accommodation)

Gîtes offer a charming alternative to refuges and hotels! These rural accommodations, common in France and Italy, provide more privacy and often self-catering facilities. Expect simple, comfortable rooms, sometimes with shared bathrooms. Gîtes are ideal for those seeking a quieter experience and the flexibility to prepare their own meals.

They are frequently located in picturesque villages, offering a glimpse into local life; Booking in advance is recommended, though generally less critical than for refuges. Gîtes can be a cost-effective option, particularly for smaller groups or families. They provide a delightful blend of comfort and authenticity along the TMB route.

Hotels & B&Bs in Villages

Villages along the Tour du Mont Blanc offer a range of hotels and bed & breakfasts! These provide the highest level of comfort and convenience, often including private bathrooms, restaurants, and other amenities. They are a great option for those prioritizing rest and relaxation after long hiking days. Expect to pay a premium compared to refuges or gîtes.

Booking well in advance is crucial, especially during peak season. Hotels and B&Bs allow for a more flexible itinerary, as you aren’t tied to refuge meal times or availability. They offer a chance to immerse yourself in local culture and enjoy village life. Consider these for occasional splurges!

Planning Your Itinerary

Careful itinerary planning is essential for a successful Tour du Mont Blanc! Most hikers complete the circuit in 11-14 days, averaging between 13-16 kilometers (8-10 miles) per stage. Popular starting points include Chamonix (France), Les Houches (France), and Courmayeur (Italy). Each offers unique logistical advantages.

Consider your fitness level and desired pace when determining daily distances. Route variations exist, allowing you to customize the trek. Explore alternative paths for challenging ascents or quieter trails! Pre-booking accommodation is highly recommended, especially during peak season, to secure your preferred lodging along the route.

Typical Stage Lengths (11-14 Days)

A standard Tour du Mont Blanc itinerary spans 11 to 14 days, with daily stages averaging 13 to 16 kilometers (8 to 10 miles). However, distances can vary significantly based on elevation gain and terrain difficulty. Shorter days allow for more leisurely exploration and rest, while longer days cater to experienced hikers seeking a faster pace.

Expect some stages to be considerably more challenging, involving steep ascents and descents. Plan for approximately 6-8 hours of hiking per day, factoring in breaks for meals and enjoying the scenery. Flexibility is key; adjust your itinerary as needed based on weather conditions and personal energy levels.

Popular Starting Points (Chamonix, Les Houches, Courmayeur)

Chamonix, France, is the most common launchpad for the TMB, offering excellent transport links and a vibrant atmosphere. Les Houches, a quieter village near Chamonix, provides a gentler start with less crowded trails. Courmayeur, Italy, is another favored option, particularly for those flying into Turin.

Each starting point influences the initial direction of the circuit. Chamonix typically leads clockwise, while Courmayeur often begins counter-clockwise. Consider accessibility, accommodation options, and personal preference when selecting your starting location. Regardless of your choice, ensure convenient transportation to and from the trailhead;

Route Variations & Alternatives

The classic TMB offers several variations to tailor the trek to your fitness level and preferences. The Grand Balconies route provides stunning views but can be exposed. The Fenêtre d’Arpette is a challenging high-altitude pass, offering a more remote experience; Alternatively, the Bonhomme route avoids the Fenêtre, providing a less strenuous option.

Shortcuts and extensions are also possible, allowing you to customize the duration and difficulty. Consider adding side trips to nearby peaks or valleys. Always research conditions and assess your capabilities before attempting alternative routes. Flexibility is key for a successful self-guided adventure!

Navigation & Mapping

Reliable navigation is crucial for a self-guided Tour du Mont Blanc. Detailed topographic maps, such as those from IGN or Kompass, are essential, alongside a compass and the ability to use them. Guidebooks provide valuable route descriptions and elevation profiles.

GPS devices and smartphone apps (like Gaia GPS or ViewRanger) offer added security, but shouldn’t replace traditional methods. Download offline maps before your trip, as cell service is limited. Familiarize yourself with map reading and GPS usage before setting off. Carry extra batteries or a power bank for electronic devices.

Using Maps & Guidebooks

Detailed topographic maps are fundamental for TMB navigation. Look for maps with a scale of 1:25,000 or 1:50,000, covering the specific sections you’ll be hiking. IGN (France), Kompass (general Alpine region), and local providers offer excellent options. Learn to interpret contour lines, identify landmarks, and understand map symbols.

Complement maps with a dedicated guidebook. These provide route descriptions, elevation profiles, refuge information, and points of interest. Cicerone Press and Sunflower Books are reputable publishers. Cross-reference map information with guidebook details to ensure accuracy and enhance your understanding of the terrain.

GPS Devices & Apps

GPS devices and smartphone apps are valuable supplements, not replacements, for traditional navigation. Download offline maps before your trip, as cell service is unreliable in the mountains. Gaia GPS, AllTrails, and Komoot are popular choices, offering TMB routes and trail information. Familiarize yourself with the app’s features before departing.

Carry a fully charged power bank to extend your device’s battery life. Pre-download GPX files of the TMB route for use in your GPS device. Always verify GPS data with your map and compass, as technology can fail. Use GPS to confirm your location and track your progress, but rely on traditional skills for primary navigation.

Food & Water on the Trail

Refuges offer meals, but they’re expensive and require reservations. Pack high-energy snacks like nuts, dried fruit, and energy bars. Consider dehydrated meals to reduce weight. Resupply points are available in villages along the route, but options can be limited. Plan your food purchases accordingly.

Water sources are generally plentiful, but treat all water before drinking. Use a water filter or purification tablets to eliminate bacteria and viruses. Carry enough water between sources, especially during warmer months. Refill at streams, fountains, and refuges. Staying hydrated is crucial for maintaining energy levels and preventing altitude sickness.

Budgeting for a Self-Guided TMB

A self-guided TMB can range from €80-€150 per day, depending on your choices. Accommodation is a major cost; refuges (€60-€80/night), gîtes (€40-€60/night), and hotels (€100+/night) vary significantly. Food costs depend on self-catering versus refuge meals (€20-€40/day). Transportation (flights, buses, transfers) adds to the expense.

Factor in map/guidebook costs, potential GPS device rental, and insurance. Allow a buffer for unexpected expenses like gear repairs or emergency situations. Pre-booking accommodation can sometimes secure better rates. Careful planning and prioritizing can help you manage costs effectively for this incredible adventure.

Booking Accommodation in Advance

Advance booking is crucial, especially during peak season (July-August)! Refuges and gîtes fill up months ahead. Online reservation systems are available for many accommodations, but some require phone calls. Consider booking a mix – refuges for mountain stages, gîtes/hotels in villages. Flexibility is key; have backup options in case your first choice is unavailable;

Websites specializing in TMB accommodation can simplify the process. Confirm booking details carefully, including dates, bed type, and meal options. Be aware of cancellation policies. Early booking secures your preferred locations and avoids last-minute stress, ensuring a comfortable trek.

Transportation to and from the Trail

Chamonix is the most common starting/ending point, easily accessible by train from Geneva Airport (approx. 3 hours). Other starting points like Les Houches or Courmayeur require more complex travel arrangements. Consider bus connections between trailheads and transport hubs. Pre-booking train tickets, especially during peak season, is highly recommended.

Airport transfers are available, but can be expensive. Local buses offer a cost-effective alternative. Research transportation options thoroughly before your trip. Factor in travel time when planning your itinerary. Ensure your luggage is manageable for public transport.

Safety Considerations

Mountain weather is unpredictable; be prepared for rapid changes. Check forecasts daily and carry appropriate clothing. Be aware of potential hazards like steep descents, rocky terrain, and river crossings. Inform someone of your itinerary and expected return date. Carry a first-aid kit and know how to use it.

Learn emergency procedures and have contact information readily available. Understand altitude sickness symptoms and prevention. Stay on marked trails and avoid shortcuts. Be cautious of wildlife and maintain a safe distance. Consider a personal locator beacon (PLB) for remote areas.

Mountain Weather & Hazards

Alpine weather shifts rapidly, presenting significant challenges. Expect sunshine, rain, and even snow in a single day, regardless of season. Fog can reduce visibility dramatically, increasing navigation difficulty. Thunderstorms are common, especially in the afternoons – seek shelter immediately. Be aware of potential rockfall on steep trails.

Glacier crossings require specialized equipment and expertise; avoid them without proper guidance. River levels can rise quickly due to rainfall, making crossings dangerous. Hypothermia is a serious risk even in summer; dress in layers. Sun exposure is intense at altitude – use sunscreen, hats, and sunglasses.

Emergency Procedures & Contacts

Familiarize yourself with local emergency numbers before starting your trek. In France, dial 112 for all emergencies. Italy uses 112 as well, while Switzerland’s number is 144 for medical emergencies and 112 generally. Carry a fully charged mobile phone, but coverage is unreliable in remote areas.

Know how to activate your insurance and have policy details readily available. Inform someone of your itinerary and check in regularly. Learn basic first aid and carry a comprehensive kit. If lost, stay put and signal for help. Refuges can assist in contacting emergency services.

Language & Communication

The Tour du Mont Blanc traverses three countries, each with its primary language: French in France, Italian in Italy, and German/French in Switzerland. While English is spoken in tourist areas, learning basic phrases in each language is highly recommended for interacting with locals and refuge staff.

Download a translation app on your smartphone, but remember coverage is limited. Carry a phrasebook as a backup. Communication can be challenging in remote areas; refuges often have limited Wi-Fi. Be prepared for potential language barriers and practice patience and clear communication.

Cultural Etiquette in the Regions

Respect local customs as the TMB passes through diverse cultures. In France, a polite “Bonjour” upon entering shops is expected. Italy values a relaxed pace; avoid rushing interactions. Switzerland emphasizes punctuality and directness. Refuges are communal spaces; be mindful of noise levels and shared facilities.

Dress modestly when visiting villages and churches. Tipping isn’t mandatory but appreciated for good service. Learn a few basic greetings in each language. Be aware of local traditions and show respect for the environment and communities you encounter along the trail.

Dealing with Blisters & Common Hiking Injuries

Blisters are common on the TMB; prevention is key with well-fitting boots and moisture-wicking socks. Carry blister treatment – moleskin, tape, and antiseptic wipes. Address hotspots immediately before they develop into blisters. Ankle sprains and knee pain are also frequent. Use trekking poles for stability and reduce joint stress.

Pack a basic first-aid kit including pain relievers, bandages, and antiseptic. Know your limits and don’t push through significant pain. Seek help if an injury worsens or doesn’t improve. Rest and elevation are crucial for recovery on the trail.

Packing Light: Minimizing Weight

Weight is critical on the TMB; aim for a base weight of under 10kg (22lbs). Choose lightweight gear – tent, sleeping bag, and cooking system. Multi-use items are invaluable; a buff can be a scarf, headband, or face covering. Clothing should be layered, minimizing redundancy. Carefully consider food choices, opting for calorie-dense options.

Leave unnecessary items behind – bulky books, extra toiletries. Repackage food to reduce packaging weight. Share gear with hiking partners when possible. Every ounce counts, impacting your enjoyment and reducing strain on your body throughout the challenging trek.

Responsible Hiking & Leave No Trace Principles

Protect this pristine environment by adhering to Leave No Trace principles. Pack out everything you pack in, including food wrappers and toilet paper. Stay on marked trails to avoid erosion and protect fragile vegetation. Minimize campfire impacts – consider using a stove instead. Respect wildlife; observe from a distance and never feed animals.

Be considerate of other hikers and local communities. Properly dispose of waste, using designated facilities when available. Leave natural objects as you find them. Support local businesses and economies. Preserve the beauty of the TMB for future generations to enjoy.

Wildlife Encounters & Safety

The TMB region is home to diverse wildlife, including ibex, chamois, marmots, and birds of prey. Maintain a safe distance and never approach or feed animals. Store food securely to avoid attracting wildlife to campsites or refuges. Be aware of potential hazards like wild boar, though encounters are rare.

Carry a whistle and know how to use it to signal for help. Report any aggressive animal behavior to local authorities. Be particularly cautious at dawn and dusk when animals are most active. Respect their habitat and observe them from afar, appreciating their natural beauty without interference.

Training Hikes Before the TMB

Adequate preparation is crucial for enjoying the TMB. Begin training several months in advance with progressively longer hikes. Focus on building endurance with back-to-back hiking days, simulating consecutive stages. Incorporate elevation gain to prepare for the mountainous terrain. Practice hiking with a weighted pack, gradually increasing the weight to match your anticipated load.

Include hill repeats and stair climbing in your routine. Strengthen core and leg muscles through targeted exercises. Break in your hiking boots thoroughly to prevent blisters. Test your gear on training hikes to identify any issues. Prioritize consistency over intensity, building a solid foundation of fitness.

Insurance for Hiking in the Alps

Comprehensive travel insurance is essential for a safe TMB experience. Ensure your policy covers hiking at altitude, specifically including activities like trekking and mountaineering, even if not technical climbing. Verify coverage for emergency evacuation, including helicopter rescue, which can be costly in the Alps. Check for medical expense coverage, including repatriation if needed.

Look for policies that cover trip cancellation or interruption due to unforeseen circumstances. Consider supplemental insurance if your existing policy has limitations. Read the fine print carefully to understand exclusions and limitations. Inform your insurer about your planned itinerary and activities.

Resources for Planning (Websites & Apps)

Numerous online resources aid TMB planning. Walks Worldwide offers itinerary inspiration, while various blogs detail personal experiences. AllTrails provides trail maps and user reviews, useful for route variations. Komoot is excellent for navigation and discovering hidden gems. Visorando specializes in hiking routes, including the TMB.

The official TMB website (tourdumontblanc.com) is a central hub. Refuge booking platforms simplify accommodation arrangements. Local tourism websites offer information on transportation and village amenities. Utilize GPS apps like Gaia GPS or Maps.me for offline mapping. Don’t forget forums for community advice!

Post-Hike Recovery & Reflection

Post-TMB recovery is crucial. Prioritize rest and rehydration after days on the trail. Gentle stretching and foam rolling can alleviate muscle soreness; Replenish energy stores with nutritious meals. Allow ample time for your body to adapt – don’t rush back into intense activity!

Reflect on your accomplishment. Journaling about your experiences enhances memory and provides valuable insights. Share photos and stories with fellow hikers. Consider what you learned about yourself and the mountains. Plan your next adventure! The TMB is a transformative journey; savor the memories and lessons learned.