honeywell rth221b installation manual

Honeywell RTH221B Installation Manual: A Comprehensive Guide

Welcome! This comprehensive guide details the Honeywell RTH221B thermostat installation, offering step-by-step instructions for a successful setup. Keep this manual handy for future reference and reliable operation.

Important: Refer to the owners manual for detailed safety precautions and disposal information, especially regarding mercury tubes in older thermostats.

Congratulations on selecting the Honeywell RTH221B programmable thermostat! This device is engineered to provide years of dependable service and user-friendly climate control within your home. The RTH221B offers a backlit display for enhanced visibility, simplifying temperature adjustments and schedule programming.

This thermostat is designed for compatibility with various heating and cooling systems, including heat-only, cool-only, and combined heat/cool configurations. Its intuitive push-button interface allows for easy operation, while programmable features enable customized temperature schedules to optimize comfort and energy savings.

Before beginning the installation process, carefully review this manual and the included instructions. Understanding the wiring diagrams and safety guidelines is crucial for a correct and safe installation. The Honeywell Home trademark is utilized under license, ensuring quality and reliability.

Understanding the Package Contents

Upon opening your Honeywell RTH221B package, please verify that all components are present. The standard package includes the RTH221B thermostat unit itself, featuring a user-friendly interface and backlit display. You should also find a baseplate designed for secure wall mounting, ensuring stability during operation.

Additionally, the package contains mounting screws and anchors for attaching the baseplate to various wall types. A wire label kit is included to facilitate accurate wire identification during the removal of your old thermostat – a crucial step for correct wiring.

Finally, this installation manual is provided to guide you through each stage of the process. If any components are missing or damaged, immediately contact Honeywell Home Support for assistance before proceeding with the installation. Retain all packaging materials for potential returns or warranty claims.

Safety Precautions

Important Safety Information: Before beginning the Honeywell RTH221B installation, always disconnect power to your HVAC system at the breaker box to prevent electrical shock. Failure to do so could result in serious injury or damage to your equipment. If you are uncomfortable working with electrical wiring, consult a qualified HVAC technician.

Exercise caution when handling wiring, ensuring wires are securely connected to prevent shorts or loose connections. Be particularly careful if your old thermostat contains a mercury tube; follow the specific disposal instructions outlined in the manual to avoid environmental contamination.

This thermostat is designed for indoor use only. Do not expose it to direct sunlight, extreme temperatures, or moisture. Keep the manual accessible for future reference and troubleshooting. Always adhere to local electrical codes during installation.

Preparing for Installation

Begin by identifying your HVAC system type – heat only, cool only, or heat/cool – and gather the necessary tools. Crucially, turn off power!

Identifying Your System Type (Heat Only, Cool Only, Heat/Cool)

Determining your HVAC system type is essential before beginning the installation process. Carefully examine your existing thermostat wiring and system configuration. A heat-only system utilizes wires connected solely for heating functions, typically with a single wire for power.

Cool-only systems, conversely, will have wiring dedicated exclusively to cooling, also usually with a power wire. The most common configuration is a heat/cool system, which incorporates wires for both heating and cooling operations, alongside a common wire for power.

Consult your HVAC system’s documentation or a qualified technician if you are unsure about your system type. Incorrect wiring based on an incorrect system identification can lead to malfunctions or damage to your equipment. Accurate identification ensures proper thermostat functionality.

Tools Required for Installation

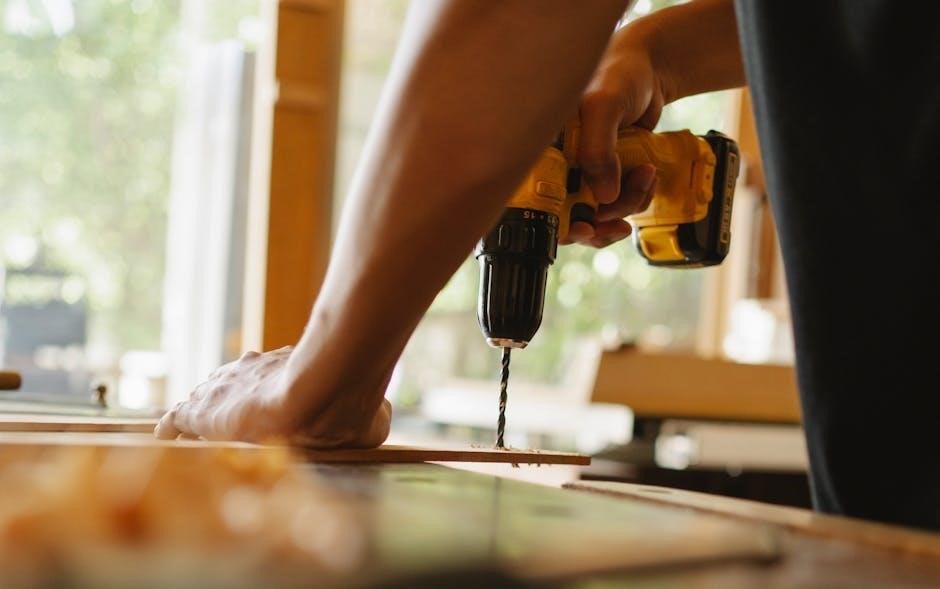
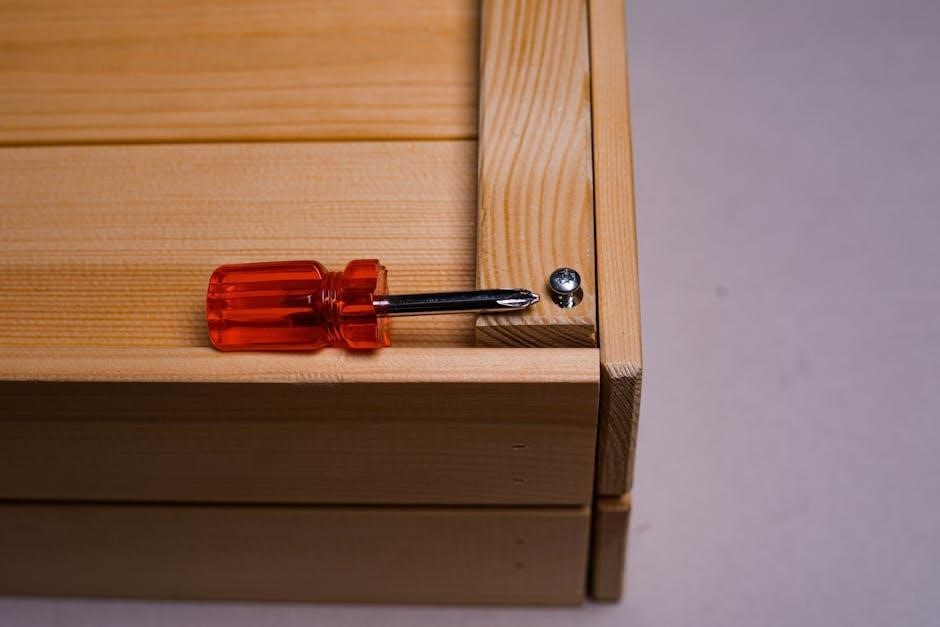
Prior to commencing the Honeywell RTH221B installation, gather the necessary tools to ensure a smooth and efficient process. A small flathead screwdriver is essential for terminal block connections. A Phillips head screwdriver will be needed for mounting the thermostat baseplate securely.

Wire strippers are crucial for preparing the existing thermostat wires for connection to the new unit. A voltage tester is highly recommended to verify power is completely off before handling any wiring. A level will help ensure the baseplate is mounted straight.

Additionally, a pencil for marking wire labels, and potentially a drill with appropriate bits for creating mounting holes, may be required. Having these tools readily available will minimize interruptions during installation and promote a professional result.

Turning Off Power to Your HVAC System

Before beginning any wiring or installation procedures for your Honeywell RTH221B thermostat, absolutely disconnect power to your heating, ventilation, and air conditioning (HVAC) system. This is a critical safety precaution to prevent electrical shock and potential damage to the thermostat or HVAC equipment.

Locate the circuit breaker that controls your HVAC system in your electrical panel. It’s often labeled, but if not, you may need to test breakers individually. Switch the breaker to the “OFF” position. Confirm the power is off by attempting to operate your HVAC system – it should not respond.

Double-check with a voltage tester at the thermostat wires to ensure no power is present. Proceed with the installation only after verifying a complete power shutdown. This step is non-negotiable for your safety.

Removing Your Old Thermostat

Carefully remove your existing thermostat, first labeling each wire before disconnecting them. Document the wiring configuration and then detach the old baseplate.

Labeling Existing Wires

Before disconnecting any wires, meticulous labeling is absolutely crucial for a smooth installation. Use the provided wire labels, or create your own with clear and concise markings. Carefully note the terminal letter each wire is connected to on your old thermostat.

Common terminal designations include R (power), C (common), W (heat), Y (cool), and G (fan); Photographing the existing wiring is also highly recommended as a visual backup. Ensure the labels are securely attached to each wire, avoiding any confusion during the re-wiring process. Double-check your labeling to prevent incorrect connections, which could damage your HVAC system. Accurate labeling will significantly simplify the installation of your new Honeywell RTH221B thermostat.

Disconnecting the Old Thermostat Wires

After carefully labeling each wire, you can proceed with disconnecting them from the old thermostat. Before touching any wires, reconfirm you’ve turned off power to your HVAC system at the breaker. Use a small screwdriver to loosen the terminal screws, and gently pull each wire free.

Avoid pulling on the wires themselves; instead, grasp the insulated wire near the terminal. Keep the wires from falling back into the wall by gently bending them away. Ensure each wire remains clearly labeled as you disconnect it. Take extra care not to allow any wires to touch each other; Proper disconnection prevents shorts and ensures a safe and efficient transition to your new Honeywell RTH221B thermostat installation.

Removing the Old Thermostat Baseplate

Once all wires are disconnected and safely positioned, you can remove the old thermostat’s baseplate. Typically, the baseplate is held in place by screws – locate and loosen these, usually at the top and bottom of the plate. Gently pull the baseplate away from the wall.

Be careful not to damage the wall surface during removal. If the baseplate is stuck, slightly wiggle it while pulling. Inspect the wall for any existing holes or damage. Note the size and placement of the old baseplate, as you’ll use this information when mounting the new Honeywell RTH221B baseplate. Ensure the wall surface is clean and dry before proceeding with the new installation.

Installing the Honeywell RTH221B

Now, carefully mount the baseplate, connect the labeled wires using detailed diagrams, and securely attach the thermostat to the baseplate for operation.

Mounting the Baseplate

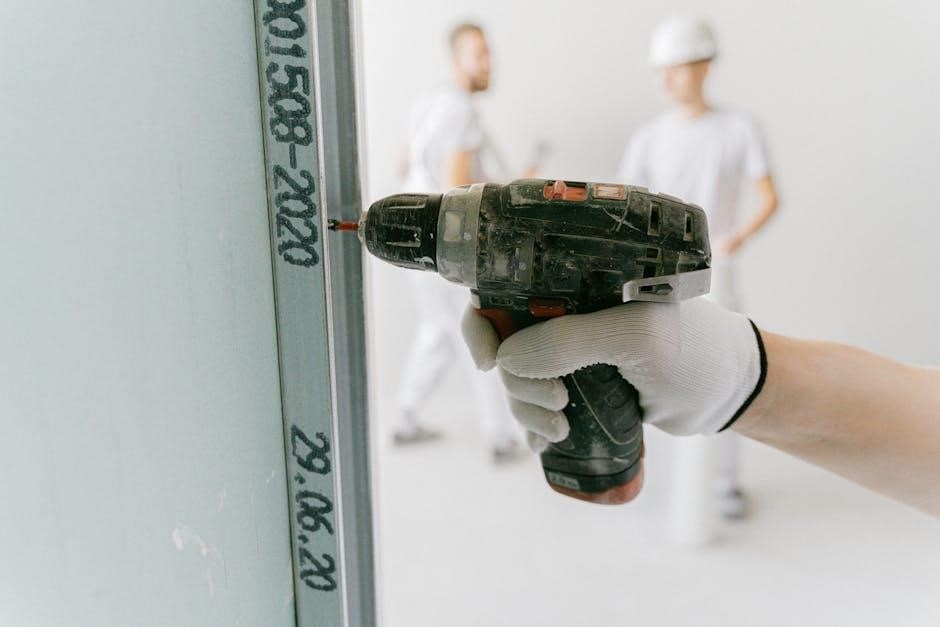
Before securing the baseplate, ensure the wall surface is clean and level for optimal mounting. Utilize the provided screws and anchors, if necessary, depending on your wall material – drywall typically requires anchors for a stable hold.

Position the baseplate, ensuring it’s straight and aligned with your desired location. Mark the screw holes lightly with a pencil. Pre-drill holes if needed, especially for harder surfaces, to prevent damage and facilitate easier screw insertion.

Carefully align the baseplate with the pre-drilled holes and securely fasten it using the screws. Avoid over-tightening, as this could strip the screw holes or damage the baseplate. A snug fit is sufficient to ensure stability. Double-check that the baseplate is firmly attached to the wall before proceeding to the wiring stage.

Connecting the Wires – Detailed Wiring Diagrams

Precise wire connection is crucial for correct thermostat operation. Refer to the wiring diagrams specific to your HVAC system type – Heat Only, Cool Only, or Heat/Cool. Carefully match the wire labels from your old thermostat to the corresponding terminals on the Honeywell RTH221B baseplate.

Gently insert each wire into the appropriately labeled terminal, ensuring a secure connection. Avoid stripping the wires excessively, leaving approximately ¼ inch of bare wire exposed. Double-check each connection to confirm it’s firmly seated and that no bare wire is exposed outside the terminal.

Incorrect wiring can damage your HVAC system or the thermostat. If unsure, consult a qualified HVAC technician. Always prioritize safety and accuracy during this step.

Wiring for Heat Only Systems

For heat-only systems, the wiring is typically straightforward. Connect the ‘Rh’ wire – often red – to the ‘R’ terminal on the Honeywell RTH221B baseplate. This provides power to the thermostat. The ‘W’ wire, usually white, connects to the ‘W’ terminal, signaling the heating system to turn on.

Ensure a secure connection for both wires. If a ‘C’ wire (common wire) isn’t present in your existing wiring, the thermostat may operate without it, but advanced features might be limited. Carefully review your existing wiring configuration before making any connections.

Double-check that all wires are firmly inserted into their respective terminals. Incorrect wiring can prevent the heating system from functioning correctly. If you encounter any difficulties, consult a qualified HVAC professional.

Wiring for Cool Only Systems

When installing the Honeywell RTH221B for cooling-only systems, identify the ‘Rh’ wire – typically red – and connect it to the ‘R’ terminal on the baseplate. This wire supplies power. The ‘Y’ wire, usually yellow, connects to the ‘Y’ terminal, activating the cooling system when signaled.

Similar to heat-only setups, a ‘C’ wire isn’t always necessary for basic operation, but it’s recommended for optimal performance and access to all features. Verify your existing wiring before proceeding with connections.

Securely fasten both wires to their designated terminals. Improper connections can lead to cooling system malfunctions. If you are unsure about any aspect of the wiring process, it’s best to seek assistance from a qualified HVAC technician to ensure a safe and correct installation.

Wiring for Heat/Cool Systems

For heat/cool systems, the Honeywell RTH221B requires careful wiring to ensure both functions operate correctly. Typically, the ‘Rh’ (red) wire connects to the ‘R’ terminal, providing power. The ‘Y’ (yellow) wire activates cooling, connecting to the ‘Y’ terminal, while the ‘W’ (white) wire controls heating, connecting to the ‘W’ terminal.

A common wire, ‘C’ (blue), is highly recommended for heat/cool systems to provide consistent power to the thermostat and enable all features. Ensure the ‘G’ (green) wire, controlling the fan, connects to the ‘G’ terminal.

Double-check all connections for tightness and accuracy. Incorrect wiring can cause system malfunctions or damage. If you encounter any difficulties or are unsure about the wiring configuration, consult a qualified HVAC professional for assistance.

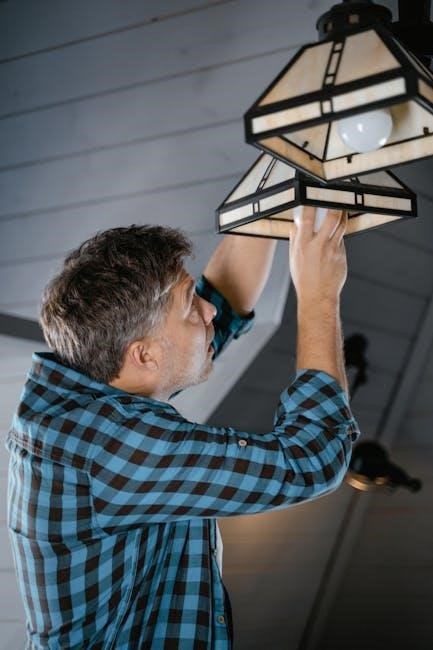
Attaching the Thermostat to the Baseplate

Once all wires are securely connected to the baseplate terminals, carefully align the Honeywell RTH221B thermostat body with the mounted baseplate. Gently push the thermostat onto the baseplate, ensuring it clicks firmly into place. Avoid forcing it, as this could damage the connections or the thermostat itself.

Verify that the thermostat is securely attached and doesn’t wobble. A proper fit is crucial for reliable operation and accurate temperature readings. Inspect the wiring connections again through the access points to confirm nothing has become dislodged during attachment.

Finally, restore power to your HVAC system at the breaker box. The thermostat should power on, displaying the date and time if previously set.

Configuring the Thermostat

Now, set the current date and time for accurate scheduling. Program your desired temperature schedule, utilizing up to four periods daily for optimal comfort and efficiency.

Setting the Date and Time

To accurately program your Honeywell RTH221B thermostat, correctly setting the date and time is essential. Begin by pressing the “Menu” button on the thermostat’s faceplate. Navigate through the menu options using the up and down arrow buttons until you reach the “Date and Time” setting.

Once selected, you’ll be prompted to adjust the year, month, and day. Use the arrow buttons to modify each value, and press “Select” or “Run” to confirm each entry. Repeat this process for setting the hour and minute. Ensure you correctly identify AM or PM for accurate timekeeping.

Double-check your entries before finalizing. A properly configured date and time are crucial for the thermostat’s scheduling functions to operate as intended, providing consistent and comfortable climate control.

Programming the Temperature Schedule

The Honeywell RTH221B allows for a customized temperature schedule, optimizing comfort and energy savings. Access the programming mode via the “Menu” button, then select “Schedule.” You can program up to four distinct periods per day – Wake, Leave, Return, and Sleep – each with a unique temperature setting.

Use the arrow buttons to navigate between periods and adjust the desired temperature for each. Confirm your selections with the “Select” or “Run” button. Consider your daily routine when setting temperatures; lower temperatures while away and during sleep, and increase them for comfort when home.

Remember to save your schedule after programming. This feature enables automated temperature adjustments, reducing energy consumption and ensuring a comfortable environment.

Understanding the Run Program Function

The “Run” button on your Honeywell RTH221B is crucial for activating and deactivating the programmed temperature schedule. When “Run” is enabled, the thermostat automatically adjusts the temperature according to your pre-set Wake, Leave, Return, and Sleep periods, maximizing comfort and energy efficiency.

Pressing the “Run” button toggles between the programmed schedule and a manual “Hold” mode. In “Hold” mode, the thermostat maintains a single, user-defined temperature, overriding the programmed schedule. This is useful for temporary temperature adjustments or when your routine deviates from the norm.

Ensure the “Run” function is active for automated climate control. The display will typically indicate whether “Run” is on or off. Regularly review and adjust your schedule for optimal performance.

Advanced Features & Troubleshooting

Explore the backlight for easy viewing, battery options for reliable operation, and troubleshooting tips to resolve common issues quickly and efficiently.

Backlight Functionality

The Honeywell RTH221B thermostat features a convenient backlight, enhancing visibility in low-light conditions. This feature automatically activates with button presses, illuminating the display for easy reading and operation, even in dimly lit rooms or at night. The backlight doesn’t require any special programming or activation; it’s designed to function seamlessly whenever you interact with the thermostat.

However, the backlight is powered by the thermostat’s batteries, so prolonged or frequent use may contribute to faster battery depletion. If you notice the backlight dimming or becoming less responsive, it’s a good indicator that the batteries may need replacing. Regular battery checks, as outlined in the battery installation section, will ensure consistent backlight performance and overall thermostat functionality. This intuitive feature adds to the user-friendly design of the RTH221B.

Battery Installation and Replacement

The Honeywell RTH221B thermostat requires two AA alkaline batteries for operation, even when hardwired. These batteries primarily power the display and maintain the programmed settings during power outages. To install batteries, locate the battery compartment, typically on the side or back of the thermostat unit. Open the compartment and insert two fresh AA alkaline batteries, ensuring correct polarity (+ and -) as indicated inside.

Low battery indicators will appear on the display when replacement is needed. It’s crucial to replace batteries promptly to avoid losing your programmed schedule. Using rechargeable batteries is not recommended, as they may not provide sufficient voltage. Always use new, high-quality alkaline batteries for optimal performance and longevity. Proper battery maintenance ensures continuous and reliable thermostat operation.

Troubleshooting Common Issues

Display Blank: First, verify batteries are correctly installed and have sufficient charge. If hardwired, check the circuit breaker supplying power to your HVAC system. No Heat/Cool: Ensure the thermostat is set to the correct mode (Heat, Cool, or Auto). Confirm wiring connections are secure and match the wiring diagram for your system type.

Incorrect Temperature Readings: Recalibrate the thermostat if necessary, following the instructions in the configuration section. Thermostat Not Responding: Try resetting the thermostat by removing the batteries for a few minutes, then reinserting them. If issues persist, consult the Honeywell Home support website or contact their customer service for further assistance. Always double-check wiring before contacting support.

Disposal and Recycling Information

Properly dispose of your old thermostat, especially if it contains mercury. Contact local waste management for recycling options and disposal instructions.

Honeywell supports responsible electronic waste recycling.

Proper Disposal of Old Thermostats (Mercury Tube Considerations)

Important Safety Notice: Older thermostats may contain a sealed mercury tube. Do not attempt to disassemble the old thermostat, as this could release harmful mercury vapor. Mercury is a hazardous material, and improper handling can pose significant health risks.

If your previous thermostat contains a mercury tube, it must be disposed of properly, following all local, state, and federal regulations. Do not discard it with your regular household trash. Contact your local waste management authority or recycling center for specific instructions on how to safely dispose of mercury-containing thermostats in your area.

Many communities have designated collection programs for mercury-containing devices. These programs ensure that the mercury is safely removed and recycled, preventing environmental contamination. Refer to page 2 of the provided documentation for further guidance on this critical disposal process.

Recycling Options for the RTH221B

Responsible Disposal is Key: While the Honeywell RTH221B doesn’t contain mercury, responsible recycling is still crucial for minimizing environmental impact. Electronic components contain valuable materials that can be recovered and reused, reducing the need for new resource extraction.

Contact your local waste management authority to inquire about electronic waste (e-waste) recycling programs in your community. Many municipalities offer convenient drop-off locations or scheduled collection events for electronic devices like thermostats. Alternatively, some retailers that sell thermostats may also offer recycling services.

Check with Honeywell Home support (see contact information elsewhere in this manual) for potential manufacturer take-back programs or partnerships with recycling facilities. Proper recycling ensures that the materials from your old thermostat are handled safely and sustainably.

Contacting Honeywell Home Support

Need Assistance? Honeywell Home provides comprehensive support resources to ensure a smooth installation and operation of your RTH221B thermostat. For immediate assistance, visit the official Honeywell Home website – honeywellhome.com – where you’ll find a wealth of frequently asked questions, troubleshooting guides, and downloadable resources, including digital copies of this manual.

If you require personalized support, Honeywell Home offers several contact options. You can reach their customer support team via phone, or through their online chat feature. Be prepared to provide your thermostat model number (RTH221B) and a detailed description of your issue to expedite the support process.

Their dedicated team is available to assist with wiring questions, programming challenges, and any other concerns you may have. Don’t hesitate to reach out for expert guidance!

boss rc1 loop station manual

Boss RC-1 Loop Station Manual: A Comprehensive Guide

This comprehensive guide details the Boss RC-1, a user-friendly looper perfect for beginners․ Explore its features, from basic connections to advanced looping techniques,
and memory management․

The Boss RC-1 Loop Station represents a cornerstone in accessible looping technology, designed for musicians of all levels, particularly those venturing into the world of loop-based performance for the very first time․ As highlighted by numerous reviews, it’s lauded as an incredibly intuitive and cost-effective solution, embodying the renowned reliability associated with Boss products․

This compact pedal isn’t merely a device; it’s a gateway to sonic exploration, allowing guitarists, vocalists, and instrumentalists to build layered compositions in real-time․ The RC-1 simplifies the often-complex process of looping, offering a streamlined interface and straightforward operation․ Whether you’re crafting ambient soundscapes, beatboxing rhythms, or developing intricate instrumental arrangements, the RC-1 provides the tools to bring your musical ideas to life․

This manual serves as your complete companion, guiding you through every facet of the RC-1, from initial setup and basic functionality to advanced techniques and troubleshooting․ We’ll delve into its specifications, pedal layout, and explore resources for continued learning, ensuring you unlock the full potential of this powerful creative tool․

Understanding Loop Station Technology

Loop station technology, at its core, revolves around the concept of recording a short musical phrase – a “loop” – and then continuously playing it back while you simultaneously add layers on top․ This creates a dynamic, evolving musical texture built from repeated cycles․ The Boss RC-1 simplifies this process, making it accessible even without prior experience․

Traditionally, creating loops required complex multi-track recording setups․ Loop stations condense this functionality into a single, foot-switch controlled unit․ The RC-1 captures audio input, stores it digitally in its internal memory, and then seamlessly repeats the recording․ Different looping modes (Red, Green, Yellow – explored later) dictate how new recordings interact with existing loops․

Understanding the fundamental principles – recording, playback, overdubbing, and quantization – is crucial․ Quantization ensures loops align rhythmically, while overdubbing allows for the addition of new elements․ The RC-1’s intuitive design abstracts away much of the technical complexity, allowing musicians to focus on creativity rather than technical hurdles․

Key Features of the RC-1

The Boss RC-1 Loop Station boasts several key features designed for both beginners and experienced loopers․ Its compact and rugged design ensures durability for stage and practice use․ A prominent feature is its intuitive three-pedal control: one for recording/playback, one for overdubbing/undo, and one for stopping/clearing the loop․

The RC-1 offers 99 onboard memory locations for storing loops, providing ample space for diverse musical ideas․ It supports up to 32 minutes of recording time, allowing for extended compositions․ Built-in rhythm guide tracks, with various time signatures and styles, assist in maintaining tempo and creating rhythmic foundations․

Furthermore, the RC-1 includes a Quantize function, automatically aligning loop start and end points to the nearest beat, ensuring tight and professional-sounding loops․ Connectivity options include input and output jacks for integrating with guitars, keyboards, and other instruments․ Its ease of use and cost-effectiveness make it a standout choice in the looper market․

Powering the RC-1 and Basic Connections

The Boss RC-1 can be powered in two ways: using a 9V DC adapter (Boss PSA-120 recommended, sold separately) or via batteries․ For reliable performance, especially during gigs, a DC adapter is highly recommended․ The power jack is located on the rear panel․ When using batteries, four AA alkaline batteries provide approximately 3․5 hours of operation․

Basic connections are straightforward․ The INPUT jack accepts a standard 1/4-inch instrument cable from your guitar, keyboard, or other audio source․ The OUTPUT jacks (LEFT/MONO and RIGHT) connect to your amplifier, mixer, or recording interface․ Using both outputs provides a stereo signal, enhancing the spaciousness of your loops․

Ensure all cables are securely connected to prevent signal loss or unwanted noise․ The RC-1’s input level can be adjusted to optimize the signal-to-noise ratio․ Refer to the section on Input and Output Configuration for detailed instructions on setting appropriate levels․

Input and Output Configuration

Proper input and output configuration is crucial for optimal sound quality with the Boss RC-1․ The input level is adjusted using the INPUT LEVEL knob on the pedal’s top panel․ Start with the knob at its minimum setting and gradually increase it while playing your instrument until the indicator lights illuminate steadily without clipping (indicated by excessive flashing)․ Clipping introduces distortion and degrades the loop’s clarity․

The OUTPUT section offers both LEFT/MONO and RIGHT jacks for stereo operation․ Connecting to both outputs provides a wider, more immersive soundscape․ If connecting to a mono amplifier or mixer, use only the LEFT/MONO output․ The OUTPUT LEVEL knob controls the overall volume sent to your amplifier or recording device․

Experiment with different input levels to find the sweet spot for your instrument and playing style․ Remember, a clean input signal is essential for creating high-quality loops․ Incorrect levels can lead to unwanted noise or distortion, impacting the overall performance․

Memory Management and Loop Storage

The Boss RC-1 utilizes internal memory to store your created loops․ Understanding memory management is key to maximizing the number of loops you can save․ The RC-1 offers 99 loop memories, allowing for extensive storage of musical ideas․ Each loop’s length and complexity affect how much memory it consumes․

Loops are saved by pressing the WRITE button while a loop is playing or stopped․ The pedal will automatically assign the next available memory slot․ You can also manually select a memory slot using the MEMORY buttons (1-99) before writing․ To overwrite an existing loop, simply write to the same memory slot․

Be mindful of loop length; shorter loops utilize less memory․ Regularly backing up your loops (if possible, depending on future firmware updates) is recommended to prevent data loss․ Efficient memory usage allows for a vast library of looped phrases, fostering creativity and performance flexibility․

Recording Your First Loop

Recording your initial loop on the Boss RC-1 is straightforward․ Begin by connecting your instrument and headphones․ Ensure the RC-1 is powered on and set to the RED looping mode – this is the simplest mode for beginners․ Press the [LOOP START] pedal to initiate recording․ Your signal will now be captured into the loop memory․

Play your desired phrase․ The RC-1 records until you press the [LOOP START] pedal again․ This automatically closes the loop, and playback begins․ The loop will continuously repeat until you press the pedal once more to stop playback․ Don’t worry about perfection on your first attempt; looping is about experimentation!

If you’re unhappy with the recording, press the UNDO button to erase the loop and try again․ Practice timing your phrase to align with the loop’s beginning for seamless repetition․ This initial loop forms the foundation for building more complex arrangements․

Looping Modes: Red, Green, and Yellow

The Boss RC-1 offers three distinct looping modes, each indicated by a different LED color: Red, Green, and Yellow․ Red mode is the most basic, ideal for beginners․ It’s a single-track loop, recording and playing back one layer at a time․ Pressing the pedal starts recording, pressing again ends recording and begins playback․

Green mode introduces overdubbing․ After recording a base loop in Red, switch to Green․ Pressing the pedal now adds a new layer on top of the existing loop․ Each press records a new phrase, building up arrangements․ This allows for layering instruments or vocal harmonies․

Yellow mode enables free-running recording․ The RC-1 continuously records, even during playback, without a fixed loop length․ This is excellent for creating evolving soundscapes or improvisational performances․ Experiment with each mode to discover the unique creative possibilities they offer․ Understanding these modes unlocks the full potential of the RC-1․

Using the Rhythm Guide

The Boss RC-1’s rhythm guide is a powerful tool for staying in time while looping․ Accessed via the dedicated button, it provides a metronomic click track to help maintain a consistent tempo․ The tempo can be adjusted using the TAP button, allowing you to set the desired speed by tapping your foot or instrument․

The rhythm guide isn’t just a simple click; it offers various beat subdivisions․ You can choose between quarter notes, eighth notes, and sixteenth notes, providing flexibility for different musical styles․ This feature is invaluable when building loops from scratch, ensuring that each overdub aligns perfectly with the existing rhythm․

Furthermore, the rhythm guide can be set to play only during recording, only during playback, or continuously․ Experiment with these settings to find what best suits your workflow․ Mastering the rhythm guide is crucial for creating tight, professional-sounding loops with the RC-1․

Quantize Functionality Explained

The Boss RC-1’s quantize function is a vital feature for achieving perfectly timed loops, especially when improvising or playing with less-than-perfect rhythmic precision․ When activated, quantize automatically adjusts the start and end points of your recorded phrases to align with the nearest beat within the tempo setting․

This means that even if you play slightly ahead or behind the beat, the RC-1 will subtly correct your timing, resulting in a loop that sounds incredibly tight and polished․ The quantize function works in conjunction with the rhythm guide, using its tempo as the reference point for timing adjustments․

It’s important to note that quantize isn’t a substitute for good timing, but it’s a powerful tool for cleaning up minor imperfections and creating loops that are rhythmically solid․ Experiment with enabling and disabling quantize to hear the difference it makes in your recordings․

Effects and Sound Manipulation

The Boss RC-1 offers a range of effects to enhance and manipulate your loops, adding depth and creativity to your performances․ While not as extensive as some dedicated effects pedals, the RC-1’s built-in effects provide versatile sound-shaping options directly within the looper․

These effects include reverb, delay, and modulation effects like chorus and flanger․ You can apply these effects to the entire loop or selectively to newly recorded phrases, allowing for dynamic soundscapes․ The intensity of each effect is adjustable via the control knob, giving you precise control over the sonic texture․

Experimenting with different effect combinations can transform a simple loop into a complex and engaging soundscape․ Remember that effects are applied after the loop is recorded, so consider the initial sound of your loop when choosing effects․ The RC-1’s effects are a powerful tool for adding character and personality to your looping creations․

Phrase Looping and Memory

The Boss RC-1 excels in phrase looping, allowing you to record and store short musical ideas – phrases – for spontaneous playback and layering․ This feature expands creative possibilities beyond continuous loops, enabling intricate arrangements and dynamic performances․

The RC-1’s memory allows storing up to 99 loops, providing ample space for a diverse collection of phrases․ Each loop can be individually named and recalled, facilitating quick access during live performances or practice sessions․ Memory management is straightforward, allowing for easy overwriting or deletion of existing loops․

Phrase looping is particularly useful for building song sections on the fly, creating rhythmic variations, or adding vocal snippets․ Utilizing the memory function ensures your favorite phrases are readily available, fostering improvisation and musical exploration․ Regularly backing up your loops is recommended to prevent data loss․

External Control via Pedals

The Boss RC-1 significantly expands its functionality through external pedal control, offering hands-free operation and enhanced performance capabilities․ A dedicated footswitch input allows for remote triggering of essential functions like loop start/stop, record, and playback, freeing up your hands for instrument playing or expressive gestures․

Connecting an expression pedal unlocks real-time control over parameters such as loop volume, playback speed, or effect levels․ This dynamic control adds a new dimension to your looping performances, enabling nuanced adjustments and creative sound manipulation on the fly․ The RC-1 supports a wide range of Boss expression pedals, ensuring compatibility and seamless integration․

External pedal control is invaluable for live performances, allowing you to navigate loops and effects without interrupting your playing․ Experimenting with different pedal configurations can unlock unique performance techniques and elevate your looping artistry․ Proper pedal assignment within the RC-1’s settings is crucial for optimal control․

Firmware Updates and Maintenance

Maintaining your Boss RC-1 through regular firmware updates is crucial for optimal performance and access to the latest features․ Boss periodically releases firmware updates that address bug fixes, improve stability, and introduce new functionalities․ These updates ensure your loop station remains current and reliable․

Downloading the latest firmware is typically done via the Boss website and requires a computer connection․ Follow the instructions carefully, as incorrect installation can potentially disrupt operation․ Backing up your loop memory before updating is a recommended precaution to safeguard your creations․

Beyond firmware, basic maintenance extends the lifespan of your RC-1․ Keep the unit clean and free from dust, and avoid exposing it to extreme temperatures or humidity․ Regularly check the footswitch and input/output jacks for any signs of wear or damage․ Proper care ensures years of reliable looping enjoyment․

Troubleshooting Common Issues

Encountering issues with your Boss RC-1 is sometimes unavoidable, but many problems have straightforward solutions․ A common issue is no sound – verify all cable connections, input levels, and output destinations․ Ensure the RC-1 has sufficient power and the footswitch is functioning correctly․

If loops are recording quietly, check the input gain settings․ Conversely, distorted loops suggest the input signal is too strong; reduce the gain accordingly․ Unexpected looping behavior can often be resolved by clearing the memory or resetting the unit to factory defaults (consult the manual for instructions)․

Should the RC-1 freeze or become unresponsive, try a power cycle․ If problems persist, consult the Boss support website for FAQs, troubleshooting guides, and potential firmware updates․ Remember to document the issue and steps taken before seeking further assistance․

Understanding Specifications

The Boss RC-1 boasts specific technical details crucial for optimal performance․ Its nominal input level is -20 dBu, while the output level reaches +8 dBu․ Input impedance measures 1 MΩ, ensuring compatibility with various instruments․ The RC-1 operates on DC 9V, requiring approximately 80 mA of current․

Looping capabilities include up to 99 memories for storing phrases, with a maximum recording time of 99 seconds per loop․ The unit supports WAV file format, offering high-fidelity audio reproduction; Frequency response spans 20 Hz to 20 kHz, delivering a wide sonic range․

Dimensions are 73 mm x 129 mm x 59 mm, and it weighs approximately 390 grams․ These specifications highlight the RC-1’s compact design and portability․ Understanding these parameters aids in proper setup and integration within your musical setup, maximizing its potential․

Detailed Pedal Layout and Controls

The Boss RC-1 features an intuitive layout․ The main footswitch handles loop recording, playback, and overdubbing․ Dedicated buttons control loop stop, undo/redo, and memory selection․ A rotary knob navigates through stored loops, while a separate knob adjusts the loop volume․

The pedal incorporates three LED indicators: red for recording, green for playback, and yellow for overdubbing․ These provide clear visual feedback during operation․ Input and output jacks are conveniently located on the rear panel, alongside the DC power input․ A thumbscrew secures the battery housing․

The RC-1’s coil spring and battery housing contribute to its robust construction․ Mastering these controls unlocks the full potential of the looper, enabling seamless loop creation and manipulation․ Familiarizing yourself with the pedal’s physical layout is essential for efficient performance․

Accessories and Optional Purchases

While the Boss RC-1 operates effectively as a standalone unit, several accessories can enhance your looping experience․ A high-quality instrument cable is crucial for optimal signal transfer, minimizing noise and ensuring a clear loop recording․ Consider a reliable power supply to avoid battery dependency during extended performances․

For musicians seeking expanded control, a dedicated expression pedal allows real-time manipulation of loop parameters like volume or effects․ High-fidelity headphones are essential for critical listening and precise loop editing․ Exploring the mech keys community can reveal custom pedalboards designed to integrate the RC-1 seamlessly․

Optional purchases, such as a protective case, safeguard the pedal during transport․ Investing in quality headphones ensures accurate monitoring․ Remember to explore Roland’s range of compatible accessories for a fully optimized setup․

Resources and Further Learning

To deepen your understanding of the Boss RC-1 and looping techniques, numerous resources are available․ Begin with the official Boss website, offering the RC-1 owner’s manual in PDF format (English and Deutsch versions available)․ Explore online forums dedicated to loopers and effects pedals, where users share tips, tricks, and custom loop creations․

YouTube tutorials provide visual demonstrations of various looping methods, from basic recording to advanced layering and effects utilization․ Websites specializing in music production and guitar techniques often feature articles and lessons on looping․

Engage with the Mech Keys Community for insights into pedalboard integration and customization․ Roland’s support pages offer additional documentation and troubleshooting assistance․ Continuously experimenting and exploring these resources will unlock the full potential of your RC-1․

btech 50×2 manual

BTECH 50X2 Manual: A Comprehensive Guide

This comprehensive guide details the BTECH UV-50X2 radio, covering programming, menu navigation, and advanced features for optimal performance and usability․

Explore manual and software programming methods, alongside resources like CHIRP and the PC04 FTDI cable, ensuring seamless channel configuration;

Discover detailed menu definitions, DTMF functionality, and troubleshooting tips, empowering you to customize and resolve common issues effectively․

The BTECH UV-50X2 is a versatile mobile transceiver designed for both amateur radio enthusiasts and professional communicators․ This two-way radio boasts an impressive feature set, offering wide frequency coverage and multiple programming options․ It’s a robust and reliable device, capable of handling diverse communication needs, from local gatherings to long-range contacts․

This manual serves as a comprehensive resource for understanding and utilizing the full potential of your UV-50X2․ Whether you’re a seasoned radio operator or a beginner, this guide will walk you through every aspect of the radio, from initial setup and programming to advanced features and troubleshooting․ We’ll explore both manual configuration and the convenience of software programming tools like CHIRP, alongside the essential PC04 FTDI cable․

Prepare to unlock the power of the UV-50X2 and enhance your communication experience!

Understanding the Radio’s Features

The BTECH UV-50X2 is packed with features designed for effective communication․ Key capabilities include a wide frequency range, supporting both VHF and UHF bands, and a high channel capacity allowing for numerous saved frequencies․ Full implementation of DTMF functionality enables remote control and access to repeater systems․

This radio supports both manual programming and computer-based programming via CHIRP software and the PC04 FTDI cable, offering flexibility in configuration․ Memory channels allow you to store frequently used frequencies for quick access․ The UV-50X2 also provides customizable menu settings, enabling users to tailor the radio’s operation to their specific needs․

Understanding these features is crucial for maximizing the radio’s performance and enjoying a seamless communication experience․ This manual will detail each feature, providing clear instructions and practical examples․

Unboxing and Initial Setup

Upon unboxing your BTECH UV-50X2, you should find the radio unit, a rechargeable battery pack, a micro-USB charging cable, and a belt clip․ Carefully inspect all components for any signs of damage during shipping․ Before first use, fully charge the battery using the provided cable – this typically takes several hours․

Once charged, install the antenna securely․ Power on the radio by pressing and holding the power button․ Initially, the display will illuminate, and the radio will perform a self-test․ Familiarize yourself with the basic button layout and menu navigation․ It’s recommended to perform a basic frequency scan to confirm functionality․

Refer to the included user manual for detailed instructions on initial setup and basic operation․ Ensure the radio is programmed with appropriate frequencies before use․

Programming the BTECH 50X2

Programming the BTECH UV-50X2 involves manual entry, utilizing CHIRP software, or employing the PC04 FTDI cable for streamlined channel and menu configuration․

Manual Programming Methods

Manual programming of the BTECH UV-50X2 requires navigating the radio’s menu system to input frequencies, PL tones, and other settings directly․ This method, while time-consuming, offers precise control and is ideal for users preferring a hands-on approach․ Begin by accessing the memory channel you wish to program․

Utilize the keypad to enter the desired frequency, ensuring correct syntax and band selection․ Subsequently, input the appropriate PL tone (if required) for your specific communication needs․ Save the channel, and repeat the process for each desired frequency․ Walk-through steps are available online to guide you through this process, ensuring accurate configuration of your UV-50X2․

Remember to consult the user manual for detailed instructions and specific menu options related to manual programming․

Using CHIRP Software for Programming

CHIRP software provides a user-friendly interface for programming the BTECH UV-50X2, offering a faster and more efficient alternative to manual entry․ Download and install CHIRP, then connect your radio to your computer using a compatible programming cable – the BTECH PC04 FTDI cable is recommended․

CHIRP allows you to read the current configuration from your radio, edit channels, and upload the modified data back to the device․ You can easily input frequencies, PL tones, and channel names․ The software lays out all radio features in an easy-to-use format, simplifying the programming process․

Regularly back up your radio’s configuration using CHIRP to safeguard your settings and streamline future programming endeavors․

BTECH PC04 FTDI USB Programming Cable

The BTECH PC04 FTDI USB Programming Cable is specifically designed for seamless data transfer between your BTECH UV-50X2 radio and your computer․ This cable facilitates the use of programming software like CHIRP, enabling efficient channel configuration and firmware updates․

Unlike generic USB cables, the PC04 ensures reliable connectivity and compatibility, eliminating potential driver issues or connection errors․ It connects to your computer via a standard USB port and to your radio through the designated programming port․

Using this cable unlocks the full potential of your radio, allowing for quick and accurate programming of memory channels and menu settings․ It’s a crucial accessory for serious radio enthusiasts․

Programming Examples and Scenarios

Let’s explore practical programming scenarios for your BTECH UV-50X2․ A common request is setting up the Overland Bound channel for off-road communication․ This involves inputting the correct frequency and PL tone for localized communication․ Another scenario is programming local repeater frequencies, requiring offset and tone settings for optimal reach․

Consider a marine application; you’ll need to input the appropriate marine VHF channels․ For business use, program dedicated frequencies for your team․ These examples demonstrate the radio’s versatility․

Remember to consult frequency allocation charts for your region to ensure legal operation․ Utilizing CHIRP software simplifies these processes, allowing you to upload and download configurations easily․

Navigating the Radio’s Menu

Explore the BTECH UV-50X2’s intuitive menu system, accessing customizable settings and features for enhanced functionality and personalized radio operation․

Understand quick reference definitions․

Menu Definitions ― Quick Reference

The BTECH UV-50X2 menu offers extensive customization․ Menu 01 controls Squelch level, adjusting sensitivity to receive weaker signals․ Menu 02 manages VOX (Voice Operated Transmit) functionality, enabling hands-free operation․ Menu 03 sets the Backlight level for display visibility․ Menu 04 configures the Keypad Lock, preventing accidental button presses․

Menu 05 adjusts the Beep tone, confirming button presses․ Menu 06 sets the Power On Level, determining the initial power output․ Menu 07 manages the Auto Power Save function, conserving battery life․ Menu 08 controls the Scan function, searching for active signals․ Menu 09 configures the Roger Beep, signaling transmission end․

Further menus cover TOT (Time-Out Timer), Busy Channel Lock, and more, allowing tailored operation․ Refer to the full manual for detailed explanations of each setting․

Understanding DTMF Functionality

DTMF (Dual-Tone Multi-Frequency) signaling on the BTECH UV-50X2 enables remote control and access to repeater systems․ This feature transmits tones representing numbers and symbols, used for various functions like accessing voice mail or activating repeaters․ The radio boasts a full implementation of DTMF, offering versatility in communication․

DTMF encoding converts keypad presses into unique tone combinations․ DTMF decoding allows the radio to interpret incoming DTMF signals, enabling remote control capabilities․ Users can configure DTMF settings within the radio’s menu to customize transmission and reception parameters․

Proper DTMF setup is crucial for seamless interaction with compatible systems․ Ensure correct encoding and decoding settings for reliable operation and access to desired features․

Customizing Menu Settings

The BTECH UV-50X2 offers extensive menu customization options, allowing users to tailor the radio’s functionality to their specific needs․ Accessing the menu provides control over various parameters, including squelch levels, transmit power, and VOX sensitivity․

Menu navigation is intuitive, utilizing the radio’s keypad and display․ Users can scroll through options, adjust settings, and save changes․ The BTS-50×2 software simplifies this process, offering a user-friendly interface for configuring menu settings on a computer․

Experimenting with different settings can optimize performance for various environments and applications․ Remember to document changes for easy restoration if needed, ensuring a personalized and efficient radio experience․

Advanced Features and Operations

Explore memory channel setup, signal strength understanding, and troubleshooting techniques for the BTECH UV-50X2, maximizing its capabilities and ensuring reliable communication․

Setting Up Memory Channels

Memory channels on the BTECH UV-50X2 are crucial for quickly accessing frequently used frequencies․ To program a memory channel, first, tune to the desired frequency using manual programming or CHIRP software․

Then, press the ‘MENU’ button, navigate to the ‘Memory Channel’ option, and select an empty channel number․ Press ‘A/B’ to save the frequency into that channel․ You can also assign a name to each channel for easy identification․

Remember to utilize the radio’s ability to store a significant number of channels, allowing for organized access to various communication groups or emergency frequencies․ Regularly review and update your memory channels to maintain an efficient and reliable radio setup․ Proper channel management enhances usability․

Troubleshooting Common Issues

Common issues with the BTECH UV-50X2 often involve programming difficulties or transmit/receive problems․ If the radio won’t transmit, verify the squelch setting and ensure a proper antenna connection․ For receive issues, double-check the frequency and PL tone settings․

Programming errors can be resolved by resetting the radio to factory defaults via the menu or re-programming using CHIRP software․ If the display is unresponsive, try a battery reset by removing and reinserting the battery pack․

Ensure the correct cable (PC04 FTDI) is used for computer programming․ Consult online forums for solutions to specific error codes or unusual behavior․ A systematic approach to troubleshooting will quickly restore functionality․

Understanding Signal Strength and Range

Signal strength on the BTECH UV-50X2 is indicated by the signal meter on the display, representing the received signal’s intensity․ Higher bars signify a stronger, clearer signal․ However, signal reading can be deceptive; a strong signal doesn’t always guarantee clear communication․

Range is heavily influenced by several factors, including antenna quality, terrain, and atmospheric conditions․ Obstacles like buildings and hills significantly reduce range․ The UV-50X2’s power output settings (Low, Medium, High) impact range, with higher power consuming more battery․

Understanding propagation characteristics and utilizing a suitable antenna are crucial for maximizing communication distance․ Remember that handheld radios have limited range compared to base station setups․

Technical Specifications

The BTECH 50X2 boasts impressive power output, extensive frequency range, and substantial channel capacity, delivering reliable performance for diverse communication needs and scenarios;

Power Output and Battery Life

The BTECH 50X2 delivers a robust power output, typically ranging from 1 to 50 watts, adjustable across various frequency bands, ensuring strong and clear transmissions․ This variable power setting allows users to optimize for range or conserve battery life․

Regarding battery performance, the radio utilizes a high-capacity battery pack, providing approximately 8-12 hours of operational use on low power settings․ However, transmission duration and power level significantly impact battery life; continuous high-power transmissions will naturally reduce operating time․

Users can extend battery life by utilizing lower power settings when possible, employing battery-saving features within the radio’s menu, and considering an external power source for prolonged operation․ Proper battery care, including avoiding complete discharge and storing in a cool, dry place, will maximize longevity․

Frequency Range and Channel Capacity

The BTECH 50X2 boasts an expansive frequency range, covering 65-108 MHz (FM radio), 136-174 MHz (VHF), 400-480 MHz (UHF), and 700-999 MHz․ This broad coverage enables communication across a wide spectrum of frequencies, supporting various applications and services․

In terms of channel capacity, the radio offers an impressive 128 memory channels, allowing users to store frequently used frequencies for quick and easy access․ These channels can be organized and labeled for efficient management․

Furthermore, the 50X2 supports both wideband and narrowband operation, ensuring compatibility with different communication systems․ Users can program channels for various modes, including FM, AM, and digital modes, enhancing its versatility and adaptability․

Resources and Support

Access the official user manual, explore vibrant online forums, and connect with dedicated BTECH support for assistance, troubleshooting, and maximizing your radio experience․

Accessing the User Manual

The BTECH UV-50X2 user manual is your primary resource for understanding all aspects of the radio’s operation․ It provides detailed instructions on everything from initial setup and programming to advanced features and troubleshooting․ You can typically find the most up-to-date version of the manual directly on the BaofengTech website – the official source for BTECH products․

Locating the manual is straightforward; navigate to the support or downloads section of their site and search for the UV-50X2 model․ The manual is usually available as a downloadable PDF file, allowing you to easily view it on your computer, tablet, or smartphone․

Furthermore, the manual often includes valuable information on safety precautions, regulatory compliance, and warranty details․ Regularly referencing the manual will ensure you are operating your radio correctly and maximizing its potential․

Online Forums and Communities

Engaging with online forums and communities dedicated to the BTECH UV-50X2 and amateur radio is an invaluable way to enhance your experience․ These platforms offer a space to connect with fellow users, share knowledge, and find solutions to common challenges․ Many experienced operators are eager to assist newcomers with programming, troubleshooting, and understanding advanced features․

Popular online destinations include dedicated Facebook groups, Reddit communities (like r/amateurradio), and specialized ham radio forums․ These spaces often host detailed discussions, programming examples, and user-created guides․

Actively participating in these communities can significantly accelerate your learning curve and provide access to a wealth of practical advice beyond the official manual․ Remember to search existing threads before posting to avoid redundant questions․

Contacting BTECH Support

For direct assistance with your BTECH UV-50X2, reaching out to BTECH Support is a crucial step when encountering issues not addressed by the manual or online communities․ BTECH provides several avenues for customer support, ensuring accessibility for all users․

The primary method for contacting support is through their official website, baofengtech․com․ Here, you’ll typically find a contact form or email address dedicated to technical inquiries․ Be prepared to provide detailed information about your issue, including the radio model, firmware version (if known), and a clear description of the problem․

Response times may vary depending on the volume of requests, but BTECH aims to provide timely and helpful assistance․ Keep your order number handy if your inquiry relates to a purchase․

unimac washer parts manual pdf

Unimac Washer Parts Manual PDF: A Comprehensive Guide

Navigating Unimac washer maintenance is simplified with accessible PDF manuals, offering detailed schematics and parts lists for efficient repairs and long-term operation.

UniMac washers are renowned within the commercial laundry industry for their durability and robust performance, serving businesses like hotels, hospitals, and laundromats. Understanding these machines requires access to detailed documentation, specifically the Unimac Washer Parts Manual PDF. These manuals are crucial for identifying components, troubleshooting issues, and ensuring proper maintenance.

Models like the U061C and FLW1535C benefit from readily available parts diagrams. A comprehensive manual empowers technicians and owners to efficiently manage repairs, extending the lifespan of their Unimac equipment and minimizing downtime.

Understanding the Importance of a Parts Manual

A detailed Unimac Washer Parts Manual PDF is indispensable for effective maintenance and repair. It provides exploded views, part numbers, and crucial installation instructions, preventing incorrect part replacements and potential damage. Access to this documentation minimizes downtime, reducing operational costs for commercial laundry facilities.

Proper identification of components, facilitated by the manual, ensures technicians can accurately diagnose and resolve issues. Furthermore, it supports safe operation by outlining correct procedures and referencing essential safety guidelines, extending the machine’s lifespan.

Locating the Unimac Washer Parts Manual PDF

Find Unimac washer manuals through the official Alliance Laundry Systems website, third-party suppliers like Parts Town, or targeted online searches.

Official Alliance Laundry Systems Website

Accessing the official Alliance Laundry Systems website is the primary method for obtaining genuine Unimac washer parts manuals in PDF format. Navigate to their support or resources section, often categorized by brand – specifically, Unimac. Utilize the model number of your washer to refine your search and locate the corresponding documentation.

Downloadable PDFs typically include detailed parts breakdowns, installation guides, and troubleshooting tips. Ensure you have a stable internet connection for efficient downloading. Registering an account on the website may provide access to additional resources and support materials, streamlining the process of finding the correct manual for your specific Unimac model.

Third-Party Parts Suppliers (Parts Town)

Parts Town emerges as a valuable resource for Unimac washer parts manuals, often providing PDF versions alongside their extensive parts catalog. Searching by model number is crucial for accurate results; they boast a large selection of genuine OEM Unimac parts.

While primarily a parts retailer, Parts Town frequently hosts downloadable manuals to aid in identification and repair. Expect detailed diagrams and parts lists within these PDFs. Consider their fast shipping options when ordering replacement components, complementing the manual’s guidance for efficient maintenance and repair procedures.

Online Search Strategies

Effective online searches for the Unimac washer parts manual PDF require specific keywords. Combine “Unimac,” “washer,” “parts manual,” and “PDF” for targeted results. Include the specific model number (e.g., U061C, FLW1535C) to refine the search.

Utilize Google, Bing, and dedicated laundry equipment forums. Employ advanced search operators like “filetype:pdf” to prioritize PDF documents. Browse Alliance Laundry Systems’ website and third-party suppliers like Parts Town simultaneously for comprehensive coverage. Remember to verify the manual’s relevance to your exact model.

Key Components & Parts Identification

Detailed diagrams within the Unimac parts manual PDF pinpoint crucial components – drums, motors, valves, and pumps – aiding accurate identification and repair.

Washer Drum & Basket Assembly

The Unimac washer parts manual PDF meticulously details the drum and basket assembly, showcasing exploded views of all related components. This includes the inner and outer baskets, spider arms, bearing assemblies, and associated hardware like bolts and clips (F430317 washer). Understanding this assembly is vital for addressing issues like excessive vibration, unbalanced loads, or drum rotation problems. The manual provides specific part numbers for each element, facilitating accurate ordering of replacements. Proper reassembly, guided by the manual’s instructions, ensures optimal washer performance and prevents further damage. Detailed illustrations clarify component placement and torque specifications.

Motor & Drive System

The Unimac washer parts manual PDF comprehensively covers the motor and drive system, illustrating components like the main motor, drive belt, pulleys, and associated wiring. Detailed diagrams aid in diagnosing issues such as motor failure, belt slippage, or speed control problems. Part numbers are clearly identified for each component, streamlining the replacement process. The manual emphasizes proper electrical connections and grounding procedures for safe operation. Understanding the drive system’s mechanics, as outlined in the PDF, is crucial for efficient troubleshooting and maintaining optimal washer functionality. Refer to the manual for torque specifications.

Water Inlet Valves & Hoses

The Unimac washer parts manual PDF provides detailed illustrations of the water inlet valves and hoses, crucial for proper water filling and temperature control. It identifies various valve types and hose connections, including hot and cold water inlets. Troubleshooting guides address issues like insufficient water flow or leaks, with clear part numbers for replacement components. The manual stresses the importance of inspecting hoses for cracks or kinks. Proper installation and secure connections, as detailed in the PDF, prevent water damage and ensure efficient washer operation. Always disconnect power before servicing.

Drain Pump & Components

The Unimac washer parts manual PDF meticulously details the drain pump assembly, including the pump motor, impeller, and housing. It illustrates component locations and provides exploded views for easy identification during repairs. Troubleshooting sections address common issues like slow draining or complete pump failure, offering diagnostic steps. The manual lists specific part numbers for replacement pumps, seals, and hoses. Proper maintenance, as outlined in the PDF, involves clearing debris from the pump and inspecting hoses for obstructions. Ensure power is off before any service.

Troubleshooting Common Issues

The Unimac washer parts manual PDF guides users through diagnosing problems like draining or spinning failures, and water leaks, with clear steps.

Washer Not Draining

If your Unimac washer isn’t draining, the parts manual PDF is crucial for pinpointing the issue. Consult the diagrams to inspect the drain pump and its components, verifying functionality. Check for obstructions within the drain hose or pump housing, referencing the manual’s exploded views. The manual details how to test the drain valve motor linkage (part F602274) for proper operation. Additionally, it assists in identifying if a drain conversion kit (F0798776-00) is necessary or correctly installed, ensuring efficient water removal. Proper diagnosis relies on the manual’s detailed illustrations and part numbers.

Washer Not Spinning

When a Unimac washer fails to spin, the parts manual PDF becomes invaluable. Utilize it to examine the motor and drive system, identifying potential faults in belts or connections. The manual’s schematics aid in tracing electrical pathways to the motor, verifying power supply. Inspect the washer drum & basket assembly for obstructions hindering rotation. Refer to exploded views to understand component relationships. Troubleshooting often involves checking for worn parts, using the manual’s part numbers for accurate replacements. Correct diagnosis and repair depend on the manual’s detailed guidance.

Water Leaks

Addressing water leaks in a Unimac washer requires the detailed diagrams within the parts manual PDF. Begin by inspecting water inlet valves and hoses, referencing the manual’s illustrations to pinpoint connection points. Examine the drain pump and components for cracks or loose fittings, utilizing part numbers for replacements. The manual assists in identifying the source – whether from connections, seals, or the drum itself. Follow the exploded views to understand assembly and disassembly. Proper repair relies on accurate part identification and the manual’s step-by-step guidance.

Installation & Safety Instructions

The Unimac washer parts manual PDF details proper installation, emphasizing grounding and electrical connections for safe and efficient operation of the machine.

Proper Installation Procedures

Consult the Unimac washer parts manual PDF for detailed, step-by-step installation guidance. Ensure the washer is level to minimize vibration and noise during operation. Carefully follow instructions regarding water supply connections, verifying proper hose tightness to prevent leaks. Prioritize correct electrical connections, adhering to grounding instructions for safety. Confirm adequate ventilation around the machine, and always disconnect power before any maintenance. Refer to the manual for specific model requirements, ensuring a secure and functional installation, maximizing the lifespan of your Unimac washer.

Grounding & Electrical Connections

The Unimac washer parts manual PDF emphasizes the critical importance of proper grounding. Ensure the washer is connected to a dedicated, grounded electrical circuit, adhering to local electrical codes. Incorrect grounding can create a severe shock hazard. Verify the voltage matches the washer’s specifications. Never use extension cords. Consult a qualified electrician if unsure about electrical work. Follow the manual’s diagrams precisely for wiring connections, prioritizing safety and preventing electrical malfunctions. Proper grounding safeguards both the machine and the user.

Specific Model Series & Manuals

Detailed PDF manuals are available for specific Unimac series like U061C and FLW1535C, providing tailored parts diagrams and troubleshooting guidance for each model.

UniMac U061C Series

The UniMac U061C series washer-extractor, as documented in Part No. F232115R1 (April 1999), requires a dedicated parts manual for effective servicing. These manuals, often available through Group Dynamics Laundry’s website (groupdynamics-laundry.com), detail component layouts and necessary replacement parts.

Accessing the PDF version streamlines identification of crucial elements like the drum assembly, motor components, and water inlet systems. Proper maintenance, guided by the manual, ensures optimal performance and longevity of this commercial laundry machine. Detailed diagrams aid in accurate repairs.

FLW1535C Frontload Washers

The FLW1535C frontload washer, detailed in Part No. 803402R2 (March 2016) from Alliance Laundry, benefits greatly from a readily available PDF parts manual. This resource is crucial for troubleshooting common issues and identifying specific replacement components.

The manual provides comprehensive diagrams of the washer’s internal structure, aiding in repairs related to the drain pump, motor, or water inlet valves. Accessing this PDF ensures technicians can efficiently diagnose and resolve problems, minimizing downtime for commercial laundry operations. Refer to alliancelaundry.com.

Ordering Replacement Parts

Genuine OEM parts are vital for Unimac washers; identifying correct part numbers—found within the PDF manual—ensures compatibility and optimal performance.

Genuine OEM Parts

Utilizing genuine Original Equipment Manufacturer (OEM) parts is paramount when servicing your Unimac washer, guaranteeing a precise fit and maintaining the machine’s original performance standards. The Unimac washer parts manual PDF is crucial for identifying the correct part numbers, avoiding compatibility issues associated with aftermarket alternatives.

These authentic components are rigorously tested to meet Alliance Laundry Systems’ specifications, ensuring durability and reliability. Sourcing OEM parts through authorized distributors, or directly from Alliance, safeguards against substandard quality and potential damage to your equipment. Prioritize OEM for lasting repairs.

Identifying Part Numbers

Accurate part number identification is critical when ordering replacements for your Unimac washer. The Unimac washer parts manual PDF serves as your primary resource, providing detailed diagrams and lists with corresponding part numbers for every component. Carefully cross-reference the manual with the specific part you need to replace.

Part numbers are typically found printed directly on the component itself, or within the manual’s exploded views. Utilize this information to ensure you order the correct part, preventing delays and ensuring a successful repair. Double-check before finalizing your order!

Contacting Alliance Laundry Systems

For direct assistance with Unimac washer parts or manual inquiries, contacting Alliance Laundry Systems is recommended. Refer to the documentation within your Unimac washer parts manual PDF for their official contact details. Typically, you can reach them via phone at (920) 748-3950.

Alternatively, explore their website, alliancelaundry.com, for online support options and a comprehensive parts catalog. Clearly have your model number and part number ready when contacting them to expedite the process and ensure accurate support.

Maintenance & Care

Regular cleaning, as detailed in the Unimac washer parts manual PDF, extends machine life and maintains optimal performance, preventing costly repairs.

Regular Cleaning Procedures

Consult your Unimac washer parts manual PDF for specific cleaning recommendations tailored to your model. Typically, wiping down the exterior with a mild detergent and water is sufficient. Crucially, clean the dispenser drawers regularly to prevent buildup. Periodically run an empty hot water cycle with a washing machine cleaner to remove residue and odors. Inspect and clean the drain pump filter frequently, as lint and debris accumulation can cause drainage issues. Always disconnect power before any internal cleaning. Following these steps, outlined in the manual, ensures longevity and peak performance.

Preventative Maintenance Tips

Refer to your Unimac washer parts manual PDF for a detailed maintenance schedule. Regularly inspect hoses for cracks or leaks, replacing them proactively. Check the drive belt for wear and tension, adjusting or replacing as needed. Ensure proper leveling to minimize vibration and stress on components. Periodically examine the motor brushes (if applicable) and replace them when worn. Always use genuine OEM parts, as specified in the manual, for optimal performance and reliability. Adhering to these tips extends the washer’s lifespan.

Seasonal Considerations & Holiday Support

Consult your Unimac washer parts manual PDF for winterizing tips and note Alliance Laundry Systems’ Thanksgiving office closures for support availability.

Thanksgiving Office Closures

Please be advised that Alliance Laundry Systems, the manufacturer of UniMac washers, observes the Thanksgiving holiday. Consequently, their offices will be closed on Thursday, November 27th, and Friday, November 28th. While accessing the Unimac washer parts manual PDF remains available online during this period, direct customer support and parts ordering assistance will be temporarily unavailable.

Plan accordingly for any urgent repair needs or parts requests before the holiday. The online resources, including exploded views and part numbers within the PDF manual, can aid in preliminary troubleshooting. Normal operations will resume promptly on the following business day.

Drain Conversion Kits & Specific Parts

Essential drain conversion kits, like F0798776-00, and individual components—springs (F430317), washers (F431205)—are detailed within the Unimac parts manual PDF.

F0798776-00 Drain Conversion Kit

The F0798776-00 Drain Conversion Kit is a crucial component for specific Unimac washer models requiring adaptation for differing plumbing configurations. Detailed diagrams within the Unimac washer parts manual PDF illustrate the kit’s contents and precise installation procedures.

This kit typically includes necessary hoses, fittings, and adapters to facilitate a seamless transition. Proper installation, as outlined in the manual, ensures optimal drainage and prevents potential leaks. Referencing the manual’s exploded views is vital for correct part orientation and secure connections, guaranteeing efficient washer operation and longevity.

Springs, Washers & Rod End Clips (F430317, F431205)

The Unimac washer parts manual PDF meticulously details components like springs (F430317), washers, and rod end clips (F431205), essential for maintaining the drive and linkage systems. These seemingly small parts play a vital role in smooth operational functionality.

The manual provides precise illustrations showing their placement and how they interact with other parts. Correct installation, guided by the PDF, prevents premature wear and ensures efficient power transfer. Always refer to the parts list to verify compatibility and order genuine replacements for optimal performance and longevity.

Resources & Support

Access comprehensive assistance through Alliance Laundry Systems and Group Dynamics Laundry websites, offering manuals, parts, and dedicated customer support options.

Customer Support Options

For immediate assistance with your Unimac washer, several support channels are readily available. Contact the original purchasing source for initial troubleshooting or parts inquiries. Alternatively, reach out directly to Alliance Laundry Systems; their contact information is often included within the manuals.

Furthermore, Group Dynamics Laundry’s website (groupdynamics-laundry.com) provides valuable resources, including downloadable manuals and potential access to support forums. Parts Town also offers support alongside parts ordering. Remember to have your model number handy for efficient service.

Group Dynamics Laundry Website

The Group Dynamics Laundry website (groupdynamics-laundry.com) serves as a central hub for Unimac washer resources, including downloadable parts manuals in PDF format. Users can often find model-specific documentation, troubleshooting guides, and exploded views to aid in repairs.

Additionally, the site may offer access to a network of authorized service providers and parts distributors. Checking their online catalog can quickly identify compatible parts for your specific Unimac model, streamlining the maintenance process and ensuring optimal washer performance.

howard miller accuwave ds manual

Howard Miller Accuwave DS Manual: A Comprehensive Guide

This guide provides detailed instructions for setting up, operating, and troubleshooting your Howard Miller Accuwave DS clock, ensuring accurate, radio-controlled timekeeping․

Explore features like automatic time synchronization, daylight saving adjustments, and accurate temperature/humidity readings, all detailed within this comprehensive manual․

The Howard Miller Accuwave DS represents a blend of classic clockmaking and modern radio-controlled technology․ This clock is designed for effortless accuracy, automatically synchronizing with the WWVB time signal, ensuring you always have the correct time․

Unlike traditional clocks, the Accuwave DS minimizes the need for manual adjustments, even accounting for Daylight Saving Time changes․ It’s a sophisticated timepiece built for convenience and reliability․ Many users find the self-setting feature particularly appealing, eliminating the hassle of constant resetting․

This manual will guide you through the clock’s features, setup, and troubleshooting, helping you maximize its functionality and enjoy years of precise timekeeping․ Understanding its capabilities will unlock a seamless user experience․

What is the Accuwave DS Technology?

Accuwave DS technology centers around receiving signals from the National Institute of Standards and Technology’s (NIST) WWVB radio transmitter, located in Fort Collins, Colorado․ This transmitter broadcasts a highly accurate time signal derived from atomic clocks․

The Howard Miller Accuwave DS clock contains a receiver that decodes this signal, automatically setting the time and date․ This process ensures exceptional accuracy, far surpassing that of quartz or mechanical clocks․ However, signal reception can be affected by location and interference․

Essentially, the Accuwave DS eliminates manual time setting, offering a “set-it-and-forget-it” experience․ It’s a reliable system designed for consistent, precise timekeeping, making it a popular choice for those seeking convenience and accuracy․

Understanding the Clock’s Features

The Accuwave DS boasts radio-controlled time, automatic DST adjustment, and displays indoor temperature and humidity, offering convenience and accurate environmental monitoring․

Radio-Controlled Time Synchronization (WWVB)

Your Howard Miller clock utilizes the WWVB radio signal, transmitted by the National Institute of Standards and Technology (NIST), for exceptionally accurate timekeeping․ This signal carries precise time data, automatically synchronizing your clock․

Optimal reception requires unobstructed placement, away from potential interference sources like computers or large metal objects․ The clock automatically searches for the WWVB signal daily, typically overnight․

Successful synchronization is indicated by a WWVB icon on the display․ Note that signal strength can vary based on location and atmospheric conditions․ If synchronization fails, refer to the troubleshooting section for guidance on improving reception․

The WWVB technology ensures your clock remains consistently accurate, minimizing the need for manual adjustments․

Automatic Daylight Saving Time Adjustment

The Howard Miller Accuwave DS clock is pre-programmed to automatically adjust for Daylight Saving Time (DST)․ This feature eliminates the need for manual time changes twice a year, ensuring your clock always displays the correct local time․

The clock follows the North American DST schedule, automatically advancing the time by one hour in the spring and reverting in the fall․ This functionality relies on the accurate reception of the WWVB time signal․

If the WWVB signal is lost or reception is poor, the DST adjustment may not occur correctly․ In such cases, manual time setting might be necessary․

Ensure the correct time zone is set for accurate DST observance․ This feature provides convenience and peace of mind, keeping your clock synchronized year-round․

Temperature Display Functionality

The Howard Miller Accuwave DS clock features an integrated temperature display, providing current indoor temperature readings in either Fahrenheit (°F) or Celsius (°C)․ This functionality enhances the clock’s utility beyond simple timekeeping, offering convenient environmental information․

The temperature is measured by a built-in sensor․ For optimal accuracy, avoid placing the clock in direct sunlight, near heat sources, or in areas with poor air circulation․ These factors can influence the readings․

Calibration of the temperature sensor may be required to ensure precise measurements․ Refer to the ‘Calibrating Temperature and Humidity Sensors’ section for detailed instructions on adjusting the temperature display․

The display updates periodically, providing a consistent view of the ambient temperature․ Enjoy the added convenience of knowing the room temperature at a glance․

Humidity Display Functionality

The Howard Miller Accuwave DS clock incorporates a humidity sensor, displaying the current indoor humidity level as a percentage (%)․ This feature complements the temperature reading, providing a more complete picture of the indoor environment․ Maintaining optimal humidity levels is crucial for comfort and health․

The humidity sensor measures the amount of moisture in the air․ Like the temperature sensor, placement is key for accurate readings․ Avoid locations near water sources, such as bathrooms or kitchens, and areas with significant drafts․

Calibration may be necessary to ensure the humidity display reflects accurate measurements․ Consult the ‘Calibrating Temperature and Humidity Sensors’ section for detailed guidance on adjusting the humidity reading․

Regularly monitoring humidity can help prevent issues like mold growth or dry skin, enhancing your overall well-being․

Initial Setup and Configuration

Proper setup involves installing batteries, initiating the time synchronization process with the WWVB signal, and accurately setting your location and time zone․

Installing Batteries

To begin, locate the battery compartment, typically found on the back of the Howard Miller Accuwave DS clock․ Carefully open the compartment cover, ensuring not to apply excessive force․ The clock generally requires AA batteries; however, always verify the specific battery type recommended in your clock’s documentation․

Insert the batteries, paying close attention to the polarity markings (+ and -) inside the compartment․ Incorrect battery installation can prevent the clock from functioning correctly or even cause damage․ Once the batteries are securely in place, close the compartment cover․ The clock should then initiate a self-test or display a signal, indicating successful battery installation․

Note: Replace all batteries at the same time to maintain consistent performance and avoid potential issues with time synchronization․

Initial Time Synchronization Process

Upon initial battery installation, your Howard Miller Accuwave DS clock will automatically begin searching for the WWVB radio signal, broadcast from Fort Collins, Colorado․ This process can take several minutes, and the clock’s display may show a “searching” or “receiving” indicator․

For optimal reception, ensure the clock is positioned away from potential sources of interference, such as electronic devices or metal objects․ A clear line of sight to the west is generally recommended․ The clock will attempt synchronization several times throughout the night․

Successful synchronization is indicated by a WWVB signal icon appearing on the display․ If synchronization fails after a prolonged period, consult the troubleshooting section of this manual․

Setting Location and Time Zone

Although the Accuwave DS automatically receives the time signal, it needs your location to accurately calculate the correct time zone․ This is typically done through a menu setting accessible via the clock’s buttons․ Refer to the specific button layout detailed in the ‘Manual Operation’ section․

The clock may present a list of cities or regions; select the one closest to your location․ Alternatively, some models allow direct input of your longitude and latitude for precise time zone determination․ Accurate location setting is crucial for correct daylight saving time adjustments․

Incorrect location settings will result in inaccurate time displays․ Double-check your selection after initial setup and adjust as needed if you relocate․

Troubleshooting Common Issues

This section addresses frequent problems like synchronization failures, incorrect time, inaccurate readings, and display malfunctions, offering solutions for your Accuwave DS clock․

Clock Not Synchronizing with WWVB Signal

Difficulty receiving the WWVB signal is a common issue․ Ensure your clock isn’t near large metal objects or sources of interference like computers or televisions․ Try relocating the clock to a different location, preferably near a window․

Nighttime is generally the best time for synchronization, as atmospheric conditions are more stable․ The clock automatically searches for the signal several times a day, but manual initiation can sometimes help․

Check that the location and time zone settings are correct, as incorrect settings can hinder signal reception․ If problems persist, a weak WWVB signal in your area might be the cause, and manual time setting may be necessary․

Incorrect Time Display

If your Howard Miller Accuwave DS clock displays the incorrect time, first verify it’s attempting to synchronize with the WWVB signal․ A weak or absent signal will result in an inaccurate time․ Allow sufficient time for synchronization, especially after initial setup or relocation․

Confirm your location and time zone settings are accurate within the clock’s menu․ Incorrect settings will cause a consistent time offset․ If the clock was synchronizing and suddenly displays the wrong time, a temporary signal interruption may be the cause․

As a last resort, manually set the time as a temporary solution, and allow the clock to resume automatic synchronization when the signal is restored․

Temperature/Humidity Readings Inaccurate

Inaccurate temperature or humidity readings on your Howard Miller Accuwave DS clock can stem from several factors․ Ensure the clock isn’t exposed to direct sunlight, heat sources, or drafts, as these can significantly skew the sensor readings․

Consider the clock’s placement; proximity to walls or furniture may restrict airflow and affect accuracy․ The manual details calibration options for both temperature and humidity․ Utilize these settings to fine-tune the readings to match a trusted external thermometer and hygrometer․

Remember that these sensors provide relative measurements, and slight variations are normal․ If calibration doesn’t resolve the issue, contact customer support;

Display Issues (Dimness, Errors)

If your Howard Miller Accuwave DS clock’s display appears dim, first attempt adjusting the brightness settings․ The manual outlines how to cycle through different brightness levels to optimize visibility․ Persistent dimness, even at the highest setting, could indicate low battery power – replace the batteries with fresh ones․

Error messages or garbled characters on the display often signal a temporary glitch․ Try resetting the clock to factory defaults (refer to the manual for instructions)․ If errors persist, it may indicate a hardware malfunction․

Check for any physical damage to the display itself․ Contact Howard Miller customer support for assistance if the issue remains unresolved․

Advanced Settings and Customization

Explore options to personalize your Howard Miller Accuwave DS clock, including display brightness, sensor calibration, and a full factory reset capability․

Adjusting Display Brightness

The Howard Miller Accuwave DS clock offers adjustable display brightness to suit various lighting conditions and personal preferences․ To modify the brightness, locate the designated button – often labeled ‘Light’ or ‘Set’ – on the clock’s casing․

Repeatedly pressing this button cycles through different brightness levels, ranging from dimmest to brightest․ Observe the display carefully to select the most comfortable setting for your environment․ Some models may feature multiple brightness levels, while others offer a continuous adjustment range․

Consider the ambient light; a dimmer setting is ideal for nighttime use to avoid glare, while a brighter setting enhances visibility during daylight hours․ Experiment to find the optimal balance between clarity and energy conservation․

Calibrating Temperature and Humidity Sensors

The Howard Miller Accuwave DS clock features built-in temperature and humidity sensors․ However, these sensors may occasionally require calibration to ensure accuracy, especially if discrepancies are noticed compared to a trusted reference source․

Calibration typically involves comparing the clock’s readings to a known accurate thermometer and hygrometer․ If a difference exists, access the clock’s settings menu – usually through a ‘Set’ or ‘Adjust’ button – and locate the temperature/humidity calibration option․

Follow the on-screen prompts to adjust the readings, incrementally increasing or decreasing the values until they align with the reference measurements․ Remember to record the calibration adjustments for future reference․

Resetting the Clock to Factory Defaults

Occasionally, you may need to reset your Howard Miller Accuwave DS clock to its original factory settings․ This is useful for resolving persistent issues or preparing the clock for a new location or setup․ The reset process typically involves a specific button combination or menu option․

Consult your clock’s manual for the exact procedure, as it can vary slightly between models․ Generally, you’ll need to press and hold a ‘Reset’ or ‘Set’ button for a designated period – often around 5-10 seconds – until the display clears or indicates a reset is in progress․

Be aware that a factory reset will erase all custom settings, including time zone, daylight saving preferences, and any calibration adjustments․ The clock will then restart the initial setup process․

Manual Operation and Override

Despite automatic synchronization, the Accuwave DS allows manual time setting and disabling the radio signal for complete user control and customization․

Manually Setting the Time

If the Accuwave DS fails to synchronize with the WWVB signal, or if you wish to temporarily override the automatic time setting, manual adjustment is possible․ Typically, this involves pressing and holding a designated “Set” or “Mode” button on the clock․

Once in setting mode, use the “Up” and “Down” buttons to adjust the hour and minutes․ Pay close attention to the AM/PM indicator to ensure correct time․ Confirm your selections by pressing the “Set” button again․ Remember that manually setting the time will disable automatic synchronization until re-enabled․

Consult your specific model’s instructions, as button configurations can vary․ This override is useful for travel across time zones or during periods of weak signal reception․

Disabling Automatic Time Synchronization

To prevent unwanted time adjustments, particularly after manually setting the time or when relocating the clock, you may need to disable automatic synchronization with the WWVB signal․ This is usually achieved through a specific sequence involving the “Set” or “Mode” button․

Often, holding the button for an extended period, or cycling through menu options, will reveal a setting to turn off radio-controlled time updates․ The clock will then rely solely on your manual settings․ Remember to re-enable synchronization when desired, allowing the clock to resume automatic updates․

Refer to your model’s manual for the precise procedure, as it can differ․ Disabling synchronization is helpful when the WWVB signal is consistently unreliable in your location․

Resources and Support

Access the official Howard Miller manual (PDF) online, or contact their customer support for assistance․ Explore online forums for community help!

Downloading the Official Howard Miller Manual (PDF)

Locating the official Howard Miller Accuwave DS manual in PDF format is a straightforward process, providing a readily accessible resource for detailed information․ Several websites archive these documents for convenient download․

The Clock Depot (theclockdepot․com) offers a technical operations manual specifically for the Howard Miller 625-236 TechTime model, which shares similar functionalities․

Searching online using keywords like “Howard Miller Accuwave DS manual PDF” will yield additional results․ Always ensure the source is reputable to avoid downloading potentially harmful files․

Having a digital copy allows for easy searching, printing, and offline access to troubleshooting tips, setup instructions, and a complete overview of your clock’s features․

Contacting Howard Miller Customer Support

For personalized assistance with your Howard Miller Accuwave DS clock, reaching out to their customer support team is a valuable option․ While direct contact information isn’t explicitly detailed in readily available online resources, exploring the broader Howard Miller website is recommended․

Typically, manufacturers provide contact forms, email addresses, or phone numbers on their official websites for customer inquiries․

Be prepared to provide your clock’s model number (e․g․, 625-205) and a detailed description of the issue you’re experiencing․

Customer support can offer specific guidance, troubleshooting steps, or information regarding warranty claims related to your Accuwave DS clock․

Online Forums and Communities

Beyond official documentation, numerous online forums and communities can provide valuable insights and support for your Howard Miller Accuwave DS clock․ These platforms often host discussions among fellow owners who have encountered and resolved similar issues․

Searching online using keywords like “Howard Miller Accuwave DS problems” or “Accuwave DS troubleshooting” can lead you to relevant threads and discussions․

These communities are excellent resources for sharing experiences, seeking advice, and discovering workarounds for common challenges․

Remember to exercise caution and critically evaluate information found in online forums, as advice may vary in accuracy and reliability․

Technical Specifications

The Howard Miller Accuwave DS typically requires batteries for operation and functions optimally within a specified temperature range for accurate readings․

Power Requirements

The Howard Miller Accuwave DS clock primarily relies on battery power to maintain its functions, including timekeeping, synchronization with the WWVB signal, and display operation․

Typically, these clocks utilize standard alkaline batteries, often C or D cells, depending on the specific model․ Battery life can vary significantly based on usage patterns, display brightness settings, and the frequency of synchronization attempts․

It is recommended to use high-quality batteries to ensure consistent performance and avoid potential inaccuracies․ Regular battery replacement is crucial for uninterrupted operation and to prevent data loss, particularly regarding time and location settings․ Avoid mixing old and new batteries, and always replace all batteries simultaneously for optimal results․

Operating Temperature Range

The Howard Miller Accuwave DS clock is designed to function accurately within a specific temperature range․ Optimal performance is generally achieved between 32°F (0°C) and 122°F (50°C)․

However, extreme temperatures, both high and low, can affect the clock’s accuracy and potentially damage its internal components․ Exposure to temperatures outside the recommended range may cause temporary inaccuracies in timekeeping or temperature/humidity readings․

Prolonged exposure to extreme conditions could lead to permanent damage to the LCD display or the sensitive electronic circuitry․ It’s advisable to avoid placing the clock in direct sunlight, near heat sources, or in areas prone to freezing temperatures to ensure its longevity and reliable operation․

2016 hyundai tucson owners manual

Understanding your 2016 Hyundai Tucson is crucial for safe and enjoyable driving; official manuals are available in multiple languages like Spanish and Portuguese.

Digital and physical copies, often exceeding 600 pages, provide detailed guidance on all vehicle aspects, ensuring optimal performance and maintenance.

Resources like the Internet Archive offer downloadable versions, with file sizes around 28MB, facilitating easy access to vital information for owners.

Overview of the Manual’s Purpose

The 2016 Hyundai Tucson Owner’s Manual serves as a comprehensive guide, meticulously detailing every facet of your vehicle’s operation and maintenance. Its primary purpose is to empower owners with the knowledge necessary to safely and efficiently utilize all features.

This extensive document, available in various languages including Spanish, Portuguese, and Norwegian, aims to prevent potential issues through proactive maintenance schedules and clear operational instructions. It covers everything from basic functions like starting the engine to complex systems like the infotainment and safety features.

The manual’s detailed approach, spanning hundreds of pages, ensures owners can confidently address routine checks, understand warning signals, and navigate emergency procedures, ultimately maximizing their driving experience and vehicle longevity. Accessing these resources, often available digitally, is vital.

Where to Find the Official Manual (Digital & Physical)

Locating the 2016 Hyundai Tucson Owner’s Manual is straightforward, offering both digital and physical access points. Hyundai dealerships typically provide a physical copy with the vehicle purchase. However, digital versions are readily available online.

The Internet Archive hosts downloadable PDFs in multiple languages – Spanish, Portuguese, and Norwegian – with file sizes around 28MB. These resources, often exceeding 600 pages, can be accessed via platforms like car-service-manuals.org.

Searching online for “2016 Hyundai Tucson Owner’s Manual PDF” will yield further results. Ensure the source is reputable to guarantee accuracy and completeness, providing a reliable guide for your vehicle’s operation and upkeep.

Understanding Your Vehicle

Identifying your 2016 Tucson requires locating the Vehicle Identification Number (VIN), crucial for service and ownership verification, as detailed in the manual.

Vehicle Identification Number (VIN) Location

Locating the VIN on your 2016 Hyundai Tucson is essential for various reasons, including vehicle history reports, insurance claims, and warranty verification. The owner’s manual details several locations where you can find this unique 17-digit code.

Typically, the VIN is visible on a small metal plate affixed to the driver’s side dashboard, easily viewed through the windshield. It’s also commonly found on the driver’s side doorjamb, specifically on the sticker containing vehicle information. Additionally, the VIN is often stamped on the vehicle’s registration and insurance documents.

Confirming the VIN’s accuracy across these sources is recommended. This unique identifier is critical for accessing specific information related to your Tucson, ensuring proper service and maintenance throughout its lifespan.

Key Components and Systems

The 2016 Hyundai Tucson features a range of sophisticated components and systems, comprehensively detailed within the owner’s manual. These include the engine, transmission, braking system (incorporating ABS and ESC), and the airbag system for enhanced safety.

The manual provides in-depth explanations of the infotainment system, climate control, and various driver-assistance features. Understanding the fuel system, including refueling procedures, is also crucial. Detailed diagrams and explanations cover the electrical system, lighting, and wiper functionalities.

Furthermore, the manual outlines the operation of the vehicle’s security system and provides guidance on maintaining optimal performance of each key component, ensuring longevity and reliability.

Operating Your Vehicle

The 2016 Hyundai Tucson’s manual details essential operations, from starting and stopping the engine to utilizing driving modes and the fuel system effectively.

Owners will find clear instructions for maximizing vehicle performance and understanding all operational features for a safe driving experience.

Starting and Stopping the Engine

The 2016 Hyundai Tucson’s owner’s manual provides comprehensive instructions for safely starting and stopping the engine. It details the proper procedures for utilizing the ignition system, ensuring a smooth and reliable start every time. Specifically, the manual likely outlines the steps for both standard key ignition and, if equipped, push-button start systems.

Furthermore, it will explain the correct sequence for shutting down the engine to prevent potential damage and ensure all systems are properly deactivated. Important considerations such as parking brake engagement and gear selector position are also likely covered. The manual emphasizes the importance of following these procedures to maintain optimal vehicle performance and longevity, contributing to a safe and efficient driving experience for all Tucson owners.

Driving Modes and Features

The 2016 Hyundai Tucson owner’s manual thoroughly explains the vehicle’s various driving modes and features, enhancing the driving experience. It details how to utilize features like Eco, Sport, and Normal modes, outlining their impact on fuel efficiency and performance. The manual likely covers the operation of systems like Drive Mode Select, allowing drivers to customize their driving style.

Additionally, it will explain features such as Downhill Brake Control and Cornering Control, enhancing safety and stability in challenging conditions. Understanding these features is crucial for maximizing the Tucson’s capabilities and enjoying a comfortable, controlled ride. The manual serves as a guide to unlocking the full potential of the vehicle’s advanced technologies.

Fuel System and Refueling

The 2016 Hyundai Tucson owner’s manual provides detailed instructions regarding the fuel system and proper refueling procedures. It specifies the recommended fuel type – typically unleaded gasoline – and cautions against using fuel additives that may not meet performance standards. The manual likely emphasizes the importance of verifying fuel compatibility when traveling to different countries.

Furthermore, it will outline the location of the fuel tank, the operation of the fuel door release, and safety precautions to take during refueling. Understanding these guidelines ensures safe and efficient operation of the fuel system, preventing potential damage or performance issues. The manual’s guidance helps owners maintain optimal fuel efficiency and vehicle health.

Maintenance and Care

The 2016 Hyundai Tucson manual details a recommended maintenance schedule, covering fluid checks (oil, coolant, brake fluid) and tire upkeep for longevity.

Following these guidelines ensures optimal vehicle performance, safety, and adherence to any warranty requirements outlined within the comprehensive manual.

Recommended Maintenance Schedule

The 2016 Hyundai Tucson’s owner’s manual provides a detailed maintenance schedule crucial for preserving vehicle reliability and performance. Regular inspections and servicing, as outlined, are vital for preventing unexpected issues and costly repairs.

Typically, the schedule includes oil and filter changes at specified intervals (often every 7,500 to 10,000 miles under normal driving conditions), tire rotations, and fluid level checks. More extensive services, like coolant flushes, brake inspections, and air filter replacements, are recommended at higher mileage milestones.

Adhering to this schedule not only extends the life of your Tucson but also helps maintain its resale value and ensures continued safe operation. The manual will specify precise intervals based on driving habits and conditions.

Fluid Checks and Replacements (Oil, Coolant, Brake Fluid)

Maintaining proper fluid levels in your 2016 Hyundai Tucson is essential for optimal performance and preventing damage. The owner’s manual details how to check oil, coolant, brake fluid, power steering fluid, and windshield washer fluid.

Regular oil changes, typically every 7,500-10,000 miles, are critical for engine health. Coolant should be inspected and replaced according to the schedule to prevent overheating. Brake fluid absorbs moisture, reducing effectiveness, and requires periodic replacement.

Using the correct type of fluid, as specified in the manual, is vital; mixing incompatible fluids can cause serious problems. Consistent fluid checks and timely replacements contribute to a safer and more reliable driving experience.

Tire Information and Maintenance

Proper tire care significantly impacts your 2016 Hyundai Tucson’s handling, safety, and fuel efficiency. The owner’s manual provides crucial information regarding tire size, pressure, and load capacity. Maintaining correct tire pressure, found on the driver’s side doorjamb, is paramount.

Regularly inspect tires for wear, damage, and uneven tread. Rotate tires every 5,000-7,500 miles to ensure even wear and extend their lifespan. The manual details the recommended rotation pattern.

Understanding tire markings, including the DOT code, helps determine tire age. Replace tires when they reach the wear bars or are six years old, regardless of tread depth, for optimal safety.

Safety Features

The 2016 Tucson boasts essential safety systems detailed in the owner’s manual, including airbags, ABS, and ESC, designed to protect occupants during collisions.

Understanding these features—and their limitations—is vital for responsible driving and maximizing vehicle safety capabilities.

Airbag System

The 2016 Hyundai Tucson’s airbag system is a crucial component of its overall safety design, detailed extensively within the owner’s manual. This system includes front airbags for both driver and passenger, along with side and curtain airbags offering comprehensive protection during various collision scenarios.

The manual emphasizes the importance of always wearing seatbelts, as airbags are designed to work in conjunction with them, not as a replacement. It also provides critical information regarding airbag deployment, potential risks, and what to do following a deployment event.

Furthermore, the manual outlines specific cautions, such as never placing rear-facing child seats in front of active airbags, and the potential for injury from rapidly deploying airbags. Proper understanding of these guidelines is paramount for ensuring the safety of all passengers.

Anti-lock Braking System (ABS)

The 2016 Hyundai Tucson is equipped with an Anti-lock Braking System (ABS), a vital safety feature thoroughly explained in the owner’s manual. ABS prevents wheel lock-up during hard braking, allowing the driver to maintain steering control and potentially avoid obstacles.

The manual details how ABS functions – you may feel a pulsing sensation in the brake pedal when activated, which is normal and indicates the system is working correctly. It stresses the importance of maintaining firm, continuous pressure on the brake pedal during ABS activation.

The owner’s manual also clarifies that ABS does not necessarily shorten stopping distances, particularly on loose gravel or snow, but significantly enhances steering capability during emergency braking situations. Understanding its limitations is key to safe operation.

Electronic Stability Control (ESC)

The 2016 Hyundai Tucson’s Electronic Stability Control (ESC) system is a crucial safety component detailed within the owner’s manual. ESC helps prevent skidding and loss of control by selectively applying brakes to individual wheels when it detects a difference between the driver’s intended path and the vehicle’s actual direction.

The manual explains that a flashing ESC indicator light on the instrument panel signifies the system is actively intervening. Drivers should maintain a firm grip on the steering wheel and avoid abrupt steering or braking maneuvers during ESC activation.

It’s important to note, as the manual clarifies, that ESC isn’t a substitute for careful driving; it’s a supplemental system designed to assist in challenging driving conditions and enhance overall vehicle stability.

Interior Features

The 2016 Tucson’s interior boasts an infotainment system, climate controls, and adjustable seats, all thoroughly explained in the owner’s manual for optimal use.

Understanding these features enhances comfort and convenience, providing a tailored driving experience as detailed within the comprehensive guide.

Infotainment System and Navigation

The 2016 Hyundai Tucson’s infotainment system is a central hub for connectivity and entertainment, comprehensively covered within the owner’s manual. It details operation of the touchscreen display, audio controls, and smartphone integration features like Bluetooth connectivity.

Navigation system instructions, if equipped, are also thoroughly explained, including map updates and destination input procedures. The manual guides users through pairing devices, accessing media, and customizing system settings for a personalized experience.

Troubleshooting tips for common issues, such as connectivity problems or display malfunctions, are included to help owners resolve minor concerns independently. Understanding these features maximizes the enjoyment and functionality of the Tucson’s interior technology.

Climate Control System

The 2016 Hyundai Tucson’s climate control system, detailed in the owner’s manual, ensures passenger comfort in all weather conditions. It explains operation of the automatic temperature control, fan speed adjustments, and air distribution modes. Instructions cover both manual and automatic settings, allowing for personalized climate preferences.

The manual also clarifies the use of features like the defroster, rear air conditioning (if equipped), and air recirculation mode. Troubleshooting guidance is provided for common issues, such as insufficient cooling or heating.

Proper usage and maintenance, as outlined, contribute to system efficiency and longevity, ensuring a comfortable driving experience throughout the year.

Seat Adjustments and Comfort Features

The 2016 Hyundai Tucson’s owner’s manual provides comprehensive instructions on adjusting the driver and passenger seats for optimal comfort and support. It details manual and power seat controls, including fore/aft position, seat height, and backrest angle adjustments.

Information covers lumbar support adjustments, if equipped, to enhance lower back comfort during long drives. The manual also explains operation of any available heated or ventilated seats, maximizing comfort in extreme temperatures.

Guidance is given on headrest adjustments for proper neck support and safety. Understanding these features ensures a personalized and comfortable driving experience for all occupants.

Exterior Features

The 2016 Tucson manual details exterior components like lights, signals, wipers, and door locks, ensuring owners understand operation and maintenance procedures.

Proper use of these features enhances visibility, safety, and security, contributing to a confident driving experience for all conditions.

Lights and Signals

The 2016 Hyundai Tucson owner’s manual provides a comprehensive guide to all exterior lighting systems. It details the operation of headlights, including high and low beams, as well as automatic headlight functionality, if equipped.

The manual explains the use of turn signals, hazard lights, and parking lights, emphasizing their importance for clear communication with other drivers. Information is also provided on fog lights, if present, and their appropriate usage in reduced visibility conditions.

Furthermore, the manual covers bulb replacement procedures for all exterior lights, ensuring owners can maintain optimal visibility and safety. It also addresses any specific warning indicators related to the lighting system, helping drivers quickly identify and address potential issues.

Wipers and Washers

The 2016 Hyundai Tucson owner’s manual offers detailed instructions on operating the windshield wiper and washer systems. It explains the various wiper settings, including intermittent, low, and high speeds, allowing drivers to adjust to different weather conditions.

The manual also details how to use the windshield washer fluid, ensuring clear visibility by removing dirt, debris, and other obstructions. Information is provided on refilling the washer fluid reservoir, emphasizing the use of appropriate washer fluid formulations.

Additionally, the manual covers rear wiper operation, if equipped, and provides guidance on blade replacement procedures, maintaining optimal performance and clear visibility for safe driving.

Door Locks and Security System

The 2016 Hyundai Tucson owner’s manual comprehensively explains the operation of the vehicle’s door locks, including manual and power locking systems. It details how to use the interior door lock switches and the remote keyless entry system for convenient control.

The manual also provides instructions on activating and deactivating the security system, outlining the features designed to deter theft and protect the vehicle. Information is included on the panic alarm function and its use in emergency situations.

Furthermore, the manual covers child safety locks, ensuring a secure environment for young passengers, and explains any available automatic door locking features for added convenience and security.

Troubleshooting and Emergency Procedures

The 2016 Tucson manual details vital procedures like jump starting and flat tire handling, ensuring driver preparedness in unexpected roadside emergencies.

Clear instructions and diagrams guide owners through these critical situations, promoting safety and minimizing potential vehicle damage.

Jump Starting Procedures

Safely jump starting your 2016 Hyundai Tucson requires careful adherence to the owner’s manual instructions to prevent damage to the electrical system. Begin by positioning a second vehicle close enough for the jumper cables to reach both batteries, ensuring the vehicles do not touch.

Connect the positive (+) cable to the positive terminal of the discharged battery, then to the positive terminal of the good battery. Next, connect the negative (-) cable to the negative terminal of the good battery, and finally, to a grounded metal surface on the Tucson – not the negative terminal of the discharged battery.

Start the good vehicle and let it run for a few minutes, then attempt to start the Tucson. Once started, carefully disconnect the cables in the reverse order of connection. Consult the manual for specific warnings and precautions regarding jump starting procedures.

What to Do in Case of a Flat Tire

Addressing a flat tire on your 2016 Hyundai Tucson safely requires following the owner’s manual guidelines. First, activate your hazard lights and pull over to a level, stable surface away from traffic. Engage the parking brake firmly.

Locate the spare tire, jack, and lug wrench – their positions are detailed in the manual. Loosen the lug nuts on the flat tire before jacking up the vehicle. Position the jack correctly, as illustrated in the manual, and raise the vehicle until the flat tire is off the ground.

Remove the lug nuts completely, replace the flat with the spare, and tighten the lug nuts by hand. Lower the vehicle, then fully tighten the lug nuts in a star pattern. Finally, check the spare tire’s pressure and have the flat tire repaired or replaced promptly.

chef’s choice knife sharpener instruction manual

ChefsChoice offers innovative electric knife sharpeners, praised by sources like Reddit’s r/Cooking and America’s Test Kitchen.
These sharpeners, such as the Trizor XV, provide a quick and effective alternative to traditional sharpening methods,
taking only seconds compared to the minutes required for manual sharpening, as noted in recent reviews from 2022-2025.

What is a ChefsChoice Knife Sharpener?

ChefsChoice knife sharpeners are electric devices designed to restore the edge on kitchen knives quickly and consistently. Unlike traditional whetstones requiring skill and time, these sharpeners utilize abrasive wheels – typically diamond – in a multi-stage process.

As highlighted by Wirecutter and Consumer Reports, models like the Trizor XV are engineered for ease of use, even for those unfamiliar with sharpening techniques. They cater to both German and Japanese-style blades, offering a convenient solution for maintaining sharp knives, as discussed on Reddit in 2023.

Benefits of Using an Electric Knife Sharpener

Electric knife sharpeners, like those from ChefsChoice, offer significant advantages over manual methods. A key benefit is speed; sharpening takes seconds instead of minutes per knife, as noted by r/Cooking users.

Consistency is another advantage, ensuring a uniform edge regardless of user skill. Consumer Reports testing confirms effective sharpening, while Wirecutter emphasizes the convenience. This makes maintaining a sharp knife collection far less time-consuming and more accessible for all cooks.

Understanding the ChefsChoice Trizor XV

The ChefsChoice Trizor XV is a highly-rated, 3-stage electric knife sharpener, favored for its speed and effectiveness, according to Wirecutter and Consumer Reports reviews.

Key Features of the Trizor XV Model

The ChefsChoice Trizor XV boasts several key features contributing to its popularity. Consumer Reports highlights its ability to effectively sharpen both German and Japanese-style knives. Its 3-stage process – diamond abrasives for shaping and sharpening, and stropping for polishing – delivers a remarkably sharp edge.

Notably, the Trizor XV accommodates 15-degree and 20-degree knife angles, catering to a wide range of kitchen cutlery. As discussed on Reddit, its speed—sharpening in approximately 40 seconds—is a significant advantage over manual methods. The model’s robust construction ensures durability and consistent performance.

The 3-Stage Sharpening Process Explained

The ChefsChoice Trizor XV utilizes a three-stage sharpening system for optimal results. Stage 1 employs diamond abrasive wheels to repair and reshape the knife’s edge. Stage 2, also using diamond abrasives, refines the edge to achieve sharpness. Finally, Stage 3 utilizes stropping wheels to polish and create a lasting, refined edge.

Wirecutter emphasizes the impressive speed and quality of this process. This sequential approach, as highlighted in reviews, ensures a consistently sharp blade, effectively addressing dullness and restoring the knife’s cutting performance with minimal effort.

Setting Up Your ChefsChoice Sharpener

ChefsChoice sharpeners require simple setup: unboxing to identify components, followed by secure placement on a stable surface, and connection to a standard power outlet for operation.

Unboxing and Component Identification

Upon opening your ChefsChoice sharpener, carefully remove all packaging materials. You should find the main sharpening unit, typically a Trizor XV or AngleSelect 1520 model.
Inspect for included accessories like a user manual, potentially angle guides, and cleaning brushes.
Verify the presence of all three sharpening stages – diamond abrasive wheels for shaping and sharpening, and stropping wheels for polishing.
Ensure no parts are damaged during shipping before proceeding with setup.

Proper Placement and Power Connection

Place your ChefsChoice sharpener on a stable, dry, and level surface. Ensure adequate space around the unit for comfortable operation.
Locate the power cord and plug it into a standard electrical outlet.
Confirm the voltage compatibility before connecting.
Avoid using extension cords if possible; if necessary, use a heavy-duty cord.
Always ensure the sharpener is switched off before plugging or unplugging it.

Sharpening with the ChefsChoice Trizor XV

The Trizor XV utilizes a three-stage process for exceptional sharpening, as highlighted by Wirecutter.
Each stage progressively refines the blade, delivering professional results quickly and efficiently.

Stage 1: Diamond Abrasive Wheels ― Repairing and Shaping

Stage one, employing diamond abrasive wheels, is crucial for repairing dull or damaged blades. This initial stage effectively reshapes the knife’s edge, removing imperfections and establishing the correct angle for sharpening.
As Consumer Reports demonstrates, this stage prepares the blade for subsequent refinement. Gently draw the blade through the slot, following the sharpener’s guide, allowing the diamond wheels to do the work. Repeat several times to restore the blade’s profile.

Stage 2: Diamond Abrasive Wheels ౼ Sharpening

Stage two utilizes finer diamond abrasive wheels to refine the edge created in stage one. This stage actively sharpens the blade, creating a precise and effective cutting surface. Maintaining consistent pressure and following the sharpener’s guide is vital for optimal results, as highlighted by user experiences on Reddit.
Repeat passes through this stage until a noticeable improvement in sharpness is achieved.

Stage 3: Stropping Wheels ౼ Polishing and Refining

The final stage employs stropping wheels to polish the blade and remove any remaining burr, resulting in a remarkably refined and sharp edge. Wirecutter reviews emphasize the impressive finishing touch provided by this stage. Several passes through the stropping wheels enhance edge retention and overall cutting performance. This step is crucial for achieving professional-level sharpness.

Knife Angle Selection

ChefsChoice sharpeners accommodate 15- and 20-degree angles, suitable for modern and traditional knives, respectively. BestAdvisor.com highlights the importance of selecting the correct angle for optimal results.

Understanding 15-Degree vs. 20-Degree Angles

Fifteen-degree angles, commonly found on Japanese knives, produce a sharper, more delicate edge ideal for precision slicing. Conversely, twenty-degree angles, typical of German-style knives, create a more durable, robust edge suited for heavier tasks.

Reddit discussions emphasize that most modern cooking knives utilize a 15-degree angle. ChefsChoice models, like the Trizor XV, often offer settings for both, allowing versatility. Selecting the appropriate angle ensures optimal performance and longevity for your blades.

Adjusting the Angle Guide for Different Knives

ChefsChoice sharpeners feature adjustable angle guides to accommodate various knife types. Carefully consult your model’s instruction manual for specific guidance. Typically, a dial or slider allows you to select between 15 and 20-degree settings.

Ensure the knife is firmly seated against the guide during sharpening. Proper adjustment is crucial for achieving the desired edge. BestAdvisor.com highlights the importance of selecting the correct setting for optimal results, maximizing sharpness and blade life.

Knife Types Compatible with ChefsChoice

ChefsChoice sharpeners excel with chef’s and paring knives, but avoid ceramic or single-bevel blades. Wirecutter notes impressive results on Japanese and German-style knives.

Suitable Knife Styles (Chef’s, Paring, Serrated)

ChefsChoice sharpeners are remarkably versatile, effectively handling a wide array of kitchen knives. German-style knives, like the J;A. Henckels tested by Consumer Reports, and Japanese blades, such as Global knives, respond exceptionally well to the sharpening process.

Standard chef’s knives and smaller paring knives are ideally suited for the 3-stage system. While some models can handle serrated knives, always consult the specific model’s instructions for proper technique and compatibility to avoid damage.

Knives to Avoid (Ceramic, Single-Bevel)

ChefsChoice sharpeners are not designed for all knife types. Ceramic knives, due to their hardness and brittleness, should never be sharpened with these electric models, as it can cause irreparable damage to both the knife and the sharpener.

Similarly, knives with a single-bevel edge, commonly found in certain Asian culinary traditions, are not compatible with the sharpening angles of ChefsChoice systems. Using the sharpener on these knives will likely result in an uneven and unusable edge.

Maintenance and Cleaning

ChefsChoice sharpeners require regular cleaning to maintain optimal performance. Remove metal filings from each stage after use, ensuring longevity and consistent sharpening results, as per instructions.

Cleaning the Sharpening Stages

Regular cleaning is crucial for maintaining your ChefsChoice sharpener’s efficiency. After each use, unplug the unit and use a soft brush to remove metal filings accumulated in each of the three sharpening stages.
These filings can hinder performance if left unchecked. A damp cloth can wipe down the exterior, but avoid immersing the unit in water.
Ensure all components are completely dry before reassembling and storing, preserving the sharpener’s lifespan and sharpening quality.

Replacing Diamond Abrasive Wheels

Diamond abrasive wheels will eventually wear down with use, impacting sharpening performance; ChefsChoice recommends periodic replacement, though frequency depends on usage. Carefully remove the old wheels, noting their orientation for correct installation of the new ones.
Ensure the replacement wheels are specifically designed for your Trizor XV model. Proper replacement restores optimal sharpening, maintaining the precision and effectiveness of your knife edges.

Troubleshooting Common Issues

If knives aren’t sharpening, ensure proper angle selection and clean sharpening stages. Unusual noises may indicate debris or worn wheels, requiring inspection and cleaning.

Knife Not Sharpening Effectively

If your Chef’sChoice sharpener isn’t delivering a sharp edge, first verify you’ve selected the correct angle – 15 degrees for most modern knives, or 20 degrees for older, tougher blades.
Ensure the knife is inserted fully into each stage and pulled through with gentle, consistent pressure.

Also, inspect and clean the diamond abrasive wheels; accumulated metal filings can hinder performance.
Confirm the wheels are properly aligned and not excessively worn.
Refer to the manual for wheel replacement guidance if needed, as noted in user feedback.

Sharpener Making Unusual Noises

Unusual noises from your Chef’sChoice sharpener often indicate debris buildup within the sharpening stages. Immediately discontinue use and unplug the unit. Carefully inspect and thoroughly clean each stage, removing any accumulated metal filings or food particles.

Ensure proper knife insertion; forcing a blade can strain the motor and create noise.
If the noise persists after cleaning, consult the instruction manual for troubleshooting or contact ChefsChoice customer support for assistance, as recommended by user reviews.

Safety Precautions

Always unplug the sharpener before cleaning or maintenance. Handle knives with extreme care during and after sharpening.
Keep fingers clear of moving parts to avoid injury, as emphasized in the manual.

Handling the Sharpener with Care

ChefsChoice sharpeners contain precision components; avoid dropping or subjecting the unit to strong impacts. Wirecutter reviews highlight the importance of careful operation. Always ensure the unit is placed on a stable, level surface before use.
Never insert knives forcefully – let the sharpening stages guide the blade. Regularly inspect the power cord for damage, and discontinue use if frayed. Proper handling extends the sharpener’s lifespan and ensures safe operation.

Avoiding Injury During Operation

Always unplug the ChefsChoice sharpener before cleaning or maintenance. Keep hands clear of the sharpening slots during operation – knives are drawn through automatically. Never attempt to sharpen damaged or excessively dull blades without first assessing their condition.
Exercise caution when handling freshly sharpened knives, as they will be exceptionally sharp. Reddit discussions emphasize the speed of the process, requiring focused attention.

Comparing ChefsChoice Models

ChefsChoice offers various models, like the Trizor XV and AngleSelect 1520, differing in features and price. BestAdvisor.com highlights key specification comparisons to aid selection.

Trizor XV vs. AngleSelect 1520

ChefsChoice’s Trizor XV and AngleSelect 1520 both deliver exceptional sharpening, but cater to different needs. BestAdvisor.com details a feature comparison, noting the AngleSelect 1520 allows for customizable sharpening angles – 15 or 20 degrees – while the Trizor XV excels with its three-stage system.

The Trizor XV consistently receives high marks for speed and ease of use, as highlighted in Wirecutter reviews, making it ideal for frequent sharpening. The AngleSelect 1520 provides greater control for specialized knives, though potentially requiring a steeper learning curve.

Choosing the Right Model for Your Needs

Selecting the ideal ChefsChoice sharpener depends on your sharpening frequency and knife collection. If you prioritize speed and simplicity for regularly maintained kitchen knives, the Trizor XV, recommended by America’s Test Kitchen, is an excellent choice.

However, if you possess a diverse range of knives requiring varied angles, or enjoy a more customized sharpening experience, the AngleSelect 1520 offers greater flexibility, as detailed by BestAdvisor.com. Consider your skill level and knife types when deciding.

Advanced Sharpening Techniques

While primarily for standard knives, some users explore reviving extremely dull blades with multiple passes through the ChefsChoice system.
However, serrated knife sharpening capabilities vary by model, requiring careful consideration.

Sharpening Serrated Knives (If Applicable)

ChefsChoice sharpeners offer varying capabilities with serrated knives; not all models are suitable. The Trizor XV, for example, can sharpen some serrated edges, but requires a specific technique.
Users should consult their instruction manual for guidance, as improper use can damage the blade.
Gentle, consistent pressure is crucial, and multiple passes may be needed to restore the serrations.
Always prioritize safety and refer to the manufacturer’s recommendations.

Reviving Extremely Dull Blades

ChefsChoice sharpeners excel at restoring heavily dulled knives, utilizing diamond abrasive wheels for initial repair and reshaping. The Trizor XV, specifically, is noted for its ability to tackle significantly damaged edges.
However, multiple passes through Stage 1 may be necessary. Patience is key; avoid excessive force, and allow the sharpener to work gradually.
Consult the manual for optimal settings and techniques to safely revive your blades.

Understanding Sharpening Terminology

Key terms include a “burr,” the thin, raised edge created during sharpening, and “edge retention,” describing how long a knife stays sharp after honing.

What is a Burr?

A burr is a microscopic, raised edge of metal formed on the blade during the sharpening process. ChefsChoice sharpeners intentionally create this burr, as it signifies metal removal and indicates the blade is being reshaped.

Initially quite fragile, the burr is removed in subsequent sharpening stages – specifically, the stropping phase – to refine the edge. Recognizing a burr confirms effective sharpening; its presence demonstrates the abrasive wheels are actively working to create a new, sharp edge.

Defining Edge Retention

Edge retention refers to how long a knife maintains its sharpness after being sharpened. Factors influencing retention include steel hardness, the angle of the edge, and usage. ChefsChoice sharpeners, particularly the Trizor XV, aim to create a durable edge.

While electric sharpeners offer convenience, consistent edge retention relies on proper technique and the quality of the knife itself. Regular honing and occasional sharpening will maximize the lifespan of your blade’s sharpness.

Customer Reviews and Testimonials

ChefsChoice sharpeners receive largely positive feedback, with users on Reddit praising their speed and effectiveness. Wirecutter and Consumer Reports also highlight impressive results, though some note minor concerns.

Positive Feedback from Users

Many users express significant satisfaction with ChefsChoice sharpeners, particularly the Trizor XV model. Reddit discussions reveal appreciation for the speed and convenience, contrasting sharply with time-consuming manual methods. Users report achieving impressively sharp edges in seconds, even on previously dull blades.
America’s Test Kitchen’s recommendation further bolsters confidence, while Wirecutter confirms the sharpener’s ability to quickly restore kitchen knives to peak performance.

Common Concerns and Criticisms

Despite positive reviews, some users voice concerns. While generally effective, a few reports suggest the ChefsChoice sharpeners may not achieve the absolute finest edge compared to skilled manual sharpening. Comparisons between models like the AngleSelect 1520 and Trizor XV highlight nuanced performance differences.
Some users also question long-term durability, though overall, satisfaction remains high, with most praising the value for the price.

Where to Purchase and Pricing

ChefsChoice sharpeners are widely available at authorized retailers and online stores like Amazon, typically ranging from $120 to $150, depending on the model, such as the Trizor XV.

Authorized Retailers and Online Stores

ChefsChoice knife sharpeners are conveniently accessible through a variety of channels. Major retailers like Amazon consistently stock models such as the Trizor XV and AngleSelect 1520, offering competitive pricing and frequent sales. Additionally, you can find them at kitchen supply stores, department stores like Bed Bath & Beyond (if available), and specialty culinary shops. Checking the official ChefsChoice website provides a comprehensive list of authorized dealers, ensuring product authenticity and warranty support. Online availability ensures easy access for all customers.

Typical Price Range for Different Models

ChefsChoice sharpeners cater to various budgets. Entry-level models generally range from $80 to $120. The popular Trizor XV, frequently recommended by Consumer Reports and Reddit users, typically sells for around $148. More advanced options, like the AngleSelect 1520, can reach prices between $150 and $200. Prices fluctuate based on retailer, promotions, and specific features, so comparing across multiple stores is advisable for the best deal.

Warranty Information

ChefsChoice offers warranty coverage on its sharpeners, details of which are available through their customer support. Specific terms vary by model, ensuring product reliability and customer satisfaction.

Coverage Details and Claim Process

ChefsChoice warranties typically cover defects in materials and workmanship for a specified period, often one to three years depending on the model. To initiate a claim, customers should contact ChefsChoice customer support with proof of purchase and a description of the issue.

The company may request photos or return of the defective unit for inspection. Warranty coverage doesn’t extend to damage from misuse, accidents, or unauthorized repairs. Detailed warranty information is available on the ChefsChoice website or within the product’s documentation.

Contacting ChefsChoice Customer Support

ChefsChoice customer support can be reached through various channels for assistance with product inquiries, warranty claims, or troubleshooting. Their official website provides a comprehensive FAQ section and contact form.

Customers can also connect with support via phone during business hours. Prompt and helpful assistance is a priority, ensuring users can maximize their sharpening experience. Detailed contact information, including email and phone numbers, is readily available on their website.

companion eco oxygen concentrator manual

Companion Eco Oxygen Concentrator Manual: Article Plan

This detailed plan outlines a comprehensive guide for users, covering setup, operation, maintenance, and troubleshooting of the CAIRE Companion 5 Eco oxygen concentrator.

Welcome to the comprehensive user manual for the Companion Eco Oxygen Concentrator! This guide is designed to provide you with all the necessary information to safely and effectively operate your new device. The CAIRE Companion 5 Eco delivers a reliable source of supplemental oxygen, enhancing quality of life for individuals with respiratory needs.

This manual details everything from initial setup and understanding key components, to troubleshooting common issues and performing routine maintenance. We’ll cover safety precautions, alarm indicators, and warranty information.

Whether you are a healthcare professional or a patient, this resource will ensure optimal performance and longevity of your Companion Eco.

What is a Companion Eco Oxygen Concentrator?

The Companion Eco Oxygen Concentrator is a medical device designed to deliver supplemental oxygen to individuals requiring respiratory support. Unlike oxygen tanks, it extracts oxygen directly from the air, providing a continuous and convenient supply. The CAIRE Companion 5 Eco is specifically engineered for portability and efficiency, making it suitable for home and travel use.

This concentrator offers a reliable alternative to traditional oxygen delivery systems, improving patient comfort and independence. It’s a durable and user-friendly device, featuring a simple interface and easy-to-read hour meter.

Key Features of the Companion 5 Eco

The Companion 5 Eco boasts several key features enhancing usability and patient care. Its lightweight design and compact size facilitate easy transport, while the durable plastic casing protects internal components. A user-friendly interface simplifies operation, and the integrated hour meter tracks usage for maintenance scheduling.

Furthermore, it offers adjustable oxygen flow settings to meet individual needs. The device is designed for quiet operation, minimizing disruption. Sprylyfe provides shipping, payment plans, and a money-back guarantee, adding value to this high-quality concentrator.

Understanding the Device Components

The Companion 5 Eco comprises both external and internal components working in harmony. Externally, a robust plastic case safeguards the inner workings, while the ON/OFF power switch – marked with ‘I’ for on and ‘O’ for off – controls power supply. The device connects via nasal cannula and tubing, often utilizing an in-line firebreak for safety.

Internally, sophisticated mechanisms deliver concentrated oxygen. Proper understanding of these components is crucial for safe operation and effective troubleshooting, as detailed within this manual and the CAIRE technical documentation.

External Components Overview

The Companion 5 Eco’s exterior features a durable plastic casing designed for protection and portability. A clearly labeled ON/OFF power switch initiates or halts operation; the ‘I’ symbol indicates power on, while ‘O’ signifies power off. Oxygen delivery relies on a connection point for nasal cannulas or extension tubing.

Crucially, an in-line firebreak can be added between the concentrator and the patient for enhanced safety. Always consult the firebreak manufacturer’s instructions for correct usage. These external features facilitate simple, yet secure, operation.

Internal Components & Protection

The CAIRE Companion 5 Eco houses sophisticated internal components responsible for oxygen concentration. These are shielded by the robust, durable plastic case, safeguarding against external damage and ensuring longevity. Internal protection mechanisms are vital for consistent performance and patient safety.

While users shouldn’t attempt internal repairs – this voids the warranty and poses risks – understanding the protective casing’s role is key. Regular external cleaning, as detailed later, contributes to maintaining this internal component security.

Setting Up Your Companion Eco

Proper setup is crucial for optimal performance and safety. Begin with a thorough initial inspection, carefully unpacking the device and verifying all components are present and undamaged. Ensure the unit is placed on a stable, level surface with adequate ventilation.

Before first use, familiarize yourself with the ON/OFF power switch – indicated by ‘I’ for ON and ‘O’ for OFF; This simple interface initiates or halts power supply. Following these steps ensures a smooth and safe start to using your Companion 5 Eco oxygen concentrator.

Initial Inspection & Unpacking

Carefully inspect the carton for any signs of damage during shipment. Once opened, verify all listed components are included: the Companion 5 Eco unit, nasal cannula, tubing, and this manual. Check the durable plastic case for any cracks or dents, ensuring the internal components are protected.

Confirm the ON/OFF power switch functions correctly. Report any discrepancies or damage to your equipment provider immediately. Proper unpacking and inspection guarantee a fully functional device from the start, maximizing your oxygen therapy experience.

Powering On/Off the Device

To initiate operation, locate the ON/OFF power switch on the unit. The “I” symbol indicates the ON position, while “O” signifies OFF. Ensure the device is plugged into a grounded electrical outlet before switching it on. A brief self-test will commence, indicated by internal sounds and lights.

To power down, simply switch the power to the “O” position. Always turn off the device before performing any maintenance or filter replacements. Proper powering on/off procedures ensure device longevity and safe operation.

Operating Instructions

The Companion 5 Eco features a simple, user-friendly interface for adjusting oxygen delivery. Begin by ensuring the device is powered on and has completed its self-test. Oxygen flow settings can be adjusted as prescribed by your healthcare professional. Always use approved nasal cannulas and tubing, checking for kinks or leaks before use.

Monitor the hour meter to track usage. Regular operation and adherence to prescribed settings are crucial for effective oxygen therapy. This device is designed for ease of use and reliable performance.

Adjusting Oxygen Flow Settings

Oxygen flow is adjusted based on your doctor’s prescription, ensuring optimal therapy. The Companion 5 Eco allows for precise control of oxygen output. Carefully follow your healthcare provider’s instructions regarding the prescribed flow rate (liters per minute ⸺ LPM).

Avoid self-adjusting the flow rate without medical guidance. Incorrect settings can compromise treatment effectiveness. Regularly monitor your oxygen saturation levels as directed by your physician. Proper flow settings are vital for maintaining health and well-being during oxygen therapy.

Using with Nasal Cannula & Tubing

Proper connection of the nasal cannula and tubing is crucial for effective oxygen delivery. Ensure the tubing connects securely to both the oxygen concentrator outlet and the nasal cannula. Inspect the cannula for any cracks or damage before each use, replacing it if necessary.

Avoid kinking or obstructing the tubing, as this restricts oxygen flow. Regularly check connections for leaks using a mild soapy water solution. A secure and unobstructed pathway ensures optimal oxygen intake, contributing to successful therapy.

Safety Precautions

Prioritizing safety is paramount when using the Companion Eco. Always use a Firebreak, installed in-line with the nasal cannula, to mitigate potential fire hazards associated with oxygen-rich environments. Regularly inspect the device and accessories for damage.

Never operate the concentrator near open flames or flammable materials. In the event of an alarm or malfunction, immediately consult the troubleshooting section of this manual or your equipment provider. Proper maintenance and adherence to these precautions ensure safe and effective oxygen therapy.

Firebreak Installation & Use

The Firebreak is a crucial safety device, designed to prevent flashback and potential fire hazards. It’s installed in-line between the oxygen concentrator outlet and the nasal cannula or tubing. Always refer to the manufacturer’s instructions included with each Firebreak kit for proper installation and usage.

Ensure a secure connection to prevent leaks. Regularly inspect the Firebreak for any signs of damage or deterioration. Proper Firebreak implementation significantly enhances the safety of oxygen therapy with the Companion 5 Eco.

Alarm Indicators & Troubleshooting

The Companion 5 Eco utilizes alarms to alert users to potential issues. Common alarms include low oxygen, high oxygen, and power failure. If an alarm sounds, immediately consult the troubleshooting section of this manual. Check for kinks or leaks in the oxygen tubing and nasal cannula.

If the problem persists, contact your Equipment Provider for assistance. Ignoring alarms can compromise therapy effectiveness and potentially create a hazardous situation. Prompt attention to alarm indicators is vital for safe operation.

Maintenance & Filter Replacement

Regular maintenance ensures optimal performance and longevity of your Companion 5 Eco. This includes routine cleaning of the exterior with a damp cloth and, crucially, timely filter replacement. Filters prevent dust and particles from entering the device, maintaining air quality.

Filter replacement schedules vary based on environmental factors; however, consistent checks are vital. Refer to the dedicated ‘Filter Replacement Schedule’ section for specific guidance. Proper cleaning and filter upkeep are essential for reliable oxygen delivery.

Filter Replacement Schedule

To maintain optimal performance, replace the Companion 5 Eco’s filters regularly. A general guideline suggests replacing the main filter every 3-6 months under normal household dust conditions. However, environments with higher dust levels – such as those with pets or ongoing renovations – necessitate more frequent changes, potentially monthly.

Always inspect filters visually; if visibly dirty, replace them immediately. Keeping a log of replacement dates helps ensure adherence to the schedule, guaranteeing consistent air quality and device efficiency.

Cleaning Procedures

Regular cleaning extends the life of your Companion 5 Eco. Before cleaning, always disconnect the device from the power source. The exterior cabinet can be wiped down with a damp, non-abrasive cloth and mild detergent. Avoid getting moisture into the unit’s openings.

Do not use strong solvents or abrasive cleaners. The filter compartment should be cleaned during each filter replacement. Ensure all components are completely dry before reassembling and powering on the device. Consistent cleaning promotes hygienic operation.

Troubleshooting Common Issues

Addressing issues promptly ensures continued reliable performance. If no oxygen flow is detected, first check for kinks or leaks in the nasal cannula and tubing. Verify the device is powered on and the flow settings are appropriately adjusted. Consult the alarm troubleshooting guide for specific error codes.

If problems persist, contact your equipment provider. Never attempt internal repairs yourself. Regular maintenance and adherence to safety precautions minimize potential issues, guaranteeing optimal oxygen delivery.

No Oxygen Flow – Causes & Solutions

Several factors can cause a lack of oxygen delivery. A kinked or leaking oxygen tubing, including the nasal cannula, is a common culprit – inspect thoroughly. Ensure the concentrator is switched on and properly plugged into a functioning power outlet. Verify the oxygen flow setting isn’t set to zero.

If these checks don’t resolve the issue, consult the alarm indicators section. If the problem continues, contact your equipment provider for assistance. Do not attempt self-repair.

Alarm Troubleshooting Guide

The Companion 5 Eco utilizes alarms to alert users to potential issues. Consult the device’s display panel for specific alarm codes. Common alarms include low oxygen concentration, high/low pressure, and system malfunction. Refer to the full technical manual for a complete list and detailed explanations of each alarm.

Attempt simple fixes like checking tubing connections. If an alarm persists, power cycle the unit. If the problem isn’t resolved, immediately contact your healthcare provider or equipment supplier for professional assistance.

Understanding the Hour Meter

The Companion 5 Eco features an easily readable hour meter, crucial for tracking device usage and scheduling preventative maintenance. This meter displays the total accumulated operating hours of the oxygen concentrator. Regularly noting the hour meter reading allows for timely filter replacements, ensuring optimal performance and longevity of the unit.

Consistent monitoring helps maintain the concentrator’s efficiency and adherence to recommended service intervals. It’s a simple operation, but vital for reliable oxygen delivery.

Warranty Information & Support

CAIRE offers a comprehensive warranty on the Companion 5 Eco oxygen concentrator, protecting against manufacturing defects. Specific warranty terms and duration are detailed in the separate warranty document included with your device. For warranty claims or support inquiries, contact your equipment provider or CAIRE directly.

Dedicated customer support is available to assist with any questions or concerns regarding operation, maintenance, or troubleshooting. Accessing support ensures continued reliable performance and peace of mind.

Purchasing Options & Deals

Sprylyfe provides convenient purchasing options for the CAIRE Companion 5 Eco oxygen concentrator, including flexible payment plans to suit various budgets. We frequently offer attractive deals, such as free shipping, making it more accessible to those who need it.

Furthermore, Sprylyfe stands behind its products with a money-back guarantee, ensuring customer satisfaction. Purchase the Companion 5 Eco today and experience a high-quality oxygen concentrator with exceptional support!

Sprylyfe Offers: Shipping, Payments, Guarantee

At Sprylyfe, we prioritize a seamless customer experience. We proudly offer free shipping on the CAIRE Companion 5 Eco oxygen concentrator, delivering it directly to your door without added costs. Flexible payment plans are available, allowing you to manage your investment comfortably.

To ensure peace of mind, Sprylyfe provides a comprehensive money-back guarantee. We are confident in the quality of our products and stand behind your satisfaction. Purchase with confidence today!

Technical Specifications

The CAIRE Companion 5 Eco is engineered for reliable performance. This oxygen concentrator features a durable plastic casing protecting internal components. It operates with a simple user interface and an easy-to-read hour meter for tracking usage. The device utilizes pressure swing adsorption (PSA) technology to deliver consistent oxygen levels.

Specific details, including oxygen output, flow rate ranges, power consumption, and physical dimensions, are thoroughly documented in the full CAIRE Companion 5 technical manual (PN 14940837 B).

Frequently Asked Questions (FAQ)

Q: What if my Companion 5 Eco isn’t producing oxygen? A: First, check for kinks or leaks in the nasal cannula and tubing. Consult the troubleshooting section for further guidance. Q: How often should I replace the filters? A: Refer to the ‘Maintenance & Filter Replacement’ section for the recommended schedule.

Q: Where can I find the complete technical manual? A: Access the CAIRE Companion 5 Technical Manual online for detailed information. Q: What if I can’t resolve an alarm? A: Contact customer support immediately.

Resources & Further Information

For in-depth technical details, access the CAIRE Companion 5 Technical Manual online; it provides comprehensive specifications and operational procedures. Need assistance? Our dedicated customer support team is readily available to address your queries and concerns.

Explore Sprylyfe’s website for additional resources, including helpful videos and frequently asked questions. Remember to always refer to the manufacturer’s instructions for firebreak usage. We aim to provide complete support for your Companion Eco experience.

Accessing the CAIRE Companion 5 Technical Manual

The complete CAIRE Companion 5 Technical Manual is a valuable resource for detailed information regarding the device’s operation and maintenance. You can download this essential document online, providing in-depth specifications and troubleshooting guidance. This manual covers all aspects of the concentrator, from component descriptions to detailed alarm explanations.

Accessing this resource ensures you have the most accurate and up-to-date information available, supporting safe and effective use of your Companion 5 Eco oxygen concentrator.

Contacting Customer Support

Should you encounter issues not addressed in this manual, or require further assistance with your Companion 5 Eco oxygen concentrator, dedicated customer support is readily available. Promptly contacting support ensures quick resolution of any concerns, maximizing your device’s performance and your peace of mind.

Reach out to qualified professionals for expert guidance on operation, maintenance, or troubleshooting. Don’t hesitate to seek help; your health and safety are paramount. Contact your Equipment Provider for immediate assistance.

The Companion 5 Eco oxygen concentrator represents a significant advancement in portable oxygen therapy, offering users freedom and independence. This manual provides the essential knowledge for safe and effective operation, ensuring optimal performance and longevity of your device. Regular maintenance, diligent troubleshooting, and adherence to safety precautions are crucial.

By understanding the features and functionalities detailed within, you can confidently manage your oxygen needs. Sprylyfe’s commitment to quality, coupled with accessible support, empowers you to live a fuller, more active life.

brother pe770 manual

Brother PE770 Manual: A Comprehensive Guide

This comprehensive guide details the Brother PE770 embroidery machine, offering access to PDF versions of the user manual, operation guides, and quick references․

Explore service manuals, mechanism outlines, and electronic component locations, alongside warranty details and downloadable resources for optimal Brother PE770 operation․

The Brother PE770 is a popular computerized embroidery machine designed for both beginners and experienced users․ This machine offers a blend of user-friendliness and advanced features, making it a versatile choice for a wide range of embroidery projects․ Accessing the Brother PE770 manual is crucial for understanding its capabilities and ensuring optimal performance․

This guide serves as a starting point, directing users to downloadable PDF versions of the operation manual and quick reference guides․ Familiarizing yourself with the machine’s components, as outlined in the service manual, is highly recommended․ The PE770 boasts built-in designs and fonts, alongside USB connectivity for importing custom creations․ Understanding the mechanism outline and electronic component locations, detailed in available resources, will aid in maintenance and troubleshooting․ Proper use, guided by the manual, guarantees a fulfilling embroidery experience․

Understanding the PE770’s Key Features

The Brother PE770 distinguishes itself through several key features detailed within its comprehensive manual․ USB connectivity allows seamless data transfer and design importing, expanding creative possibilities beyond the built-in options․ The machine’s memory capacity, explained in the manual, facilitates storing custom designs for quick access․

A significant advantage is the range of built-in designs and fonts, offering immediate project starters․ The PE770’s mechanism, outlined in the service manual, ensures reliable operation․ Understanding the control system block diagram aids in troubleshooting․ Accessing the PDF operation manual provides detailed instructions on utilizing these features effectively․ The warranty information, also available, offers peace of mind․ Mastering these features, guided by the manual, unlocks the full potential of the Brother PE770․

Getting Started with Your PE770

Begin by carefully unboxing your PE770, referencing the manual for initial setup․ Power on and familiarize yourself with basic operations and the control panel’s functions․

Unboxing and Initial Setup

Carefully unpack your Brother PE770 embroidery machine, ensuring all components listed in the manual’s accessory parts list are present․ Inspect for any shipping damage before proceeding․ Retain the original packaging for potential future transport or warranty claims․

Remove all protective materials and locate the power cord, USB cable, and included embroidery hoops․ Consult the user manual for a detailed diagram identifying each part․ Initial setup involves attaching the embroidery arm and ensuring the machine is placed on a stable, level surface․

Before powering on, verify the machine is set to the “O” position, as detailed in the instruction manual, to prevent accidental operation during setup․ Familiarize yourself with the needle-presser module and its components, as outlined in the provided documentation․

Powering On and Basic Operations

To power on your Brother PE770, ensure the machine is switched to the “I” position – never directly plug or unplug while in any other setting, as highlighted in the manual․ The LCD screen will illuminate, initiating the startup sequence․ Allow the machine to complete its self-check before proceeding․

Basic operations begin with threading the machine, following the numbered diagram in the user manual․ Wind a bobbin and insert it correctly, referencing the illustrations provided․ Practice basic stitching on scrap fabric to familiarize yourself with the machine’s responsiveness․

Navigate the control panel to select basic stitch patterns and adjust speed settings․ The PE770 offers pre-programmed designs; explore these to understand the machine’s capabilities․ Always refer to the manual for specific instructions on each function․

Navigating the PE770 Control Panel

The Brother PE770’s control panel features an LCD screen and various buttons for operation․ The manual details each button’s function, including those for design selection, editing, and machine settings․ Utilize the directional buttons to scroll through menus and designs displayed on the screen․

Key functions include the ‘Needle Up/Down’ button, the ‘Start/Stop’ button, and the speed control slider․ The ‘Design Select’ button allows access to built-in designs and imported files via USB․ Familiarize yourself with the ‘Edit’ functions for scaling, rotating, and mirroring designs․

The control panel also provides access to settings like thread tension and stitch density․ Refer to the user manual for detailed explanations of each setting and its impact on embroidery quality․ Proper navigation is crucial for efficient operation․

Detailed Operation Manual Sections

The PE770 manual comprehensively covers embroidery areas, hoop selection, thread usage, design transfer, built-in features, and advanced techniques for optimal results․

Embroidery Area and Hoop Selection

Understanding the embroidery area is crucial for successful designs with the Brother PE770․ The machine supports various hoop sizes, directly impacting the maximum design dimensions achievable․ The manual details each hoop’s specific embroidery field, ensuring designs fit appropriately and avoid issues during stitching․

Proper hoop selection is paramount; using the incorrect hoop can lead to fabric distortion or design errors․ The PE770’s manual provides clear guidance on matching hoop size to fabric type and design complexity․ It explains how to securely attach hoops, ensuring consistent tension for optimal stitch quality․

Furthermore, the manual illustrates how to utilize the machine’s grid lines to accurately position designs within the selected hoop․ This feature aids in centering and scaling designs, maximizing the available embroidery space and preventing unwanted cropping․ Always refer to the manual for specific hoop compatibility and best practices․

Thread Usage and Tension Adjustment

Optimal thread usage is vital for achieving high-quality embroidery with the Brother PE770․ The manual emphasizes using recommended thread types and weights for best results, detailing compatibility with various materials․ Incorrect thread can cause breakage, skipped stitches, and design distortion․

Thread tension adjustment is a key skill for PE770 users․ The manual provides a step-by-step guide to identifying and correcting tension issues․ Improper tension leads to looping, puckering, or thread nests․ It explains how to adjust both upper and lower thread tension based on fabric type and thread weight․

The manual also includes troubleshooting tips for common thread problems, such as frequent breaks or uneven stitches․ It stresses the importance of regular cleaning and lubrication to maintain consistent tension․ Always test tension on scrap fabric before embroidering the final design, referencing the manual’s guidelines․

Design Transfer and Editing

The Brother PE770 manual details several methods for transferring designs to the machine, primarily utilizing USB connectivity․ It explains how to format designs for compatibility, emphasizing supported file types like PES․ The manual guides users through the process of saving designs onto a USB flash drive and then transferring them to the PE770’s internal memory․

Design editing capabilities are also covered, allowing for basic modifications directly on the machine․ Users can resize, rotate, and mirror designs․ The manual illustrates how to utilize the built-in editing tools to customize designs before embroidery․ It also explains how to combine designs and add lettering․

Furthermore, the manual provides instructions on importing designs from a computer using Brother’s software, offering more advanced editing options․ It stresses the importance of checking design integrity after transfer and editing to ensure accurate embroidery․

Built-in Designs and Fonts

The Brother PE770 manual thoroughly documents the extensive library of built-in embroidery designs and fonts available directly on the machine․ It categorizes these designs, ranging from floral patterns to decorative borders, providing clear illustrations and design IDs for easy selection․ The manual details how to access and preview these designs via the control panel․

Regarding fonts, the manual showcases the variety of lettering styles included, explaining how to input text and customize font size, spacing, and orientation․ It guides users through creating monograms and personalized text elements․ The manual also clarifies how to combine built-in designs with custom text for unique embroidery projects․

Furthermore, the PE770 manual explains how to utilize the machine’s memory to store frequently used designs and fonts for quick access, streamlining the embroidery process․ It emphasizes the importance of understanding design compatibility with different hoop sizes․

Advanced Features and Techniques

Brother PE770’s manual details USB connectivity for data transfer, memory utilization, and creating custom designs, expanding embroidery possibilities beyond basic functions․

USB Connectivity and Data Transfer

The Brother PE770 facilitates seamless design transfer via USB connectivity, expanding creative options beyond built-in designs․ The manual outlines compatible USB flash drive specifications, ensuring smooth data exchange․ Downloading designs from a computer to the machine is straightforward, allowing users to utilize a vast library of embroidery patterns․

PDF documentation details the process, including file format requirements and transfer procedures․ This feature is crucial for accessing custom designs or updates․ The manual also provides guidance on managing the machine’s memory, optimizing storage for numerous designs․ Understanding these techniques unlocks the full potential of the PE770, enabling intricate and personalized embroidery projects․ Refer to the Brother resources for the latest compatibility information and troubleshooting tips regarding USB functionality․

Utilizing the PE770’s Memory

The Brother PE770 features internal memory for storing embroidery designs, eliminating the need for constant computer connection during creation․ The manual details the memory capacity and how to efficiently manage available space․ Users can save custom designs, built-in patterns, and personalized fonts directly onto the machine․

Optimizing memory usage is key to maximizing the PE770’s capabilities․ The manual provides instructions on deleting unwanted files and organizing designs for quick access․ Understanding file size limitations and storage formats, as outlined in the PDF documentation, is crucial․ Effective memory management allows for seamless workflow and the ability to tackle complex embroidery projects without interruption․ Explore the Brother resources for advanced tips on maximizing the PE770’s internal storage․

Creating Custom Designs

The Brother PE770 empowers users to create personalized embroidery designs beyond the built-in options․ The manual guides you through transferring designs from your computer via USB, a process detailed in the downloadable PDF for USB features․ Software compatibility is key; the manual lists supported file formats for seamless import․

Editing capabilities within the machine allow for modifications to existing designs, including resizing, mirroring, and rotating elements․ The Brother PE770’s manual provides step-by-step instructions for utilizing these features․ For more complex design creation, external embroidery software is recommended, with the manual offering guidance on compatible programs․ Mastering these techniques unlocks limitless creative potential, transforming your ideas into stunning embroidered artwork․

Maintenance and Troubleshooting

The Brother PE770 manual details cleaning, lubrication, and solutions for common issues, including error codes․ PDF guides assist with upkeep and resolving operational problems․

Cleaning and Lubrication

Regular cleaning and lubrication are crucial for maintaining the Brother PE770’s performance and longevity, as detailed in the operation manual․ Always unplug the machine before any maintenance, switching it to the ‘O’ position․ Use a soft cloth to gently wipe down the exterior surfaces, removing dust and debris․

Pay particular attention to the bobbin area and needle plate, removing lint buildup with a brush․ The manual emphasizes avoiding solvents, which can damage components․ For lubrication, the Brother PE770 requires occasional oiling of specific points, outlined in the service manual․

Refer to the PDF guides for precise locations and recommended oil types․ Proper lubrication ensures smooth operation and prevents wear and tear, extending the machine’s lifespan․ Consistent maintenance, following the instruction manual, is key to avoiding costly repairs․

Troubleshooting Common Issues

The Brother PE770 manual provides solutions for frequently encountered problems․ Common issues include thread breakage, skipped stitches, and error codes․ Refer to the PDF documentation for detailed troubleshooting steps․ If thread breaks consistently, check the threading path, ensure correct tension, and use quality thread, as outlined in the operation manual․

Skipped stitches often indicate a bent or damaged needle; replace it immediately․ Error codes, detailed in the service manual, pinpoint specific malfunctions․ Consult the manual for corresponding solutions, ranging from simple resets to component checks․

Always unplug the machine before attempting repairs․ If issues persist, downloading the latest PDF updates or contacting Brother support, referencing the PE770 model number, is recommended․ Following the instruction manual’s guidance minimizes downtime․

Error Codes and Solutions

The Brother PE770 manual dedicates a section to deciphering error codes, crucial for efficient troubleshooting․ These codes, displayed on the control panel, indicate specific machine malfunctions․ The service manual provides a comprehensive list, detailing each code’s meaning and recommended solutions․

Common errors include communication failures (often related to USB connectivity – see the USB feature PDF), sensor issues, or mechanical problems․ Solutions range from restarting the machine and re-checking connections to cleaning sensors or replacing faulty components․ Always consult the operation manual before disassembly․

Referencing the PDF version of the manual ensures you have the most up-to-date error code definitions․ Ignoring error codes can lead to further damage; prompt attention, guided by the instruction manual, is vital for maintaining your PE770․

Technical Specifications and Parts

Technical details, including the mechanism outline and electronic component locations, are found within the Brother PE770 service manual, alongside a detailed accessory parts list;

PE770 Mechanism Outline

The Brother PE770’s internal mechanics are meticulously designed for precision embroidery․ The service manual provides a detailed outline of the mechanism, showcasing the interplay of key components․ Main mechanisms, such as the needle bar assembly, hook assembly, and feed dog system, are clearly illustrated․

Understanding the driveline – the system of belts and gears that power these mechanisms – is crucial for maintenance and repair․ Diagrams pinpoint the precise locations of these parts, enabling efficient troubleshooting․ The manual also details the functionality of the presser foot and its interaction with the fabric․

Furthermore, the PE770’s mechanism outline extends to the thread take-up lever and bobbin winder, vital for consistent stitch quality․ This section is invaluable for technicians and serious hobbyists seeking a comprehensive understanding of the machine’s inner workings, ensuring optimal performance and longevity․

Electronic Component Locations

The Brother PE770 incorporates a sophisticated electronic system controlling its embroidery functions․ The service manual meticulously details the locations of electronic components, essential for diagnostics and repair․ A control system block diagram illustrates the flow of signals between the main board, display panel, and various sensors․

Key components like the power supply, motor control board, and USB interface are clearly identified within the machine’s chassis․ Diagrams pinpoint the placement of sensors responsible for thread detection, needle positioning, and hoop stability․ Understanding these locations is vital when addressing electrical issues or upgrading firmware․

The manual also highlights the connection points for various cables and connectors, aiding in disassembly and reassembly․ This detailed mapping of electronic components empowers technicians to efficiently troubleshoot and maintain the PE770’s electronic systems, ensuring reliable operation․

Accessory Parts List

The Brother PE770 ships with a comprehensive set of accessories, detailed in the user manual and supplementary catalogs․ This list includes various embroidery hoops in different sizes, enabling versatility in design application․ Multiple needle sets, bobbin cases, and spools of thread are also provided to initiate your embroidery journey․

Essential tools like a screwdriver, thread snips, and a cleaning brush are included for maintenance and minor adjustments․ The manual specifies part numbers for each accessory, facilitating easy reordering when replacements are needed․ Furthermore, optional accessories like cap frames and specialty hoops are mentioned, expanding the machine’s capabilities․

Detailed diagrams illustrate each accessory, clarifying its purpose and proper usage․ Warranty cards, specific to regions like Brother RUS, are also listed as included documentation․ This thorough accessory parts list ensures users have everything required for successful embroidery projects․

Resources and Support

Downloadable PDF versions of the PE770 user manual, alongside accessory catalogs, are readily available․ Brother provides comprehensive support and warranty information online․

Downloading the PE770 User Manual (PDF)

Accessing the Brother PE770 user manual in PDF format is straightforward, providing a convenient way to learn and reference the machine’s features․ You’ll require the Adobe Acrobat Reader software installed on your device to view these documents; it’s a free and widely available program․

Brother makes several PDF guides available for download, including the complete operation manual, quick reference guides for fast assistance, and specialized manuals detailing USB connectivity features․ These resources are easily found on the official Brother support website․

Simply navigate to the support section, search for the PE770 model, and select the desired manual from the list․ Downloads are typically small in file size, ensuring a quick and efficient process․ Having the PDF manual readily available allows for offline access to crucial information, aiding in troubleshooting and maximizing your embroidery experience․

Warranty Information (Brother PE770)

Brother provides a warranty for the PE770 embroidery machine, offering peace of mind to owners․ Specific warranty terms and duration can vary depending on the region and purchase date, so it’s crucial to review the details included with your machine․

The warranty typically covers defects in materials and workmanship under normal use․ Brother’s warranty card, often labeled XE5572001 BROTHER RUS (RUS), is included in the package and should be retained for potential claims․

Warranty coverage doesn’t extend to issues arising from misuse, accidents, or unauthorized repairs․ Registering your PE770 with Brother is recommended to streamline any warranty service requests․ Refer to the user manual or Brother’s website for complete warranty information and claim procedures, ensuring you understand your rights and responsibilities as an owner․

vector 800a jump starter manual

Vector 800A Jump Starter Manual: A Comprehensive Guide

This manual details the VECTOR SS120LV, a portable jump starter, power bank, and inverter – offering 800 peak amps for V4 and V6 engines.

Welcome to the comprehensive guide for the Vector 800A Jump Starter (SS120LV)! This powerful device is designed to provide reliable jump-starting capabilities for a variety of vehicles, including cars and trucks with V4 and V6 engines. Beyond jump-starting, the Vector 800A functions as a portable power bank with dual USB ports and a 100W power inverter, offering versatile power solutions on the go.

This manual will walk you through everything you need to know – from understanding the device’s features and safety precautions, to detailed operating instructions, charging guidelines, and troubleshooting tips. The Vector SS120LV is compact and user-friendly, making it an essential tool for any vehicle owner. Maintaining a fully charged battery is crucial for optimal performance and longevity, as outlined in the warranty information.

What is the Vector 800A and its Key Features?

The Vector 800A (SS120LV) is a multi-functional portable power solution, expertly combining a jump starter, USB power bank, and a 100W power inverter into a remarkably small package. Its core capability lies in delivering 800 peak amps of starting power, sufficient to jump-start most V4 and V6 gasoline engines.

Key features include the dual USB ports for charging mobile devices, a 120V AC outlet powered by the inverter for running small electronics, and a rechargeable internal battery. This device is designed for convenience and reliability, offering a compact and self-contained power source. The Vector 800A is more than just a jump starter; it’s a versatile tool for emergencies, road trips, and everyday power needs.

Understanding the Device’s Capabilities (800 Peak Amps)

The 800 Peak Amps specification of the Vector 800A signifies the maximum current delivered during a jump-start, providing a powerful burst of energy. This rating indicates the device’s ability to overcome the higher resistance of a discharged battery and initiate engine cranking.

While 800 Peak Amps is substantial, it’s crucial to understand it’s a momentary value. The Vector 800A is optimally suited for V4 and V6 engines, but larger displacement engines or those with severely discharged batteries may require alternative solutions. Proper connection and following the jump-starting procedure are vital to effectively utilize this capability. The device’s internal battery capacity and inverter output are separate considerations, influencing its power bank and AC power functionalities.

Safety Precautions

Always prioritize safety when using the Vector 800A; incorrect usage can damage the jump starter, vehicle, or cause personal injury – read carefully!

Important Safety Instructions Before Use

Before operating the Vector 800A, thoroughly review all instructions and warnings. Ensure the vehicle’s voltage is 12V DC; do not use with 6V or 24V systems. Never attempt to jump-start a damaged battery – if cracked or leaking, avoid contact.

Always wear appropriate eye protection (safety glasses or goggles) during the jump-starting process. Remove all metallic jewelry, such as rings and bracelets, to prevent short circuits. Ensure the jump starter is fully charged for optimal performance.

Do not expose the device to extreme temperatures or moisture. Never disassemble or modify the unit; Keep away from flammable materials and children. Incorrect connections can cause sparks and potential explosions – double-check polarity before connecting!

Avoiding Damage to the Jump Starter and Vehicle

To protect both the Vector 800A and your vehicle, adhere to these guidelines. Never attempt to jump-start a battery that is frozen. Incorrect polarity connection is the most common cause of damage – always double-check red to positive (+) and black to negative (-).

Avoid prolonged sparking during connection; brief contact is sufficient. Do not attempt to jump-start a vehicle if the battery shows signs of severe corrosion or damage.

Do not exceed the recommended jump-starting time (typically under 10 seconds). Allow the jump starter to cool down between attempts. Store the device in a cool, dry place, away from direct sunlight and extreme temperatures. Regularly check the clamps for corrosion and ensure they are clean for optimal contact.

Proper Handling and Storage Guidelines

Ensure longevity of your Vector 800A with careful handling and storage. Always keep the unit clean and dry, wiping down the exterior with a soft cloth. Avoid dropping or subjecting the device to strong impacts.

For optimal battery life, keep the jump starter fully charged when not in use. If storing for extended periods, recharge it every three to six months. Store in a temperature-controlled environment, avoiding extreme heat or cold.

Keep the clamps clean and free from corrosion; a light coating of dielectric grease can help prevent this. Do not disassemble the unit, as this will void the warranty. Proper storage extends the lifespan and maintains peak performance.

Operating Instructions

The Vector 800A jump starts vehicles quickly and safely; follow the step-by-step procedure, connecting red clamps to positive and black to negative terminals.

Step-by-Step Jump Starting Procedure

Before beginning, ensure the Vector 800A is adequately charged. Connect the red clamp to the vehicle’s positive (+) terminal, then the black clamp to a grounded metal surface or the negative (-) terminal, away from the battery.

Turn on the jump starter and allow it to establish a connection for a few moments. Attempt to start the vehicle. If it doesn’t start immediately, wait a minute and try again. Do not crank the engine for more than 10 seconds at a time to avoid overheating.

Once the vehicle starts, carefully disconnect the clamps in reverse order – black first, then red; Allow the vehicle to run for several minutes to recharge its battery. Always refer to your vehicle’s owner’s manual for specific jump-starting instructions.

Connecting the Clamps: Red to Positive, Black to Negative

Proper clamp connection is crucial for a safe jump start. Always begin by attaching the red (positive) clamp to the vehicle’s positive battery terminal, clearly marked with a “+” symbol. Ensure a secure connection – a loose clamp can prevent starting and potentially cause sparks.

Next, connect the black (negative) clamp to a solid, unpainted metal surface on the vehicle’s engine block, away from the battery. This provides a safe ground. Avoid connecting directly to the negative battery terminal, as this can create sparks near flammable gases.

Double-check all connections before proceeding. Incorrect polarity can damage both the jump starter and the vehicle’s electrical system. A firm, secure connection is vital for efficient power transfer.

Using the Power Inverter (100W)

The Vector 800A features a built-in 100W power inverter, providing 120V AC power for charging or running small electronic devices. Locate the AC outlet on the unit and ensure the jump starter is powered on.

Plug your device into the AC outlet. Do not exceed the 100W power limit; overloading the inverter can cause damage to both the jump starter and the connected device. Suitable devices include smartphones, tablets, and small laptops.

Monitor the inverter’s performance and avoid using it for extended periods. The inverter is not designed for high-power appliances like hair dryers or power tools. Always disconnect devices when not in use to conserve battery life.

Charging and Maintenance

Maintaining a fully charged Vector 800A is crucial for optimal battery life; recharge after each use to prevent capacity reduction and ensure readiness.

Charging/Recharging the Vector 800A

To maximize the lifespan of your Vector 800A’s battery, consistent recharging is highly recommended. Ideally, keep the unit fully charged whenever it’s not in use. Allowing the battery to remain deeply discharged for extended periods will significantly shorten its overall life expectancy.

The Vector 800A can be recharged using the included AC adapter, plugging it into a standard 120V outlet. A full recharge typically takes several hours, depending on the battery’s initial state of discharge. During the charging process, an indicator light will typically illuminate, signaling that power is being received.

It’s best practice to recharge the jump starter after every use, even if it was only used for a brief jump start. This ensures it’s always ready for the next emergency. Avoid leaving the unit connected to the charger indefinitely once fully charged, as this can potentially lead to overcharging and battery degradation.

Maintaining Optimal Battery Life

Prolonging the life of your Vector 800A’s battery requires consistent attention to charging habits and storage conditions. Avoiding deep discharges is paramount; regularly recharging the unit, even after partial use, prevents sulfation – a major cause of battery degradation.

Store the jump starter in a cool, dry environment, away from direct sunlight and extreme temperatures. Heat accelerates self-discharge and reduces battery capacity. If storing for extended periods (months), it’s advisable to charge the unit to approximately 50-75% capacity before storage, and then recharge it every few months to prevent complete discharge.

Avoid short-circuiting the clamps during storage or use. This can cause irreversible damage to the battery and potentially create a safety hazard. Proper maintenance ensures your Vector 800A remains a reliable power source for years to come.

Recommended Charging Practices

To maximize the lifespan of your Vector 800A’s battery, consistent and correct charging is crucial. It’s highly recommended to fully recharge the unit after every use, regardless of how much capacity was consumed. This prevents the battery from remaining in a discharged state, which significantly shortens its overall life.

Utilize the provided charging adapter and avoid using third-party chargers, as they may deliver incompatible voltage or current, potentially damaging the battery. A full charge typically takes several hours, and the unit’s indicator lights will signal completion.

Avoid interrupting the charging cycle prematurely. Allow the unit to charge fully for optimal performance. Regularly checking the charge level and adhering to these practices will ensure your Vector 800A is always ready when you need it.

Troubleshooting

If the jump starter fails, check connections, ensure a charged battery, and review error indicators for solutions – consult the manual for details.

Common Issues and Solutions

Issue: The jump starter doesn’t power on. Solution: Verify the unit is fully charged. Connect the charger and allow sufficient time for recharging. Check the charging indicator light; it should illuminate. If it doesn’t, the charger or the unit itself may be faulty.

Issue: Vehicle doesn’t start after connection. Solution: Ensure correct polarity – red clamp to positive (+), black clamp to negative (-). Confirm a solid connection to the vehicle’s terminals. The vehicle’s battery may be severely discharged or have an underlying issue requiring professional attention.

Issue: Power inverter isn’t working. Solution: Ensure the inverter is switched on. Check the connected device’s power requirements; do not exceed the 100W limit. Verify the outlet is functioning correctly. A tripped circuit breaker may also be the cause.

Issue: Unit won’t charge. Solution: Try a different power outlet and charging cable. Inspect the charging port for damage. If the problem persists, contact customer support.

What to Do if the Jump Starter Doesn’t Work

First, double-check all connections. Ensure the red clamp is firmly attached to the positive terminal and the black clamp to a grounded metal surface on the vehicle’s engine block, away from the battery. Second, verify the unit has sufficient charge. A fully charged battery is crucial for successful jump-starting.

If still unsuccessful, consult the error indicators (if equipped). These can provide clues about the issue. Next, try a different vehicle to rule out a problem with the car’s battery or starting system. Finally, if the unit remains unresponsive, do not attempt to disassemble it. Contact customer support for assistance or refer to the warranty information for potential repair or replacement options.

Remember: Improper use can damage both the jump starter and your vehicle. Prioritize safety and consult the manual for detailed troubleshooting steps.

Error Indicators and Their Meanings

While specific models may vary, common error indicators on the Vector 800A include a flashing red light, a continuous beep, or an error code displayed on a digital screen. A flashing red light often signifies insufficient battery charge – recharge the unit immediately. A continuous beep could indicate a reverse polarity connection; disconnect clamps and reattach correctly (red to positive, black to negative).

If a digital screen displays an error code, consult the full owner’s manual for a detailed explanation of each code. Low voltage warnings may also appear, indicating the vehicle’s battery is severely depleted. Overload protection will trigger if the inverter exceeds its 100W capacity. Ignoring these indicators can lead to damage.

Always refer to the manual for the most accurate interpretation of error signals specific to your Vector 800A model.

Technical Specifications

The Vector SS120LV delivers 800 peak amps, features a 100W power inverter, dual USB ports, and is designed for portability and convenience.

Detailed Specifications of the Vector SS120LV

The Vector SS120LV is engineered as a versatile power solution. It boasts 800 Peak Amps for jump-starting vehicles, specifically V4 and V6 engines, providing reliable starting power when needed. This unit functions as a portable power bank with dual USB ports for charging devices on the go.

Furthermore, it includes a 100W power inverter with a 120V AC outlet, enabling users to power various electronic devices. The compact design prioritizes portability, making it easy to store in a vehicle or emergency kit. It operates as a 12-Volt DC power supply, offering broad compatibility. Detailed dimensions and weight specifications are available for assessing its suitability for specific applications.

Power Output and Input Details

The Vector SS120LV delivers a substantial 800 Peak Amps of jump-starting power, crucial for reviving vehicles with discharged batteries. Its 100W power inverter provides a 120V AC output, suitable for powering laptops, lights, and other small electronics. Dual USB ports offer convenient charging for smartphones and tablets.

Regarding input, the unit requires a standard input voltage for recharging its internal battery. Maintaining a fully charged battery is recommended for optimal performance and longevity. The system is designed for efficient power conversion, maximizing output while minimizing energy loss. Specific input voltage and current requirements are detailed in the full user manual for safe and effective operation.

Physical Dimensions and Weight

The Vector SS120LV is notably compact and portable, designed for easy storage in a vehicle or emergency kit. While precise dimensions aren’t explicitly stated in readily available summaries, it’s described as an “ultra small take-along size”. This compact form factor doesn’t compromise its power, delivering 800 peak amps in a conveniently manageable package.

The weight of the unit is also relatively light, enhancing its portability. This allows for effortless carrying during roadside emergencies. The design prioritizes user-friendliness, balancing power with a practical size and weight. Detailed dimensional specifications and exact weight measurements can be found within the comprehensive owner’s manual provided with the product.